Category Archives: Blog

Illustration of dumpster rental for this project

How to Dispose of Drywall the Right Way

Disposing of drywall properly requires separating clean scraps—which many recycling centers and some landfills accept—from contaminated pieces containing lead paint, asbestos, or mold, which need specialized hazardous waste handling. Most homeowners underestimate how quickly drywall debris piles up during renovation work, and improper disposal can mean rejected loads at the landfill, contamination fees, or illegal dumping citations that start around $500 in many jurisdictions. The disposal method you choose depends on the drywall’s condition, your project size, and what facilities operate in your area, since acceptance policies vary widely between counties. Knowing how to dispose of drywall correctly from the start saves you from double-handling materials, paying surprise fees, or worse—leaving yourself liable for environmental violations. This guide walks through sorting techniques, explains where different types of drywall can legally go, covers the role of roll-off dumpsters for larger projects, and identifies the warning signs that mean you need professional abatement instead of standard disposal.

Renting a Dumpster for This Project?

For most of these jobs, a roll-off dumpster delivered to your driveway is the simplest, cheapest way to handle the haul. Compare local providers and get a free quote in minutes.

Find Dumpster Rental in Your City →

Contact Form Demo

Why Drywall Disposal Requires Special Handling

Why Drywall Disposal Requires Special Handling

Drywall can’t simply be tossed in a regular trash bin because many municipalities classify it as construction debris with specific disposal requirements. The gypsum core breaks down under certain conditions to produce hydrogen sulfide gas, and the sheer volume generated during renovation projects often exceeds what standard waste collection will accept. These factors mean you’ll need to plan disposal methods before starting demo work.

Landfill Restrictions on Construction Debris

Most residential waste haulers won’t take drywall in curbside bins. The material is too heavy, too bulky, and typically arrives in quantities that exceed household waste limits. A standard bedroom renovation generates 800-1,200 pounds of drywall scraps—far more than what fits in a weekly trash pickup.

When you arrange a roll-off dumpster for construction debris, confirm whether the rental company allows mixed loads or requires separate containers for drywall. Some waste management facilities charge premium rates for construction materials or refuse them entirely. Check your local transfer station’s policies before loading. Certain counties ban drywall from general construction bins and mandate delivery to designated recycling centers. Ignoring these restrictions can result in rejected loads and additional hauling fees.

Environmental Concerns with Gypsum Waste

Gypsum becomes a problem when buried in oxygen-poor landfill conditions. Anaerobic bacteria convert the calcium sulfate in drywall into hydrogen sulfide, the same compound that gives rotten eggs their smell. In high concentrations, this gas is toxic and potentially explosive. It also corrodes landfill infrastructure, particularly the methane collection systems that many facilities rely on for energy production.

Paper backing adds another layer of complexity. The kraft paper attached to each drywall sheet contains organic material that contributes to methane generation as it decomposes. While a single sheet seems harmless, the construction industry generates roughly 15 million tons of gypsum waste annually in the United States. That volume makes proper handling a practical necessity, not just an environmental nicety. Several states now require contractors to divert gypsum waste from landfills entirely, pushing it toward recycling facilities that grind it into soil amendment or new drywall manufacturing feedstock.

Disposal Methods for Drywall Scraps

Disposal Methods for Drywall Scraps

Many recycling centers accept clean drywall scraps because gypsum can be processed into agricultural soil amendments, cement additives, and new wallboard. The key limitation: most facilities only take unpainted, uncontaminated sheets without nails, tape, or joint compound. Call ahead to confirm what your local center accepts — requirements vary significantly by region, and some only process materials from commercial contractors, not residential drop-offs.

Recycling Centers That Accept Gypsum Board

Start with your municipal waste management department’s website. About half of metro areas now list gypsum-accepting facilities in their recycling directories, often under “construction and demolition” or “special materials.” If nothing appears online, call the general recycling hotline — staff can tell you whether the main transfer station accepts drywall or if you need to visit a private facility.

Private recycling operations typically charge by weight or by load size. A pickup truck bed of clean scrap might cost $25-$75 at a dedicated C&D recycler, while mixed loads with other demolition debris run higher. The material must be free of asbestos, lead paint, and mold — contaminated sheets get rejected outright. Some centers want you to separate painted from unpainted pieces; others accept both but charge more for painted stock since it requires additional processing. Before loading your truck, remove all fasteners and tear off paper joint tape. These small steps make the difference between acceptance and refusal at the gate.

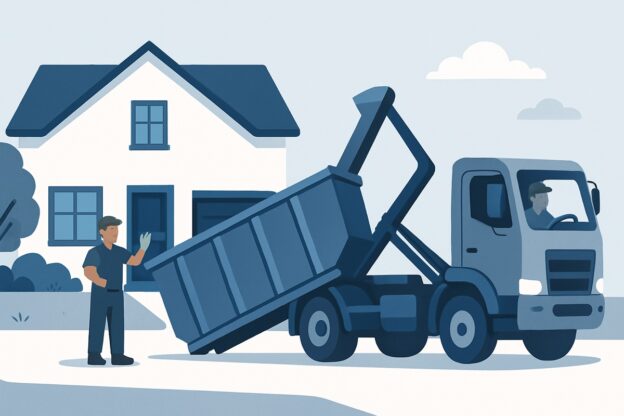
For larger renovation projects generating multiple truckloads, a roll-off dumpster often makes more sense than repeated recycling center trips. Many waste haulers now offer segregated dumpsters specifically for gypsum, which they route to recycling facilities rather than landfills. You’ll pay a premium over standard mixed-debris disposal, but it keeps material out of the waste stream without burning your entire weekend on dump runs.

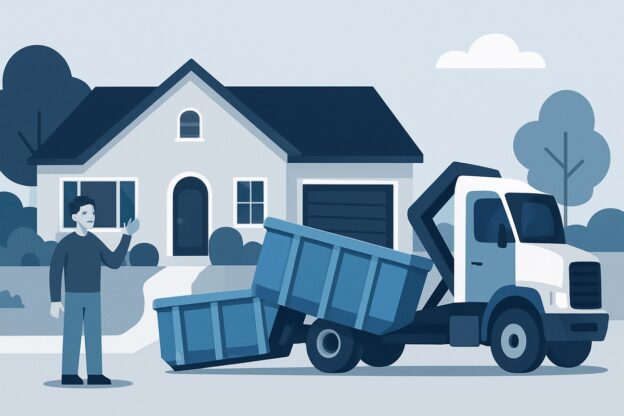
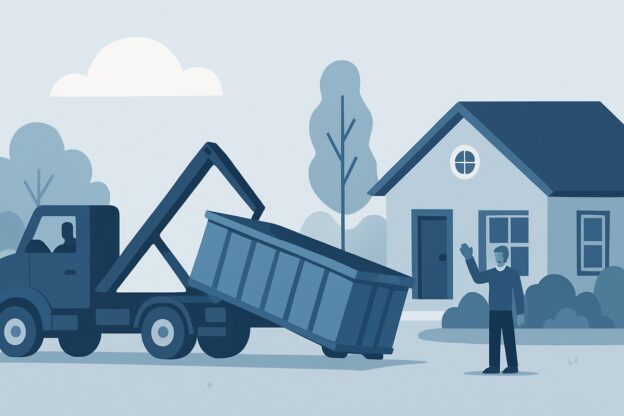
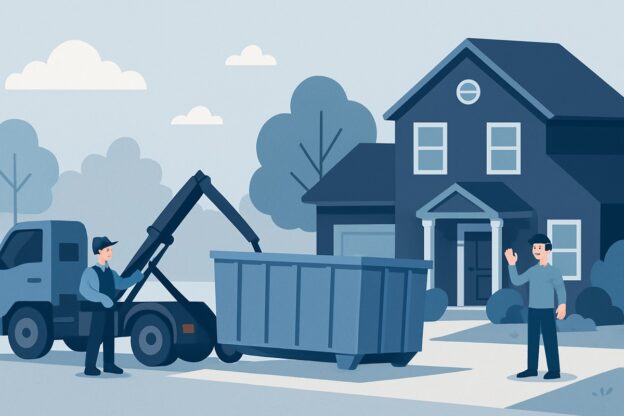
Using a Roll-Off Dumpster for Drywall Removal

A roll-off dumpster handles drywall disposal efficiently for renovation projects generating more than a few sheets worth of waste. Order a 10-yard container for single-room demolition or a 20-yard for whole-house jobs. The dumpster stays on-site for your rental period—typically seven to fourteen days—letting you work at your own pace without multiple dump runs. Just break down large pieces, load them in, and the rental company hauls everything away when you’re finished.

Choosing the Right Dumpster Size

Match the container size to your project scope, not just the square footage you’re removing. A 10-yard dumpster holds roughly 1,000 square feet of half-inch drywall when broken into manageable pieces. That covers a 12×14 bedroom with ceiling removal. A 20-yard container accommodates 2,000-2,500 square feet—enough for gutting multiple rooms or an entire floor of a house.

Account for associated debris when sizing up. Demolition rarely involves just drywall. You’ll pull out baseboards, door trim, sometimes studs or insulation. A bathroom gut with tile, fixtures, and drywall needs a 15 or 20-yard dumpster even though the wall surface area seems modest. Better to have extra space than to pile waste outside the container or order a second delivery.

Loading Tips to Maximize Space

Break drywall into roughly 2×3-foot sections before tossing them in. Full sheets or long strips create air pockets that waste half your container capacity. Snap the pieces over your knee or step on them while they’re flat on the ground. Stack the broken sections flat along the dumpster walls rather than throwing them in randomly—you’ll fit significantly more.

Fill voids with smaller demolition debris. Chunks of broken drywall, trim pieces, and insulation scraps nestle into gaps between larger sections. Load the heaviest material first—wet drywall, metal studs if you’re removing them—to create a stable base. The weight limit on a 10-yard dumpster generally ranges from two to three tons, enough for standard residential drywall projects but a concern if the material got soaked from water damage.

What You Can and Cannot Mix

Most roll-off dumpster rentals accept general construction debris, which includes drywall alongside wood framing, carpeting, tiles, and metal. Confirm this when you book—some haulers charge extra for mixed loads or require drywall-only containers. The mixed-load option saves you from sorting on-site, a real advantage during full gut jobs.

Hazardous materials stay out no matter what. Paint cans, asbestos-containing materials, and certain adhesives can’t go in a standard dumpster. If your house predates 1980, test any joint compound or texture for asbestos before demolition. You’ll need a specialized abatement contractor if it tests positive. Also keep electronics, appliances, and tires separate—these require different disposal channels and will trigger additional fees if the landfill catches them in your load.

Preparing Drywall for Disposal or Recycling

Proper preparation makes drywall disposal faster, safer, and often cheaper. Remove all nails, screws, and metal corner beads before breaking sheets into manageable pieces. Separate clean drywall from contaminated material, keep painted and unpainted pieces apart, and remove any attached insulation or vapor barriers. This sorting step determines whether your material qualifies for recycling and affects disposal costs.

Breaking Down Full Sheets

Full 4×8 sheets are unwieldy and waste space in any disposal container. Score one side of the sheet with a utility knife, then snap it cleanly along the line. For demolition debris already in irregular pieces, break larger chunks into sections roughly 2-3 feet across. Smaller pieces stack more efficiently and reduce the risk of overloading a roll-off dumpster past its weight limit.

Stack broken pieces flat rather than standing them on edge. Vertical stacking seems space-efficient but creates voids that waste capacity. Flat stacking also prevents sharp edges from puncturing bags or damaging other materials if you’re combining loads.

Removing Fasteners and Metal Components

Nails and screws must come out before recycling. Recycling facilities rely on grinding equipment that jams or breaks when it hits metal fasteners. Even if you’re landfilling the material, protruding nails create safety hazards and make stacking difficult.

Pull fasteners as you remove drywall from studs when possible. Waiting until sheets are on the ground means hunting for individual nails in piles of debris. Metal corner beads, J-trim, and edge caps should be separated completely — they belong in metal recycling, not with gypsum. Paper-faced metal beads require extra attention since the paper backing can fool sorters into thinking the piece is all drywall.

Sorting by Contamination Level

Clean, unpainted drywall commands the highest recycling value and widest acceptance. Painted drywall gets accepted at some facilities but rejected at others, depending on local processing capabilities. Moldy, water-damaged, or lead-paint-era material (pre-1978 construction) requires separate handling and typically goes to landfills.

Create distinct piles during demo: one for clean white board, one for painted surfaces, and one for anything questionable. Mixing contaminated pieces with clean material downgrades your entire load. A single moldy sheet can disqualify a whole dumpster rental from recycling programs. If you’re unsure about contamination, treat the material as non-recyclable rather than risk rejection fees at the facility.

Ready to get started?

Find a Dumpster Near You


Illustration of dumpster rental for this project

How to Dispose of a Vacuum Cleaner (2026 Guide)

Most vacuum cleaners can be disposed of through curbside recycling pickup (if your municipality accepts small appliances), drop-off at a local recycling center or scrap metal facility, retailer take-back programs when buying a replacement, or donation to a charity if the unit still works. The disposal method you choose depends on your vacuum’s condition, your local waste infrastructure, and whether you want to recover any value from its recyclable materials — bagged uprights and canister models contain steel, copper wiring, and sometimes aluminum that recyclers will accept for free. Getting this wrong means either sending reusable materials to a landfill or contaminating your recycling stream with items your hauler won’t process. Knowing how to dispose of a vacuum cleaner properly also helps you avoid the common mistake of setting out a appliance on bulk trash day without checking whether your city actually picks up small electronics that way. This guide walks through each disposal option with specifics on what conditions make each route practical, which vacuum types fit where, and how to prepare your unit so it’s actually accepted rather than left at the curb.

Renting a Dumpster for This Project?

For most of these jobs, a roll-off dumpster delivered to your driveway is the simplest, cheapest way to handle the haul. Compare local providers and get a free quote in minutes.

Find Dumpster Rental in Your City →

Contact Form Demo

Can You Throw a Vacuum Cleaner in the Trash?

Can You Throw a Vacuum Cleaner in the Trash?

Most trash services do accept vacuum cleaners in regular bins if they fit, but many have restrictions on size and require you to schedule a separate bulk pickup. Bagless uprights and small handheld models typically qualify for curbside collection, while large canister vacuums or shop vacs often exceed size limits. Your specific options depend on your local hauler’s bulk waste policies and what type of vacuum you’re disposing of.

What Trash Services Accept

Check your trash hauler’s guidelines before attempting curbside disposal. Most residential services accept vacuums that fit completely inside your standard cart with the lid closed—usually anything under 32 gallons or 50 pounds. Compact stick vacuums and lightweight uprights rarely cause issues.

Larger models present problems. A full-size Dyson upright or a 16-gallon shop vac won’t fit in a typical residential bin. Some municipalities require you to dismantle oversized vacuums—removing the canister from the base or detaching the hose assembly—to make them fit. Others reject them outright at the curb and direct you toward bulk collection instead. Call your hauler directly if you’re unsure. The person answering phones can tell you immediately whether your specific vacuum model qualifies for regular pickup.

Bulk Pickup and Dumpster Options

Bulk waste pickup handles vacuums that exceed curbside limits. Most cities offer monthly or quarterly scheduled pickups where you place large items at the curb on designated dates. Some charge per item ($10-$25 typically in 2026), while others include bulk pickup in your monthly service fee. Reserve your spot at least a week ahead—these services fill quickly during spring cleaning season.

For multiple vacuums or whole-house cleanouts, a roll-off dumpster makes more sense than scheduling separate pickups. If you’re clearing out a storage unit or estate and have three old vacuums plus furniture and boxes, a 10-yard dumpster rental handles everything in one haul. The upfront cost generally ranges from $250-$400 for a week, depending on your market. You control the timeline, and you’re not leaving items at the curb for days waiting for bulk pickup. One consideration: dumpster services sometimes charge extra for electronics or appliances, so confirm whether vacuums fall under standard debris or require an additional fee.

Recycling Your Old Vacuum Cleaner

Recycling Your Old Vacuum Cleaner

Most vacuum cleaners contain several recyclable materials, but they rarely go in curbside bins intact. The metal housing, copper motor windings, and aluminum parts have value at scrap recycling centers. Plastic components can sometimes be recycled through manufacturer take-back programs or specialized facilities. The key is separating materials — a vacuum thrown whole into a recycling bin will be rejected and sent to the landfill.

What Parts Are Recyclable

The motor contains the most valuable recyclable content in any vacuum. Inside, you’ll find copper wire windings and steel laminations that scrap yards accept readily. The outer metal housing — whether steel or aluminum — also has recycling value. Some upright models use substantial steel frames that weigh several pounds on their own.

Plastic bodies present more complications. Most vacuums use ABS or polypropylene plastic, both theoretically recyclable, but municipal programs rarely accept them in vacuum form. The plastic is often mixed with other materials or contains additives that contaminate recycling streams. Check the resin identification code (the number inside the recycling triangle, usually molded into the plastic). If your local recycling center accepts that specific number and confirms they take small appliances, you can recycle the plastic shell. Otherwise, manufacturer take-back programs offer your best option for plastic components. Some brands operate mail-in programs or drop-off locations specifically designed to handle their own vacuum plastics and separate materials properly.

Donating or Selling a Working Vacuum

If your vacuum still works, donating or selling it keeps a functional appliance out of the waste stream while helping someone else. Thrift stores, charities, and online marketplaces all accept working vacuums in good condition. Before listing or donating, clean the unit thoroughly, empty the canister or replace the bag, and test all attachments to ensure everything functions properly.

Where to Donate Used Vacuums

Goodwill and Salvation Army locations typically accept working vacuums during regular donation hours. Call ahead to confirm — some smaller locations have limited storage and may turn away bulky items during peak donation periods. Habitat for Humanity ReStores also take functional vacuums, particularly upright models that work well in newly completed homes.

Local homeless shelters and women’s shelters often need household items but may not advertise these needs publicly. Contact them directly to ask if they accept vacuum donations. Community centers and churches sometimes run donation programs for families transitioning from temporary housing. These organizations usually prefer newer models in clean condition, since recipients need items they can use immediately without repairs.

Selling Through Online Marketplaces

Facebook Marketplace and Craigslist work well for selling used vacuums locally. Price your vacuum at 30-50% of its original retail value if it’s less than three years old and still performs well. Include clear photos showing the vacuum from multiple angles, close-ups of any wear on wheels or hoses, and a short video demonstrating suction power.

List specific details buyers actually want to know: the model number, whether you’re including extra bags or filters, any remaining warranty coverage, and whether you have pets or smoke in your home. Pick-up-only listings tend to sell faster than delivery options for vacuums, since most buyers want to test the unit before paying. Expect questions about battery life if you’re selling a cordless model — be honest about how long a full charge lasts compared to when the vacuum was new.

What to Do Before Disposing of Any Vacuum

What to Do Before Disposing of Any Vacuum

Before tossing your vacuum cleaner, empty the dust bin or replace the bag, remove batteries, and check for recyclable components like metal parts or motors. These prep steps prevent messes during transport, reduce contamination at recycling facilities, and sometimes reveal that your vacuum just needs a filter replacement or belt repair instead of disposal.

Empty All Debris and Dust

Pull out the dust bin or bag while it’s still in working position over a trash can. Vacuums collect surprising amounts of fine dust that goes airborne when you move them sideways or upside down. If you’re dealing with a bagless model, the cyclone chamber often traps a secondary layer of compacted dust that doesn’t dump out with the main bin — check the filter housing and any separator screens.

Canister vacuums sometimes have debris stuck in the hose connection points. Disconnect both ends and tap them out. This matters because recycling centers sort materials by type, and a vacuum full of pet hair and dust contaminates the metal recycling stream.

Remove and Dispose of Batteries Separately

Rechargeable stick vacuums and robot models contain lithium-ion battery packs that can spark fires if crushed in regular trash compactors. Most batteries slide out after removing a panel or twisting a release mechanism on the handle. Check your model’s manual online if the release isn’t obvious — forcing it breaks the housing.

Take these batteries to a dedicated battery recycling drop-off. Home improvement stores and some electronics retailers maintain collection bins year-round. If you’re clearing out a garage full of old equipment and need a roll-off dumpster for the bulk of it, keep batteries separate. Waste haulers can refuse pickup or charge contamination fees when batteries end up in general loads.

Check for Reusable or Recyclable Parts

Vacuum motors contain copper wiring worth recovering at scrap yards. Detach the motor housing if you can access it with a screwdriver — it typically connects with four to six screws near the base. Metal wands, floor heads with aluminum plates, and steel brush rolls also have scrap value. Plastic attachments rarely recycle unless your local facility accepts mixed rigid plastics, but check anyway.

Some parts have life left as spares. HEPA filters, even used ones, sometimes fit other models in the same product line. List them free on community boards — someone fixing an older vacuum often needs exactly what you’re discarding. If the power cord still works, it’s a universal replacement part for other appliances. This sorting takes ten minutes and keeps functional materials in use instead of sending everything to a landfill.

Ready to get started?

Find a Dumpster Near You


Illustration of dumpster rental for this project

How to Dispose of a Space Heater (2026 Guide)

To dispose of a space heater, first unplug it and let it cool completely, then check if your local recycling center accepts small appliances—many will take them for metal recovery—or schedule a bulk item pickup with your waste management provider if the unit still works but you no longer need it. Getting rid of a broken or outdated heater correctly matters because tossing it in your regular trash can mean recoverable metals end up in a landfill, and in some municipalities, dumping small appliances curbside violates local codes. The challenge most people face is that space heaters fall into an awkward category: too large for typical recycling bins but not quite hazardous waste, leaving homeowners unsure where they actually belong. Knowing how to dispose of a space heater properly depends on whether it’s still functional, what it’s made of, and what disposal options your area offers. This guide walks through each pathway—from donation and resale to scrap metal recycling and bulk waste collection—so you can clear out that old heater without guessing.

Renting a Dumpster for This Project?

For most of these jobs, a roll-off dumpster delivered to your driveway is the simplest, cheapest way to handle the haul. Compare local providers and get a free quote in minutes.

Find Dumpster Rental in Your City →

Contact Form Demo

Check If Your Space Heater Still Works

Check If Your Space Heater Still Works

Before you toss that old space heater, plug it in and run it for ten minutes. If it heats properly, produces no burning smell, and shuts off when the thermostat cycles, someone else can use it. A working heater—even an older model—has value as a donation or resale item, keeping it out of the waste stream and helping you avoid disposal costs.

Testing for Basic Functionality

Run the heater on its highest setting in a well-ventilated area. Watch for flickering lights when it powers on, which signals a failing heating element. Listen for rattling, grinding, or high-pitched whining—sounds that indicate motor or fan damage. Check that the cord shows no fraying or exposed wire near the plug, a common failure point after years of wrapping and unwrapping.

Let it run long enough to cycle off automatically. Most heaters have a built-in thermostat that should cut power once the room reaches temperature. If yours runs continuously without stopping, or if the exterior housing gets hot enough to cause discomfort when touched, the safety controls have failed. These units pose fire risks and shouldn’t be donated or sold.

Donation and Resale Options

Thrift stores like Goodwill and Salvation Army accept working space heaters during cold months but typically refuse them in summer when demand drops. Call ahead—many locations test electrical items on-site and will turn away units that fail their quick safety check. Habitat for Humanity ReStores often take functional heaters year-round since they serve families setting up new households.

Online resale works better for higher-end models. Ceramic tower heaters and oil-filled radiators from recognized brands sell quickly on Facebook Marketplace and Craigslist, usually between $15 and $40 depending on age and condition. Include the model number in your listing—buyers want to verify replacement parts are still available. Basic coil heaters rarely attract buyers unless priced under $10, making donation the more practical choice. If the unit doesn’t work and you’re clearing out other bulky items during a renovation or move, a roll-off dumpster handles the heater alongside construction debris, old furniture, and yard waste in one trip.

Recycling Metal and Electronic Components

Recycling Metal and Electronic Components

Space heaters contain valuable recyclable materials — steel housings, copper wiring, and sometimes aluminum heating elements. Most scrap metal yards accept them, though facilities that handle e-waste are better equipped for units with digital controls or built-in thermostats. You’ll typically need to confirm the heater no longer works and remove any obvious non-metal parts like plastic knobs before drop-off.

Where to Recycle Space Heaters

Check with your municipal recycling center first. Many accept small appliances during regular hours at no charge, particularly if the heater is mainly metal. Call ahead to ask whether they want you to separate components — some facilities prefer intact units, while others request you remove the power cord.

Scrap metal recyclers pay by weight for heaters, though the payout is modest. A standard 1,500-watt ceramic heater weighs around 5-8 pounds, mostly steel and copper. You’ll get more per pound if you strip the copper wiring yourself, but for a single heater, the extra effort rarely justifies the additional dollar or two. Bring multiple units or combine the trip with other scrap metal disposal to make it worthwhile. If you’re clearing out a property and dealing with multiple broken appliances alongside other debris, a roll-off dumpster handles everything in one go — just verify with your rental company that they accept small appliances, as some require e-waste items go elsewhere.

Best Buy and some regional electronics retailers run take-back programs for small appliances. These programs handle devices with circuit boards or electronic displays properly, keeping components like capacitors out of landfills. Drop-off is free regardless of where you bought the heater. Home Depot accepts some heating equipment through their appliance recycling service, though they focus primarily on larger HVAC units — call your local store to confirm they’ll take a space heater.

Handling Hazardous Materials in Older Models

Older space heaters manufactured before the 1980s may contain asbestos insulation around heating elements or mercury switches in thermostats. These materials require specialized disposal through hazardous waste facilities, not standard trash or recycling. Check your heater’s age and components before disposal—if you find crumbly white insulation or a small glass vial in the thermostat, stop handling it and contact your local household hazardous waste program.

Identifying Asbestos Insulation

Space heaters from the 1960s and 1970s commonly used asbestos rope or paper wrapped around heating coils for heat resistance. The material looks like tightly woven white or gray fabric that becomes friable (crumbly) with age. If you spot this type of insulation, don’t attempt to remove it yourself. Disturbing asbestos releases microscopic fibers that cause serious lung damage decades after exposure.

Many municipal hazardous waste facilities accept small appliances with intact asbestos. Call ahead—some require you to seal the heater in a plastic bag before drop-off. Never throw an asbestos-containing heater in a roll-off dumpster or regular trash bin, as waste handlers have no warning about the hazard.

Dealing With Mercury Thermostats

Pre-1990 thermostatic controls sometimes contain mercury tilt switches—small glass capsules filled with liquid mercury that completes an electrical circuit when tilted. These switches typically sit inside the temperature dial housing. You can identify them by gently tilting the thermostat and watching for a silver bead rolling inside a glass tube.

Mercury is toxic and regulated as hazardous waste in most states. Remove the entire thermostat unit without breaking the glass capsule, seal it in a rigid plastic container, and take it to a household hazardous waste collection event. Some counties hold quarterly drop-off days specifically for mercury-containing devices. The metal heater body can go to scrap metal recycling once you’ve removed the mercury component.

Safe Handling Procedures

Wear disposable gloves when examining older heaters for hazardous materials. Work in a well-ventilated area and avoid using compressed air or vacuums that could spread contaminants. If you’re uncertain about a heater’s contents, photograph the model number plate and interior components, then send the images to your local environmental health department for identification help.

For estate cleanouts or commercial buildings with multiple old heaters, hire a licensed asbestos abatement contractor to assess and remove the units. The upfront cost beats potential fines for improper disposal—violations for asbestos dumping start at several thousand dollars in most jurisdictions.

Trash and Dumpster Disposal Options

Most electric space heaters can go in your regular trash, though you should cut the power cord to prevent reuse and check your municipality’s metal item policies. Gas and kerosene heaters require emptying all fuel first. If you’re clearing out multiple items or handling a large kerosene model, a roll-off dumpster lets you dispose of bulky heating equipment alongside other household debris in one trip.

Disposing Through Regular Trash Collection

Electric space heaters under 50 pounds typically qualify for curbside pickup. Snip the cord about six inches from the unit—this signals the item is broken and prevents someone from pulling it out and plugging in a potentially dangerous appliance. Wrap the severed cord around the heater or tape it to the body so it doesn’t create a trip hazard for sanitation workers.

Some cities treat small appliances as bulk items requiring advance scheduling. Atlanta, for example, allows two bulk items per month with notification, while San Diego charges a $36 fee for bulky item collection as of 2026. Call your waste management department or check their website for scheduling requirements and size restrictions.

When to Use a Dumpster Rental

A dumpster rental makes sense when you’re clearing out a basement, garage, or storage area with multiple large items. If you’re getting rid of three space heaters, old furniture, boxes of holiday decorations, and scrap lumber all at once, hauling everything to the dump yourself means multiple trips and vehicle wear.

Roll-off dumpsters for residential cleanouts generally range from 10 to 20 cubic yards. A 10-yard container holds roughly three pickup truck loads—enough for several heaters plus the accumulated junk from a single-room renovation or estate cleanout. Rental periods typically run seven days, though you can often extend for a daily fee. The company handles delivery, pickup, and proper disposal sorting, which matters when you’re mixing metal appliances with general waste.

Ready to get started?

Find a Dumpster Near You


Illustration of dumpster rental for this project

How to Dispose of a Dresser (2026 Guide)

You can dispose of a dresser through curbside bulk pickup (if your city offers it), by hauling it to a local landfill or transfer station, donating it to charities like Habitat for Humanity ReStore if it’s in usable condition, selling it online, or renting a roll-off dumpster for larger cleanouts that include multiple furniture pieces. The method you choose depends on the dresser’s condition, your timeline, and whether you’re clearing out just one piece or an entire household. A solid wood dresser in decent shape has real resale or donation value, while particle board furniture that’s falling apart usually heads straight to the landfill—and knowing the difference saves you time and potentially money. What most people underestimate is how quickly disposal costs add up when you factor in truck rentals, dump fees, and the physical effort of moving a 200-pound piece down a staircase. This guide walks through each disposal option with the practical details that actually matter: what each method costs, how long it takes, and which approach makes sense for your specific situation.

Renting a Dumpster for This Project?

For most of these jobs, a roll-off dumpster delivered to your driveway is the simplest, cheapest way to handle the haul. Compare local providers and get a free quote in minutes.

Find Dumpster Rental in Your City →

Contact Form Demo

Best Ways to Dispose of a Dresser

The most practical disposal methods depend on your dresser’s condition. Resale or donation works for furniture in good shape, while curbside bulk pickup handles worn pieces if your municipality offers the service. For major cleanouts involving multiple items or renovation debris, a roll-off dumpster lets you tackle everything at once without waiting for scheduled pickups.

If the dresser still functions—drawers slide, no major structural damage, finish intact enough for another home—selling or donating beats trashing it. Facebook Marketplace and Craigslist move furniture fast in most areas. Price it 60-70% below comparable new pieces, post clear photos showing any wear, and expect to handle your own delivery or require pickup. Dressers under $50 typically sell within a week if priced fairly.

Habitat for Humanity ReStores accept furniture donations and provide tax receipts for items they can resell. Most locations require you to drop off, though some offer pickup for multiple large pieces. Goodwill and Salvation Army take dressers in decent shape, but call ahead—acceptance policies vary by location, and some stores stopped taking pressboard furniture entirely. Smaller local charities serving families in transition often need bedroom furniture and may pick up if you’re donating several items.

Curbside Pickup and Bulk Waste

Many cities offer monthly or quarterly bulk waste collection for oversized items. You’ll set the dresser at the curb on a designated day—no bags or bins required. Check your waste hauler’s website for the schedule and item restrictions. Some municipalities handle this through regular trash service at no extra charge. Others require advance scheduling or charge $25-75 per pickup depending on item count.

Private waste companies in areas without municipal bulk pickup typically charge $75-150 for furniture removal. They’ll haul the dresser from inside your home, which helps if you’re dealing with a heavy solid wood piece on an upper floor. This makes sense for a single item, but the cost adds up quickly if you’re clearing out multiple rooms or handling a whole estate cleanout—that’s when renting a dumpster becomes more economical than paying per-item fees.

Using a Roll-Off Dumpster for Large Furniture

A roll-off dumpster makes sense when you’re clearing out multiple pieces of furniture at once, renovating a room, or handling an estate cleanout. If you have just a dresser and maybe a nightstand, it’s overkill. But if you’re emptying an entire bedroom, garage, or dealing with a foreclosure, renting a 10- or 15-yard dumpster lets you toss everything in one container on your schedule without multiple donation center trips or coordinating bulk pickup dates.

When Dumpster Rental Makes Sense

You’re disposing of more than one large item. A single dresser doesn’t justify the rental cost, which typically ranges from $250 to $500 for a week depending on your area and container size. But if you’re also tossing a bed frame, box spring, carpet, and old closet shelving, the math shifts. Most 10-yard dumpsters hold the contents of a one-bedroom apartment—enough for several dressers, mattresses, and assorted household junk without playing Tetris in your vehicle.

Timing matters as much as volume. Estate cleanouts, home flips, and multi-room renovations generate debris over days or weeks. A dumpster sits in your driveway while you work at your own pace. No rushing to meet the bulk waste pickup schedule or making three trips to the dump before noon on Saturday. You fill it when convenient, call for pickup when full. For projects like clearing out a deceased parent’s house or gutting a room down to studs, that flexibility alone justifies the cost.

Consider logistics too. If your dresser is a 200-pound solid oak armoire on the second floor, getting it to your car means navigating stairs, doorways, and risking your back. With a dumpster rental, you can dismantle it on-site—pull out drawers, remove the mirror, knock off the legs—and toss pieces directly into the container parked fifteen feet from your door. The dumpster company hauls it all away. You never load your vehicle or drive anywhere.

Breaking Down a Dresser for Easier Disposal

Disassembling a dresser before disposal reduces its volume by up to 70%, making it easier to fit into your vehicle, a roll-off dumpster, or curbside pickup. Remove the drawers first, then detach the mirror (if present), unscrew hardware connecting the main frame, and separate individual panels. Most dressers require only a screwdriver, hammer, and about 30 minutes of work.

Remove All Drawers and Hardware

Pull each drawer completely out of its track. Flip the dresser onto its back or side to access screws holding drawer slides to the frame. Most slides attach with two to four Phillips-head screws on each side. Keep the screws in a plastic bag if you plan to reassemble the piece later, though most people discard them with the frame.

Check for hidden fasteners behind drawers or underneath the top surface. Older dressers often have support rails screwed horizontally across the back. Newer particleboard units may use cam locks—small cylindrical fasteners that twist to release. Turn these a quarter-turn counterclockwise with a flathead screwdriver, then lift the affected panel away.

Separate the Mirror and Backing

Dresser mirrors typically attach through two methods: bracket mounts or direct screws through the mirror frame into the dresser top. Bracket mounts slide upward once you loosen wing nuts or thumbscrews at the base. For screw-mounted mirrors, support the glass with one hand while removing fasteners with the other to prevent sudden drops.

After removing the mirror assembly, pry off the thin backing panel (usually 1/8-inch hardboard) using a flathead screwdriver or pry bar. This panel is stapled or nailed around the perimeter every 6-8 inches. Once you lift one corner, the rest pulls away easily. Removing the backing exposes the dresser’s internal structure and makes the remaining frame lighter and more compact.

Break Down the Main Frame

With drawers and backing removed, you’ll see how vertical side panels connect to the top, bottom, and any horizontal dividers. Flip the dresser upside-down to access screws joining the base to the sides. Most solid wood dressers use 2-3 wood screws per joint, while particleboard units rely on confirmat screws (large-threaded fasteners with a flat head) or dowels with cam locks.

After removing bottom fasteners, turn the dresser right-side up and detach the top panel. Apply gentle upward pressure while removing the last screws—some tops are also glued and may need persuasion with a rubber mallet. The vertical dividers between drawer openings usually lift out once top and bottom panels are free. A fully disassembled dresser stacks into a pile roughly 8-12 inches tall, compared to its original 30-40 inch height. This flattened profile fits easily into most vehicles or takes up minimal space in a dumpster rental.

What to Avoid When Disposing of Furniture

When disposing of a dresser, steer clear of illegal dumping, which can result in fines ranging from several hundred to thousands of dollars depending on your municipality. Don’t place furniture at the curb without confirming your trash service accepts bulk items—many require advance scheduling or charge extra fees. Avoid breaking down treated or painted wood indoors without proper ventilation, and never burn furniture that might contain formaldehyde, lead paint, or synthetic materials that release toxic fumes.

Illegal Dumping Sites and Penalties

Abandoned furniture on public property, vacant lots, or roadsides carries serious consequences beyond fines. Many cities now use surveillance cameras at known dumping spots and track violators through discarded mail or receipts left in drawers. A first offense typically brings a $500-$1,000 fine, but repeat violations can escalate to misdemeanor charges with potential jail time.

The environmental impact matters too. Dressers left outdoors leach wood treatments and paint chemicals into soil as they deteriorate. Drawers become mosquito breeding grounds, and the dumped furniture often blocks drainage systems during heavy rain. If you’re tempted to dump because disposal feels complicated, a roll-off dumpster rental for a home cleanout project makes more sense—you get legal disposal without the risk.

Items That Don’t Belong in Regular Trash

Most residential trash services explicitly prohibit furniture in standard bins. The automated arms on garbage trucks can’t lift bulky items, and large pieces damage the compaction mechanisms. Even if you break down a dresser into smaller chunks, haulers may reject the load if they spot furniture components.

Treated lumber, particleboard with formaldehyde, and painted surfaces create additional problems at standard landfills. Some facilities separate these materials for special handling, while others reject them entirely. Call your hauler before assuming curbside pickup works. Many require you to schedule a bulk pickup appointment days or weeks ahead, and they’ll charge $25-$75 depending on the item’s size. That fee often approaches what you’d pay to handle disposal yourself with a dumpster if you’re already clearing out other household items.

Burning Furniture Hazards

Burning a dresser releases a chemical cocktail you don’t want to breathe. Particleboard contains urea-formaldehyde resin that becomes airborne when heated. Painted or stained wood may harbor lead (common in pre-1978 furniture) or volatile organic compounds. Veneers and laminates produce thick black smoke loaded with toxins as the adhesives burn.

Beyond the health risks, many jurisdictions ban open burning entirely, with violations bringing $200-$500 fines. Even in rural areas where burning is legal, furniture fires often smolder for hours, sending embers onto roofs or into dry brush. The dense smoke draws complaints from neighbors and sometimes fire department responses you’ll get billed for. Wood-burning stoves and fireplaces aren’t safe alternatives either—furniture wood burns hotter than cordwood and can crack fireboxes or chimney liners, creating carbon monoxide risks.

Ready to get started?

Find a Dumpster Near You


Illustration of dumpster rental for this project

How to Dispose of a Bookshelf (2026 Guide)

You can dispose of a bookshelf by donating it if it’s still functional, breaking it down for curbside pickup if your waste service accepts bulky items, hauling it to a local landfill or transfer station, or renting a roll-off dumpster if you’re clearing out multiple pieces of furniture during a move or renovation. The method you choose matters because the wrong approach can mean wasted time driving around town, unexpected fees at the dump, or a perfectly good piece ending up in a landfill when someone else could have used it. Particle board shelves fall apart differently than solid wood units, and a bookshelf that’s been water-damaged creates different disposal challenges than one you simply outgrew. This guide walks through each disposal option based on your bookshelf’s condition and material, explains what actually happens when you choose donation versus trash, and covers the logistics most people don’t think about until they’re halfway through the job—like whether that Billy bookshelf will fit in your sedan or why the transfer station might charge you more during peak hours.

Renting a Dumpster for This Project?

For most of these jobs, a roll-off dumpster delivered to your driveway is the simplest, cheapest way to handle the haul. Compare local providers and get a free quote in minutes.

Find Dumpster Rental in Your City →

Contact Form Demo

Donating or selling an old bookshelf keeps usable furniture out of landfills while helping others or putting cash back in your pocket. Local charities, secondhand stores, and online marketplaces all accept furniture in decent condition—meaning structurally sound with no major damage, even if it shows some wear. Most donation centers will pick up large items for free if you can’t transport them yourself.

Where to Donate Furniture Locally

Goodwill and Salvation Army accept furniture at their donation centers, though availability varies by location—call ahead to confirm they’re taking large items that day. Habitat for Humanity ReStores are particularly furniture-friendly and often schedule free pickup within a week for anything they can resell. Churches, schools, and community centers sometimes need shelving for storage rooms or libraries, especially if you’re offering it free to whoever can haul it away.

Local Buy Nothing groups and mutual aid networks move furniture fast. Post a photo in your neighborhood’s Facebook group or on Nextdoor, and someone usually claims it within hours. These grassroots options work well for pieces that might not meet retail resale standards but still function perfectly fine—scratched laminate, mismatched hardware, or styles that went out of fashion years ago.

Selling Online and Secondhand Shops

Facebook Marketplace and Craigslist sell furniture faster than most platforms because buyers can see exactly what they’re getting and arrange same-day pickup. Price a basic five-shelf bookshelf around $20-40, solid wood pieces $60-120, depending on condition and brand. List it as “porch pickup” or “curb alert” to avoid scheduling headaches—serious buyers show up fast when the price is right.

Consignment shops like Buffalo Exchange or local furniture resellers take higher-end pieces but typically keep 40-50% of the sale price. They’re selective, usually only accepting mid-century modern, solid wood construction, or designer brands. Expect the evaluation process to take a few days and prepare to haul the piece back home if they decline it. For quick cash with zero effort, selling directly to a used furniture buyer gets you paid immediately, though you’ll get roughly half of what you’d make selling it yourself.

Disassemble for Curbside Trash Pickup

Disassemble for Curbside Trash Pickup

Most municipalities accept disassembled furniture at the curb if the pieces fit inside your regular trash bin or are bundled according to local guidelines. Remove all screws, dowels, and hardware, then break shelves and side panels into sections no longer than four feet. Separate materials—wood in one pile, particle board in another, metal hardware in a bag—to speed up collection and potentially meet recycling requirements in your area.

Breaking Down a Bookshelf Safely

Start by removing all shelves and backing material. Particle board backing typically peels away once you remove the staples or small nails holding it in place. Use a flathead screwdriver to pop out any shelf pins or supports, then slide the shelves out. If the shelves are fixed with screws, work from top to bottom to avoid having upper shelves fall unexpectedly as you remove lower supports.

For the main frame, flip the bookshelf face-down on a drop cloth or old blanket to protect your floor. Remove the screws or bolts connecting the sides to the top and bottom panels. Cheap bookshelves often use cam locks—those plastic discs you twist with a screwdriver. Turn them counterclockwise until they release, then gently pull the panels apart. If panels won’t separate easily, check for hidden fasteners along the back edge or inside routed channels. Forcing pieces apart risks splintering the wood or injuring yourself when they suddenly give way.

Once disassembled, cut or break larger panels to match your trash service’s size limits. A handsaw works for solid wood; score particle board with a utility knife and snap it along the line. Wear safety glasses—particle board throws dust, and cheap laminates can splinter. If you’re dealing with multiple bookshelves or the pieces still exceed what fits in your bin, a dumpster rental handles the volume without requiring you to stage debris on your curb for weeks.

Rent a Roll-Off Dumpster for Large Projects

Rent a Roll-Off Dumpster for Large Projects

A roll-off dumpster makes sense when you’re clearing out multiple pieces of furniture, renovating a room, or handling an estate cleanout where a bookshelf is just one item among many. Rather than making repeated trips to the landfill or coordinating multiple pickup appointments, you get a container dropped at your property for several days or weeks, letting you work at your own pace.

**When a Dumpster Rental Makes Practical Sense**

The math works in your favor once you’re disposing of more than a few large items. If you’re tackling a basement cleanout, downsizing a household, or gutting a home office, the cumulative time and vehicle wear from multiple dump runs quickly exceeds the cost of having a container on-site. A 10-yard dumpster—the smallest size most companies offer—holds roughly three pickup truck loads, enough for several bookshelves, old carpet, broken electronics, and boxes of miscellaneous items you’ve been meaning to discard.

Most rental companies operate on weekly periods. You’ll typically pay a flat rate that covers delivery, pickup, disposal of a set weight limit (often 1-2 tons for residential rentals), and the rental period itself. For 2026, expect a 10-yard unit to generally range from $250-400 for a week in most markets, though prices vary by location and current disposal fees. Going over the weight limit usually adds $40-75 per additional ton.

**Choosing the Right Container Size**

A 10-yard dumpster works for single-room cleanouts—think one bedroom’s worth of furniture, plus closet contents and accumulated storage items. Step up to a 20-yard container if you’re clearing multiple rooms or handling a garage full of old furniture, yard equipment, and construction debris from a minor renovation. The 20-yarder is the workhorse size for most residential projects.

Don’t base your decision solely on volume. Weight matters, especially with solid wood furniture. Three heavy oak bookshelves, a desk, filing cabinets, and boxes of books might fit in a 10-yard container by volume but could easily hit the weight limit. Mention what you’re disposing of when you call for a quote—experienced rental companies can steer you toward the right size based on similar projects they’ve handled.

**What You Can and Can’t Toss**

Roll-off dumpsters accept most household furniture, construction debris, appliances (sometimes with an extra fee for Freon removal), and general junk. Wood, metal, and particle board bookshelves all qualify. You can mix materials freely—no need to separate wood from metal or sort hardware.

The prohibited list is shorter than you’d expect but important: no liquids (paint, oil, household chemicals), no hazardous materials (asbestos, pesticides), no tires, and typically no electronics in some municipalities. Mattresses sometimes incur an additional disposal fee. If your bookshelf cleanup involves clearing out old paint cans or cleaning supplies stored on the shelves, you’ll need to dispose of those items separately through your local household hazardous waste program.

Recycle Wood and Composite Materials

Recycle Wood and Composite Materials

Most bookshelves contain recyclable materials, but you can’t just toss them in your curbside bin. Solid wood pieces can go to wood recycling facilities or municipal drop-off centers that accept dimensional lumber. Particle board and MDF shelves require specific recycling streams since they’re treated differently than natural wood. Check your local recycling center’s policies first—some accept composite materials, while others only process untreated lumber.

Different shelf materials need different approaches. A solid oak bookcase breaks down into clean wood that recycling facilities readily accept. The same facility might reject a laminated particle board unit because the adhesives and finish layers contaminate the recycling process. Remove all metal brackets, screws, and plastic shelf pins before dropping off any materials. Most facilities charge a small fee for wood recycling, typically $5-15 per load, though some municipal centers offer free drop-off for residents.

Particle board and MDF present particular challenges. These engineered materials contain formaldehyde-based resins that make them unsuitable for standard wood recycling. Some specialized facilities can process them into new composite boards or use them as fuel in waste-to-energy plants. Call ahead to confirm acceptance—many recyclers turn away composite materials entirely. If your local options are limited and you’re clearing out multiple pieces of furniture, a roll-off dumpster rental lets you dispose of various materials in one go, though the contents typically go to a landfill rather than recycling.

Breaking down large shelves improves your options. A six-foot bookcase fits more easily in your vehicle when disassembled, and some recycling centers charge by volume rather than weight. Use a drill to remove hardware, then separate shelves from the frame. This also lets you sort materials—real wood shelves in one pile, particle board backing in another. The extra fifteen minutes of prep work often means the difference between paying disposal fees and finding a free recycling option.

Ready to get started?

Find a Dumpster Near You


Illustration of dumpster rental for this project

How to Dispose of a Carpet (2026 Guide)

The most practical ways to dispose of a carpet are to roll it, cut it into manageable sections, and either haul it to a landfill that accepts construction debris, schedule a bulk waste pickup with your municipality, or rent a roll-off dumpster for larger projects. Most people underestimate how quickly a carpet removal project becomes unwieldy — a standard 12×15 room carpet with padding can weigh 200+ pounds and won’t fit in your regular trash bins. The disposal method that works best depends on the carpet’s size, whether you’re tackling one room or a whole house, and what waste services are actually available in your area. Some materials like wool or certain synthetic fibers can be recycled through specialty programs, though this option remains limited in most regions. This guide walks through each disposal route, what it actually costs, and how to avoid the most common mistakes that turn a straightforward carpet removal into a logistical headache.

Renting a Dumpster for This Project?

For most of these jobs, a roll-off dumpster delivered to your driveway is the simplest, cheapest way to handle the haul. Compare local providers and get a free quote in minutes.

Find Dumpster Rental in Your City →

Contact Form Demo

Why Carpet Disposal Takes Planning

Why Carpet Disposal Takes Planning

Carpet disposal requires advance planning because of its physical bulk and local regulations that limit how you can get rid of it. A standard room’s carpet can weigh 50-100 pounds and won’t fit in regular trash bins. Most municipalities ban carpet from curbside pickup and restrict what landfills accept, forcing you to research approved disposal sites or arrange alternative removal methods before you start ripping up floors.

Volume and Weight Challenges

Wall-to-wall carpet from a 12×15 bedroom generates roughly 180 square feet of material. Rolled up, that creates a cylinder about 15 feet long and 1-2 feet in diameter—too large for a car trunk and awkward to maneuver through doorways. The padding underneath adds another bulky layer. If you’re clearing multiple rooms, you’re looking at several hundred pounds of material that needs cutting into manageable sections just to move it out of your house.

The weight catches people off guard. Carpet saturated with years of dust, dirt, and moisture can hit 1-2 pounds per square foot. Older styles with thick foam backing weigh even more. You’ll need help carrying these rolls to a vehicle, and loading them into a truck bed or trailer requires two or three people. A roll-off dumpster placed in your driveway eliminates the lifting problem entirely—you cut carpet into strips and toss pieces directly into the container as you work.

Local Waste Regulations

Most cities exclude carpet from household trash collection because it clogs compactor trucks and takes up excessive landfill space. Your regular garbage service won’t touch it, even if you cut it into small pieces. Some waste management districts operate special drop-off days for bulky items, but these typically run once or twice a year and may charge $20-40 per load.

Municipal landfills that do accept carpet often require you to haul it yourself during limited hours—usually weekday mornings when you’re at work. They may also mandate that carpet arrives in specific lengths (6-foot sections are common) and separated from padding. Private transfer stations generally take carpet but charge by weight or volume, with fees that typically range from $40-100 depending on the amount. Check your county’s solid waste website before removal day. Some jurisdictions fine residents who dump carpet improperly or leave it at the curb, and you don’t want to haul 200 pounds of debris across town only to learn the facility won’t accept it.

Curbside and Municipal Disposal Options

Curbside and Municipal Disposal Options

Most municipalities offer bulk trash pickup for carpets, but you’ll need to follow specific preparation rules. Carpets typically must be rolled and tied into bundles no longer than four feet, with weight limits ranging from 50 to 100 pounds per bundle. You’ll schedule pickup through your waste management provider—some cities include this service with regular trash collection, while others charge between $25 and $75 per pickup appointment.

Bulk Trash Pickup Requirements

Call your local waste management department or check their website for carpet-specific rules. Many cities require you to cut carpet into sections and secure them with twine or zip ties—loose carpet won’t get picked up. The standard four-foot length limit exists because collection crews handle bundles manually, and anything longer becomes unwieldy.

Some municipalities restrict bulk pickup to certain items or frequencies. You might get two free bulk pickups per year, with additional pickups requiring a fee. Others limit the total volume you can set out—often three cubic yards, roughly equivalent to 100-150 square feet of standard carpet. If you’re replacing carpet in multiple rooms, you may need to schedule pickups across several collection cycles or consider a roll-off dumpster for the entire project. Padding usually goes out with the carpet but must be bundled separately in some jurisdictions.

Recycling and Donation Alternatives

Most carpet can be diverted from landfills through specialized recycling programs that break down materials into new products, or donated if still usable. Carpet America Recovery Effort (CARE) facilities accept post-consumer carpet nationwide, processing nylon into pellets for new flooring and turning polypropylene backing into automotive parts. Usable carpet finds second life through Habitat for Humanity ReStores, local theater groups, or animal shelters that repurpose it for kennel bedding.

Finding Carpet Recycling Programs

Check the Carpet America Recovery Effort website for drop-off locations in your area. These facilities typically charge $0.15 to $0.35 per pound for residential drop-offs, though some municipalities offer free collection days quarterly. The key is separating carpet by material type — facilities want pure loads of nylon-6, nylon-6,6, or polypropylene, not mixed batches.

Call ahead with your carpet’s fiber content, listed on the manufacturer’s label or original product documentation. Wool and natural fiber carpets require different processors, often through textile recycling centers rather than standard CARE facilities. If you’re removing carpet from multiple rooms during a renovation, a roll-off dumpster rental might make sense for general debris, but set the carpet aside for separate recycling pickup to avoid contamination fees.

Donation Requirements and Options

Habitat ReStores accept carpet with minimal wear — think lightly used bedroom carpet, not traffic-worn hallway runners. They want pieces large enough to cover at least 100 square feet, clean and odor-free, with no water damage or pet stains. Call your local ReStore before loading your truck; some locations only accept carpet during specific donation windows or when they have warehouse space.

Community theaters, church drama departments, and high school auditoriums often need carpet remnants for set construction and sound dampening backstage. Animal rescues use cut carpet sections as kennel liners, preferring short pile that’s easy to clean. Post free listings on Nextdoor or Facebook Marketplace — contractors doing rental flips sometimes grab usable carpet for closets or storage areas where new material isn’t worth the cost.

Renting a Dumpster for Carpet Removal

A roll-off dumpster simplifies large carpet removal projects by providing a central disposal point that eliminates multiple trips to the landfill. For whole-house carpet removal or commercial jobs, renting a 10- or 20-yard dumpster typically costs between $250–$500 for a week-long rental period. The container sits in your driveway, you fill it at your own pace, and the rental company hauls everything away when you’re done.

Choosing the Right Dumpster Size

Carpet takes up more space than you’d expect once rolled. A single room’s worth compresses reasonably well, but an entire house creates bulk fast. A 10-yard dumpster handles roughly 800–1,000 square feet of residential carpet with padding. That’s about three to four average bedrooms. If you’re tearing out carpet from a 2,000-square-foot home, a 20-yard container gives you working room without playing Tetris with every roll.

Commercial spaces need bigger. Office buildings or retail spaces often require 30-yard dumpsters, especially when you’re disposing of dense commercial-grade carpet with heavy backing. Factor in the padding separately—it’s bulkier than the carpet itself and doesn’t compress much under its own weight.

What You Can (and Can’t) Toss In

Most dumpster rental companies accept carpet, padding, tack strips, and the related debris from removal—think staples, nails, and small pieces of trim. The metal tack strips go in the same container; you don’t need to separate them. Mixing carpet with other renovation debris works fine in most cases. Drywall, wood scraps, and old baseboards can share space with your carpet rolls.

Watch out for weight limits. Wet carpet from a flood or water damage weighs significantly more than dry carpet. Some companies charge overage fees if you exceed the weight allowance, which generally ranges from 2–4 tons depending on container size. Hazardous materials stay out—no paint cans, solvents, or adhesives still in containers. Dried adhesive stuck to carpet backing is fine; liquid adhesive in separate containers is not.

Timing Your Rental Period

Standard rental periods run seven days, giving you a full week to work through the removal at a reasonable pace. Weekend warriors doing a DIY project rarely need the full week—most finish in two to three days. Extended rentals typically add $10–$20 per day after the initial period, though rental companies may negotiate weekly rates for longer projects.

Schedule delivery for a day or two before you start removing carpet. This lets you stage the dumpster in the best spot and gives you flexibility if your work timeline shifts. For contractor jobs where you’re coordinating multiple trades, having the container arrive early means you’re not holding up progress waiting for delivery. Pickup happens within 24 hours of your call in most markets, so you don’t need to plan that as precisely.

Ready to get started?

Find a Dumpster Near You


Illustration of dumpster rental for this project

How to Dispose of a Bed Frame (2026 Guide)

You can dispose of a bed frame by disassembling it and taking the metal parts to a scrap recycling center, bringing wood frames to a municipal waste facility that accepts bulk items, scheduling a curbside pickup if your city offers one, donating intact frames to charity resale shops, or renting a roll-off dumpster for convenient removal during larger cleanouts. The method you choose depends on your frame’s material, condition, and your timeline—metal frames have resale value that makes recycling worthwhile, while particle board frames often end up as landfill waste unless you plan carefully. Most people underestimate how awkward a disassembled bed frame is to transport in a sedan, which is why pickup services and dumpster rentals handle the majority of residential frame disposals. Getting rid of a bed frame the right way means understanding what your local waste system accepts, which materials can actually be recycled or reused, and what disposal will cost in either time or money. The difference between a frame that gets a second life and one that sits in a garage for months usually comes down to knowing your options before you start taking it apart.

Renting a Dumpster for This Project?

For most of these jobs, a roll-off dumpster delivered to your driveway is the simplest, cheapest way to handle the haul. Compare local providers and get a free quote in minutes.

Find Dumpster Rental in Your City →

Contact Form Demo

What to Consider Before Disposing of a Bed Frame

Before disposing of a bed frame, evaluate its material composition and structural condition to determine the best disposal method. A metal frame in good shape has resale or recycling value, while a damaged particleboard frame belongs in the trash. You’ll also need to measure the frame and confirm whether it disassembles—a king-size frame that doesn’t break down won’t fit in most vehicles or standard trash bins.

Material and Condition Assessment

The frame’s material dictates your disposal options and potential costs. Metal frames—steel tubing or wrought iron—appeal to scrap metal recyclers who pay by weight. Solid wood frames (oak, maple, pine) hold resale value if the joints are tight and the finish isn’t heavily damaged. Someone will pay for a mid-century wooden platform frame with intact slats and minimal scratches.

Particleboard, MDF, and laminate frames rarely warrant the effort of selling or donating. These materials sag, chip, and delaminate with use. If the corner brackets have pulled loose or the veneer is peeling, it’s trash. Check for structural soundness—lie on the frame and rock it. Excessive wobble or cracked welds mean the frame has reached end-of-life and shouldn’t be passed along.

Size and Disassembly Requirements

Measure the frame before planning your disposal method. A twin frame might be 39 by 75 inches, fitting in an SUV with the seats down. A king frame stretches to 76 by 80 inches—too large for most vehicles unless you have a truck bed or roof rack. Write down the dimensions after disassembly; headboards and footboards often add another 12 to 24 inches in height.

Most modern frames disassemble with basic tools. Look for bolts connecting the side rails to the headboard and footboard. Remove the mattress support slats or platform. Some platform beds use cam locks or Allen bolts that require a hex key. Older frames might be welded or use non-removable rivets, forcing you to transport them whole. If the assembled frame exceeds your vehicle’s capacity and won’t break down, you’ll need either curbside bulk pickup or a roll-off dumpster for larger cleanout projects.

Donation and Resale Options

Donation and Resale Options

Donating your bed frame works best when the piece is structurally sound, clean, and made from solid materials like wood or metal. Most charities accept frames that can support a mattress without repairs — no cracked slats, broken corner brackets, or stripped screw holes. The frame doesn’t need to look new, but it should function safely for someone else to use immediately.

When Donation Makes Sense

Your bed frame qualifies for donation if someone could reasonably set it up tonight and sleep on it. Run through a quick checklist: all support slats present and intact, no bent rails that prevent assembly, headboard and footboard attachments secure if applicable. A few cosmetic scratches don’t matter. What matters is whether the frame performs its job.

Solid wood frames hold up better than particleboard or MDF, making them easier to place with charities. A queen-size wooden sleigh bed from 2015 with minor finish wear will find a home faster than a pressboard platform frame with water stains. Metal frames — even basic models — stay in demand because they’re lightweight and durable. Organizations like Habitat for Humanity ReStore, Goodwill, and The Salvation Army typically accept frames meeting these standards, though policies vary by location. Call ahead to confirm they’re taking furniture and ask about their pickup service radius. Some will retrieve large items from your home within a week; others require you to drop off during specific hours. If your frame needs disassembly for transport but you lack the tools or vehicle space, consider whether a dumpster rental makes more sense than coordinating a charity pickup for a marginal piece.

Municipal and Curbside Disposal

Most municipalities handle bed frames through bulk trash pickup programs, requiring you to schedule collection in advance or place the frame curbside on designated pickup days. Call your local waste management department or check their website for scheduling requirements, size restrictions, and any associated fees—some cities offer free quarterly pickups while others charge $20-50 per item. If your frame exceeds size limits or your city doesn’t offer bulk pickup, you’ll need to break it down to standard trash dimensions or use alternative disposal methods.

Check Your City’s Bulk Waste Schedule

Cities typically run bulk waste programs on monthly or quarterly cycles, with specific neighborhoods assigned to particular weeks. Los Angeles, for example, schedules bulky item collection twice per year per address, while Phoenix offers monthly pickups for a small fee. Look for a “bulky waste” or “large item pickup” section on your municipality’s website, where you’ll find your scheduled dates and a list of acceptable items.

Call ahead if your bed frame has unusual features—most programs accept standard metal and wood frames without issue, but adjustable bases with electrical components or frames with built-in storage might fall into different categories. Some cities require advance notice of 24-72 hours, while others let you simply place items out the night before your designated collection day. Missing your pickup window often means waiting weeks or months for the next cycle.

Understand Size and Weight Limits

Standard curbside bulk programs max out at items weighing 50-75 pounds and measuring no more than 4-6 feet in any dimension. A queen metal frame usually weighs 40-60 pounds and fits within these parameters when disassembled into rails and headboard pieces. King frames and solid wood designs frequently exceed both weight and length restrictions.

Break down oversized frames before collection day. Remove the mattress support slats, separate the headboard from the rails, and unbolt any footer pieces. This reduces each component to manageable dimensions and often converts a rejected item into an acceptable one. Stack pieces neatly at the curb rather than leaving the fully assembled frame—collectors can refuse pickups that violate posted guidelines, leaving you to haul everything back inside.

Know When You’ll Pay Extra

Cities charge fees when your bulk item falls outside the regular free program or when you exceed your annual allowance. Flat fees run $15-40 per item in most areas, though some municipalities base charges on weight or require you to purchase special collection tags from local retailers. Others bundle bulk pickup into your regular trash service at no additional cost but limit you to 2-4 items per year.

Oversized frames might trigger surcharges even within bulk programs. A California king frame that can’t be broken down small enough, or a four-poster bed with decorative finials that make it awkward to handle, could cost an extra $25-50 for special handling. Get specific pricing before scheduling—the customer service representative can tell you whether your particular frame fits standard bulk collection or requires upgraded service. For projects involving multiple large items like a full bedroom cleanout, a roll-off dumpster often costs less than paying per-item municipal fees.

Dumpster Rental for Quick Removal

Dumpster Rental for Quick Removal

Renting a roll-off dumpster makes sense when you’re clearing out more than just a bed frame — think bedroom furniture plus closet contents, or a multi-room renovation. A 10-yard dumpster typically handles 3-4 rooms worth of furniture and debris. You load at your own pace, and the rental company hauls everything away on your schedule, usually for a 3-7 day rental period.

This option works particularly well during moves or estate cleanouts. You’re already dealing with volume. A metal bed frame takes up roughly 15-20 cubic feet of space, but if you’re also tossing nightstands, a dresser, old mattresses, and boxes of miscellaneous items, the convenience of one container outweighs the cost of multiple disposal trips.

Most dumpster rental companies price by container size and rental duration. A 10-yard unit generally ranges from $250-$400 for a week in 2026, varying by location and what you’re disposing of. The company drops it in your driveway, you fill it, they pick it up. No multiple trips to the dump, no loading and unloading your vehicle repeatedly.

The real value emerges in time savings. Breaking down a bed frame takes 20-30 minutes. Loading your car, driving to a disposal facility, unloading, driving back — that’s easily 90 minutes, assuming the facility is open when you’re available. When you’re clearing an entire space, those trips multiply. A dumpster sitting in your driveway eliminates the logistics puzzle entirely.

Before ordering, confirm the rental company accepts metal furniture. Most do, but policies vary on mattresses and box springs (some charge extra for those). Mention everything you’re disposing of upfront. Getting surprised by additional fees when they arrive for pickup defeats the purpose of choosing the convenient option.

Ready to get started?

Find a Dumpster Near You


Illustration of dumpster rental for this project

How to Dispose of a Lawn Mower (2026 Guide)

You can dispose of a lawn mower through several practical routes: donate or sell a working model, recycle it through a scrap metal facility or municipal program, return it to a retailer with a take-back policy, or hire a junk removal service if local pickup won’t accept it. The method you choose depends mostly on whether your mower still runs and what disposal infrastructure exists in your area — a choice that affects both your wallet and whether usable equipment ends up in a landfill. Gas-powered mowers require extra steps since you’ll need to drain fuel and oil before disposal, while electric models are simpler but still contain materials that belong in recycling streams rather than regular trash. Understanding how to dispose of a lawn mower properly saves you from code violations in communities with strict bulk waste rules and keeps hazardous fluids out of the waste system. This guide walks through each disposal option with the specific prep work required, what to expect for costs or potential payouts, and how to match your mower’s condition to the smartest exit strategy.

Renting a Dumpster for This Project?

For most of these jobs, a roll-off dumpster delivered to your driveway is the simplest, cheapest way to handle the haul. Compare local providers and get a free quote in minutes.

Find Dumpster Rental in Your City →

Contact Form Demo

Preparing Your Lawn Mower for Disposal

Preparing Your Lawn Mower for Disposal

Before disposing of a lawn mower, drain all fluids, remove the spark plug, and detach the battery if your model has one. These steps prevent environmental contamination, meet recycling facility requirements, and eliminate safety hazards during transport. Most disposal methods — whether scrap recycling, municipal pickup, or using a roll-off dumpster for a larger cleanout — require these preparations beforehand.

Draining Fluids and Fuel

Gas-powered mowers hold gasoline, oil, and sometimes hydraulic fluid. Start by running the engine until it consumes all remaining fuel, or siphon gas into an approved container using a hand pump. Never pour gasoline down drains or onto soil — take it to a hazardous waste collection site. For oil, tilt the mower onto its side (air filter facing up to prevent flooding the carburetor) and drain into a catch pan. Most auto parts stores accept used motor oil for free recycling.

Remove the spark plug after draining to prevent accidental starts. If your mower has a separate oil reservoir or hydraulic system, consult the manual for drain locations. Expect about a quart of oil from a standard push mower, more from riding models. Skipping this step means facilities may reject your mower or charge extra handling fees.

Removing the Battery

Riding mowers and some newer electric models use lead-acid or lithium-ion batteries that require separate disposal. Disconnect the negative terminal first to avoid shorts, then the positive. Lead-acid batteries (the rectangular black boxes on most riders) can go to any auto parts retailer — they’re legally required to accept them and typically offer a small credit. Lithium batteries from cordless mowers need specialized recycling through programs like Call2Recycle or municipal e-waste centers.

Leave a removed battery sitting directly on concrete for extended periods and it can self-discharge or crack in freezing temperatures. Store it upright on wood or cardboard until drop-off. If you’re clearing out a garage full of equipment and considering a dumpster rental for the bulk items, keep batteries separate — they’re prohibited in standard waste containers and need their own disposal route.

Recycling and Scrap Metal Options

Recycling and Scrap Metal Options

Scrap yards pay cash for lawn mowers because the steel deck, aluminum engine block, and copper wiring all have resale value. Most yards accept mowers in any condition—running or not—and weigh your mower on-site to calculate payment. Expect anywhere from $5 to $25 for a push mower and $15 to $50 for a riding mower, depending on current metal prices and your machine’s weight.

Finding Local Scrap Yards

Search “scrap metal recycling near me” or “scrap yard” plus your zip code to find facilities within driving distance. Call ahead before loading your mower—some yards only accept drop-offs during specific hours, while others require you to separate certain components like batteries or fuel tanks before weighing. Ask whether they accept whole mowers or if you need to drain fluids first, since requirements vary by facility.

Check if your yard pays by gross weight or processed weight. Gross weight means they weigh everything as-is, while processed weight means they deduct for non-metal parts like plastic handles and rubber tires. Facilities that accept whole units typically pay slightly less per pound but save you disassembly time. If you’re disposing of multiple items—say, a mower plus old patio furniture or a broken grill—consolidating the trip makes sense. For larger cleanouts that include a lawn mower among other bulky items, renting a roll-off dumpster can handle everything at once, though you’ll miss out on the scrap value for the metal components.

Donation and Trade-In Programs

Many working or easily repairable lawn mowers find second lives through donation centers, community programs, and retailer trade-in offers. Nonprofits like Habitat for Humanity ReStores, Goodwill, and local tool libraries accept functional mowers year-round, while major retailers often run seasonal trade-in events offering store credit toward new equipment purchases.

Finding Local Donation Centers

Habitat for Humanity ReStores operate in most metropolitan areas and accept gas and electric mowers that start and run reliably. Call ahead—some locations have limited storage during peak donation seasons (spring and early summer) and may pause lawn equipment intake. Goodwill accepts mowers at select donation centers, though policies vary by region. Smaller electric mowers move faster than riding models, which take up warehouse space and require specialized buyers.

Community tool libraries and sharing programs actively seek lawn equipment donations. These organizations loan tools to members for nominal annual fees, making them particularly interested in quality equipment. Search “tool library” plus your city name, or check with your public library system—many now host tool-sharing programs as extensions of their services.

Retailer Trade-In Events

Home Depot and Lowe’s run trade-in promotions several times yearly, typically during spring and fall equipment changeovers. You bring in any old mower (any brand, any condition) and receive a discount voucher—usually $50 to $100—toward purchasing a new model above a minimum price threshold. The retailer handles disposal, which simplifies how to dispose of a lawn mower if you’re upgrading anyway.

These events have specific windows, often lasting just one or two weeks. Sign up for retailer email lists in February and August to catch announcements. The programs accept non-working mowers, making them useful even if your equipment is beyond repair. Some independent dealers offer year-round trade credit, though amounts vary based on your mower’s condition and resale potential.

Preparing Equipment for Donation

Drain all gasoline and oil before transporting a mower to any donation site. Most centers refuse equipment with fluids due to storage regulations and fire codes. Run the engine until it stops from fuel starvation, then tip the mower to drain remaining oil into a container for proper disposal at an auto parts store or recycling center.

Clean the deck and remove grass clumps—donation centers want equipment that looks ready to use. Replace or sharpen the blade if it’s badly nicked. Small investments in presentation significantly increase acceptance rates. Include the owner’s manual if you still have it, and note any quirks or maintenance needs on a piece of tape attached to the handle. A mower that starts on the second pull with the choke half-engaged needs that context for the next user.

When to Use a Roll-Off Dumpster

A roll-off dumpster makes sense when you’re disposing of multiple lawn mowers at once, clearing out an entire shed or garage, or tackling a larger property cleanout that includes lawn equipment among other debris. For a single mower in working condition, donation or resale is smarter. But when you’re dealing with several broken mowers, extensive yard waste, or a full-scale cleanout project, renting a dumpster becomes the most practical solution.

Multiple Equipment Disposal

Property managers and landscaping businesses often accumulate broken mowers over seasons. A commercial lawn service might retire three or four push mowers and a riding mower in a single year. Hauling these individually to a scrap yard wastes time and fuel. A 10-yard dumpster rental handles all of them at once, plus the trimmed metal shelving, old fertilizer spreaders, and rotted lumber from the equipment shed. You load everything on your schedule instead of coordinating multiple drop-off trips.

Whole-Property Cleanouts

Estate sales and foreclosure cleanouts frequently include lawn equipment buried under years of accumulated stuff. You might find two riding mowers in a barn, a broken push mower in the basement, and garden tools scattered across three outbuildings. A 20-yard roll-off dumpster positioned in the driveway becomes a central collection point. You’re not just disposing of lawn mowers — you’re clearing furniture, appliances, construction debris, and decades of storage. One container handles everything that won’t sell or donate.

Renovation Projects With Outdoor Components

Garage teardowns, shed demolitions, and backyard remodels generate mixed debris. When you’re ripping out a detached garage, you’ll deal with the structure itself plus whatever’s stored inside — often including old lawn equipment. The mower disposal becomes incidental to the larger project. A dumpster already on-site for construction waste accepts the mower along with broken concrete, rotted framing, and asphalt shingles. You avoid the hassle of separating one item for special handling when you’re already managing tons of material.

Ready to get started?

Find a Dumpster Near You


Illustration of dumpster rental for this project

How to Dispose of a Area Rug (2026 Guide)

You can dispose of an area rug through donation if it’s still usable, curbside bulk trash pickup in most municipalities, a specialized textile recycling facility, or by renting a roll-off dumpster for immediate removal—especially if you’re tackling multiple bulky items during a renovation or cleanout. The method you choose depends primarily on the rug’s condition and your timeline, because a wool Persian in decent shape has resale value while a pet-stained synthetic piece belongs in the landfill stream. Most people underestimate how difficult it is to wrestle a full-size rug into a sedan or how quickly donation centers reject worn floor coverings, which is why understanding your disposal options before you roll it up saves wasted trips. How to dispose of an area rug the right way means matching the rug’s material and condition to the most practical removal method, whether that’s finding a textile recycler that accepts natural fibers or simply loading it into a dumpster rental alongside other household debris. This guide walks through each disposal route with specific steps, costs, and the scenarios where each option makes sense.

Renting a Dumpster for This Project?

For most of these jobs, a roll-off dumpster delivered to your driveway is the simplest, cheapest way to handle the haul. Compare local providers and get a free quote in minutes.

Find Dumpster Rental in Your City →

Contact Form Demo

When to Replace vs. Repair Your Area Rug

When to Replace vs. Repair Your Area Rug

Deciding whether to repair or replace comes down to the rug’s condition, your attachment to it, and basic math. If damage affects more than 30% of the rug, if structural integrity is compromised, or if repair costs exceed 50% of replacement value, you’re better off buying new. Rugs with minor fraying, isolated stains, or fixable backing issues usually make good repair candidates.

Signs Your Rug Is Beyond Cleaning

Certain damage signals that professional cleaning won’t restore your rug. Backing deterioration is the clearest indicator — if the latex or jute backing crumbles when you bend the rug, the fibers will start shedding no matter how much you clean it. Persistent odors that return after cleaning, especially pet urine that’s soaked through to the subfloor, mean the problem goes deeper than surface dirt.

Look for structural damage that cleaning can’t address: holes larger than a quarter, tears that expose backing, or areas where the pile has worn down to bare foundation. Water damage from flooding often causes mold growth within the rug’s core layers, which remains even after surface cleaning. If your rug shows dark spots that smell musty or if fibers mat down and won’t spring back after vacuuming, the internal structure has likely failed.

Cost Comparison: Repair vs. Replacement

Professional rug repair typically ranges from $50 to $200 for minor edge binding or small patches. Extensive repairs — reweaving large sections, replacing backing, or fixing multiple areas — can run $300 to $800. Compare these costs against replacement. A quality 8×10 synthetic rug costs $200 to $600 at retail, while comparable wool rugs start around $800.

Run a simple calculation: if repair costs more than half of what you’d spend on a comparable new rug, replacement makes financial sense. A $400 repair on a $600 rug doesn’t pencil out unless the piece has sentimental value or unique character you can’t replicate. For large or heavily damaged rugs heading for disposal, renting a roll-off dumpster simplifies removal, especially during whole-room renovations where you’re clearing out multiple items. The exception is antique or handmade rugs, where even expensive repairs preserve value better than replacement — a $500 repair on a $3,000 Persian rug represents sound investment.

Donation and Resale Options for Used Rugs

Donation and Resale Options for Used Rugs

Most charities that accept furniture will take area rugs in good condition—meaning clean, unstained, and without significant wear or damage. Habitat for Humanity ReStores, Goodwill, and The Salvation Army all commonly accept rugs, though policies vary by location. Smaller local charities, shelters, and religious organizations often welcome rugs as well, especially in colder climates where they’re needed for warmth and comfort.

Where Charities Accept Area Rugs

Habitat for Humanity ReStores operate in most metro areas and typically accept rugs up to specific size limits. Call ahead to confirm whether your local store has warehouse space for larger items—some locations accept only rugs under 8×10 feet during certain seasons. Drop-off is usually self-service during business hours, though some ReStores offer scheduled pickups for multiple items.

Goodwill and The Salvation Army accept rugs at most donation centers, but condition standards matter more than you might expect. A rug with visible pet stains or worn-through backing will likely get rejected at intake, even if you drove across town to donate it. Inspect your rug honestly before loading it up. Small fraying along edges is usually acceptable; large tears or permanent odors are not.

Local homeless shelters and refugee resettlement programs often need rugs but may not advertise publicly. Contact organizations directly rather than assuming they can’t use donated items. A family services coordinator at a resettlement agency once told me they receive three offers of kitchen supplies for every one area rug, yet rugs remain one of their most-requested items. The same principle applies to domestic violence shelters furnishing apartments for families leaving emergency housing.

Religious organizations sometimes maintain donation warehouses separate from their main buildings. Synagogues, mosques, and churches with active community outreach programs may accept rugs for distribution to congregation members in need. These programs typically run informally, so you’ll need to make a phone call rather than checking a website.

Recycling and Eco-Friendly Disposal Methods

Area rugs made from natural fibers like wool, cotton, or jute can often be composted or recycled, while synthetic rugs require specialized recycling facilities that process nylon, polyester, or polypropylene materials. Check with local textile recyclers, carpet reclamation centers, or municipal composting programs that accept natural fiber materials. Many rugs contain mixed materials that complicate recycling, so identifying your rug’s composition before pursuing eco-friendly disposal saves time and ensures you’re using the right channel.

Natural Fiber Rugs: Composting and Biodegradable Options

Pure wool, cotton, sisal, and jute rugs can break down naturally when cut into smaller pieces. A 5×7 wool rug cut into 12-inch squares will compost within 6-12 months in an active compost pile, though you’ll need to remove any synthetic backing, binding tape, or rubber padding first. Municipal composting facilities sometimes accept natural fiber textiles in their yard waste programs—call ahead because acceptance varies widely by region.

Wool rugs decompose slower than plant-based materials but add nitrogen to compost. Strip away latex backing or nylon stitching before adding wool pieces to your pile. Cotton and plant fiber rugs compost faster but may need mixing with carbon-rich materials like leaves or wood chips to prevent matting and poor airflow.

Synthetic Rug Recycling Programs

Nylon and polyester rugs require industrial recycling equipment that melts down fibers for reprocessing. Carpet America Recovery Effort (CARE) maintains a database of drop-off locations across the country where recyclers accept area rugs alongside wall-to-wall carpeting. Some facilities charge $0.10-$0.30 per pound, while others offer free drop-off during specific hours.

Recycled nylon from rugs becomes automotive parts, new carpet fiber, or plastic lumber. The process requires clean, dry rugs—heavily soiled or mildewed pieces often get rejected. A few retailers like Interface and Mohawk run take-back programs for their own branded rugs, offering discounts on new purchases when you return old ones. Contact the manufacturer directly if your rug has original purchase documentation.

Textile Recycling Centers and Upcycling

Local textile recyclers process rugs that don’t qualify for composting or carpet-specific programs. These facilities sort materials by fiber type, with cotton and wool rugs becoming insulation, industrial wiping cloths, or fiber fill. Synthetic rugs get shredded for use in soundproofing panels or automotive underpadding. Search “textile recycler near me” or check with Goodwill and Salvation Army locations—some regional centers accept worn rugs even when retail stores don’t.

Upcycling transforms damaged rugs into doormats, pet beds, or rag rugs. Cut a large area rug into runner-sized sections for hallways or entryways. Braided rag rugs use strips from old cotton or wool rugs woven into new floor coverings. If you’re clearing out multiple rugs during a renovation and don’t have time for individual recycling trips, a roll-off dumpster allows you to consolidate disposal while keeping materials separate for later sorting at a waste management facility that handles textiles.

Using a Roll-Off Dumpster for Quick Removal

A roll-off dumpster makes rug disposal straightforward when you’re dealing with multiple large rugs, handling a full home cleanout, or tackling renovation debris alongside old carpeting. You call a rental company, they drop off a container sized to your project (typically 10 to 20 cubic yards for household cleanouts), and you toss the rugs in along with other unwanted items. When you’re done loading, the company hauls everything away—no vehicle limitations, no weight restrictions you can’t handle, no multiple trips required.

This approach works best when rug disposal is part of a bigger project. Renting a dumpster solely for one or two small rugs rarely makes financial sense, but if you’re clearing out a deceased relative’s home, gutting rooms before a remodel, or purging an entire household of furniture and flooring, the economics shift. You get a centralized collection point that sits on your property for days or weeks, letting you work at your own pace without coordinating pickup schedules or driving to disposal facilities during business hours.

Most dumpster rental companies place containers in driveways or along curbs. The rug goes in the same as any other household debris—you don’t need to prep it beyond getting it to the container. Rolling or folding helps maximize space, particularly if the rug is oversized. A 9×12 wool rug doesn’t compress much, so positioning matters when you’re sharing the container with furniture, drywall, or yard waste. Heavier rugs go in first as a base layer; lighter materials stack on top.

The practical floor for dumpster rental runs around $300 to $500 for a week-long rental of a 10-yard container in most markets, though prices vary by region and disposal fees. That cost covers delivery, pickup, haul-away, and a weight allowance (often one to two tons). If your project generates enough waste to justify that baseline expense, the convenience becomes worth it. You’re paying for labor savings and timeline control—the ability to demo a bathroom, rip out old carpet, and discard construction scraps all in one coordinated effort rather than piecemealing disposal over weekends.

Rental periods typically run seven days, with options to extend if needed. That window gives you flexibility to handle unexpected project delays without scrambling for immediate disposal. The container sits there while you pull up tack strips, bag debris, or wait for contractors to finish adjacent work. When the rug is one item among many heading to the landfill, this method eliminates the friction of coordinating separate disposal routes for different material types.

Ready to get started?

Find a Dumpster Near You


Illustration of dumpster rental for this project

How to Dispose of a Hot Tub (2026 Guide)

Disposing of a hot tub requires either breaking it down yourself for curbside pickup—which works for smaller acrylic models if you have the right tools and muscle—or hiring professionals to haul away the entire unit, handle the electrical disconnect, and navigate tight spaces that standard pickup trucks can’t manage. Most homeowners underestimate the weight (a typical 6-person model hits 800+ pounds dry) and the permit requirements some municipalities enforce for DIY demolition, which turns what seemed like a weekend project into a multi-week ordeal. The method you choose depends on your tub’s construction material, access to your backyard, local disposal regulations, and whether you’re physically equipped to cut through fiberglass and reinforced shells. Learning how to dispose of a hot tub the right way means understanding when a sledgehammer and reciprocating saw make sense versus when a crane rental and professional crew become non-negotiable. This guide walks through both DIY teardown and full-service removal, plus the drainage, electrical, and disposal logistics that trip up most first-timers trying to reclaim their deck space.

Renting a Dumpster for This Project?

For most of these jobs, a roll-off dumpster delivered to your driveway is the simplest, cheapest way to handle the haul. Compare local providers and get a free quote in minutes.

Find Dumpster Rental in Your City →

Contact Form Demo

Preparing Your Hot Tub for Removal

Before you can haul away your old hot tub, you need to drain all water, disconnect the electrical supply at the breaker, and remove any plumbing connections. Most hot tubs hold 300-500 gallons of water that takes 2-4 hours to drain completely, and the electrical panel should be handled by a licensed electrician if you’re unfamiliar with 240-volt circuits.

Draining the Water Completely

Locate your hot tub’s drain valve, typically at the base near the equipment panel. Attach a garden hose to the valve and run it to a suitable drainage area—your yard, a storm drain, or a street gutter depending on local regulations. Open the valve fully and let gravity do most of the work. For above-ground spas, this process moves fairly quickly. In-ground models may require a submersible pump to extract the final 50-100 gallons that sit below the drain valve level.

Don’t assume the tub is empty when the hose stops flowing. Use a wet/dry vacuum to pull out remaining water from the footwell, jets, and plumbing lines. Water trapped in pipes adds significant weight and can leak during transport, creating a mess in your driveway or inside a roll-off dumpster. Remove the filter cartridges and let them drain separately—they can hold several gallons on their own.

Disconnecting Electrical and Plumbing

Turn off the dedicated circuit breaker that powers your hot tub, then verify it’s dead by checking inside the control panel with a voltage tester. Most hot tubs run on 240-volt service with 40-60 amp breakers. If your setup uses a direct hardwire connection rather than a plug, you’ll need to disconnect the wires from the breaker and seal the exposed ends with wire nuts and electrical tape. This isn’t a job to guess at—hire an electrician if you’ve never worked inside a breaker panel.

For plumbing connections, unscrew any water supply lines if your tub has an auto-fill feature connected to your house water. PVC unions typically hand-loosen or require a strap wrench. Cut the pipes if they’re permanently glued, leaving enough stub to cap them off later. Check underneath the tub for any drainage pipes that run to your home’s plumbing system—these are rare in portable spas but common in custom installations. Once everything’s disconnected, you’re ready to dismantle the shell or arrange for hauling the entire unit in one piece.

Breaking Down and Dismantling the Hot Tub

Breaking down a hot tub requires heavy-duty cutting tools, protective gear, and equipment to manage sharp debris and hazardous materials. You’ll need a reciprocating saw with demolition blades, heavy work gloves, safety glasses, and a respirator mask rated for fiberglass dust. Most people also rent a roll-off dumpster since a typical hot tub breaks into 1,500 to 3,000 pounds of bulky debris that won’t fit in regular trash collection.

Tools and Safety Equipment Needed

A reciprocating saw is your primary demolition tool. Get one with at least 12-amp power and buy extra demolition blades—you’ll dull or break several cutting through the acrylic shell, fiberglass insulation, and wood frame. A circular saw works for straight cuts through the cabinet, but the reciprocating saw handles the curved shell better. Some people use an angle grinder for metal components like jets and plumbing fittings, though you can skip this if you’re just hauling everything to a dumpster.

For safety gear, don’t compromise. Fiberglass particles from the insulation cause severe skin irritation and respiratory problems. Wear a half-face respirator with P100 filters—paper dust masks don’t provide enough protection. Get cut-resistant work gloves rated Level 5 or higher, not gardening gloves. The acrylic shell and fiberglass create razor-sharp edges once cut. Add impact-resistant safety glasses, long sleeves, long pants, and closed-toe boots. Keep a first aid kit nearby. You’re working with power tools around wet materials and sharp debris, so minor cuts happen even when you’re careful. A heavy tarp underneath catches small fiberglass bits and makes cleanup easier, especially if you’re working on a deck or patio you want to protect.

Disposal Methods and Costs

Hot tub disposal typically costs between $200 and $800 in 2026, depending on your chosen method and location. The main options include hiring a junk removal service for hands-off convenience, renting a roll-off dumpster if you’re handling demolition yourself, selling or donating a working unit, or breaking it down for curbside pickup where permitted. Your choice hinges on the hot tub’s condition, your physical capability to dismantle it, and how quickly you need it gone.

Junk Removal Services

Junk removal companies handle everything from disconnection to hauling, making them the simplest option if you want the hot tub gone in a single day. Most services charge $300-$600 for standard hot tub removal, with prices climbing for larger models or difficult access situations. The crew disconnects the unit (though you’re responsible for ensuring power is safely shut off beforehand), breaks it down as needed, and hauls everything away.

Book at least a week ahead during peak season—spring and early summer when homeowners tackle outdoor projects. Companies typically quote a price range over the phone based on hot tub size and access, then confirm the final cost upon arrival. Some include disposal fees in their quote; others add them separately, so ask specifically what’s covered.

Dumpster Rental for DIY Removal

Renting a dumpster works well if you’re comfortable with demolition and want to control the timeline. A 10-yard roll-off dumpster generally handles a dismantled hot tub, with rental periods typically spanning 7-10 days and costs ranging from $250-$450. You’ll need a reciprocating saw, pry bars, and help from at least one other person—hot tub shells are unwieldy even after you’ve cut them into sections.

The advantage over junk removal is flexibility. You can work in stages, tackle the project over a weekend, and toss other debris from the same area. The downside is labor. Expect to spend 4-6 hours on a typical residential hot tub between cutting, disconnecting plumbing lines, and loading heavy pieces. Don’t rent the dumpster until you’re ready to start—rental fees often include delivery, pickup, and disposal in one flat rate, but every day beyond your initial period adds cost.

Selling or Donating Working Units

A functioning hot tub holds value, even if you no longer want it. Online marketplaces like Facebook Marketplace and Craigsday regularly feature hot tubs priced from $500 for basic models to $3,000+ for high-end units in good condition. Price competitively—a hot tub that’s been maintained with clear water and working jets will move faster than one that’s been sitting drained for months.

Donations make sense when you want the tax deduction or simply want it gone without the hassle of selling. Habitat for Humanity ReStores accept hot tubs in working order, though not all locations have space or demand. Call ahead. The buyer or recipient handles removal in most cases, but verify this upfront. Some charitable organizations arrange pickup; others expect you to deliver it or hire movers at your expense.

Municipal Bulk Waste Pickup

Some municipalities offer free or low-cost bulk waste pickup, though hot tubs require advance notice and specific preparation. You’ll typically need to dismantle the unit into sections small enough for the crew to handle—most programs won’t accept intact hot tubs due to size and weight. Schedule pickup at least two weeks out and confirm your hot tub qualifies under local bulk waste rules.

This option costs little beyond your labor but has strict limitations. Many cities limit bulk pickups to 1-2 per household annually, restrict individual piece weight to 50-75 pounds, and prohibit items containing refrigerants or hazardous materials (relevant if your hot tub has an integrated cooling system). If your hot tub sits in a fenced backyard with no side gate access, municipal pickup likely isn’t practical—crews rarely enter private property beyond the curb.

Using a Roll-Off Dumpster for Hot Tub Removal

A roll-off dumpster simplifies hot tub disposal by giving you a designated place to toss broken-down pieces as you work. Most hot tub removals need a 10 or 15-yard dumpster, which sits in your driveway for several days while you cut the shell into manageable sections, pull out the foam insulation, and separate the cabinet panels. This approach eliminates multiple trips to the landfill and lets you work at your own pace without scrambling to load everything into a truck in one afternoon.

Choosing the Right Dumpster Size

A 10-yard dumpster handles most standard hot tubs (6-8 person models) after they’re broken down. The container measures roughly 12 feet long, 8 feet wide, and 3.5 feet high—enough space for acrylic shell pieces, waterlogged foam insulation, and wooden cabinet components. If you’re removing an oversized swim spa or a hot tub plus a deck, step up to a 15-yard unit.

The actual volume depends on how thoroughly you break down the shell. Someone who cuts the acrylic into 2×2 foot squares and compresses the foam will fit more into a smaller dumpster than someone who leaves shell sections intact at 4×6 feet. Before you rent, measure your hot tub and mentally map out your cutting plan—that’s the only way to estimate space accurately.

Rental Duration and Timing

Most dumpster rental companies offer 7 to 14-day rental periods, which aligns well with hot tub removal timelines. Breaking down a hot tub typically takes a full weekend if you’re working solo, or a Saturday if you have help. The extra rental days matter because weather, tool breakdowns, or discovering hidden bolts can push your timeline.

Schedule delivery for a Friday morning so you have the full weekend to work. Place the dumpster as close to the hot tub as possible—dragging wet foam insulation across a yard gets old fast. If your hot tub sits on a back patio and you can’t get the dumpster close, budget extra time for hauling pieces to the front driveway.

Weight Limits and Overage Fees

Standard residential dumpsters include weight limits between 1 and 4 tons, depending on size and location. A broken-down hot tub typically weighs 800 to 1,200 pounds dry, but waterlogged insulation can double that weight. The shell itself accounts for maybe 300 pounds; the real weight comes from foam that’s been absorbing moisture for years.

Let foam pieces drain overnight before loading them into the dumpster—you’ll stay well under weight limits and avoid overage charges that generally range from $40 to $100 per ton in 2026. One practical trick: stack the foam in your yard for a day after cutting it out, flip the pieces once, and then load them. You’ll be surprised how much water runs out.

Ready to get started?

Find a Dumpster Near You