Illustration of a whole-home declutter with a roll-off dumpster

Whole Home Declutter Dumpster: Guide & Checklist

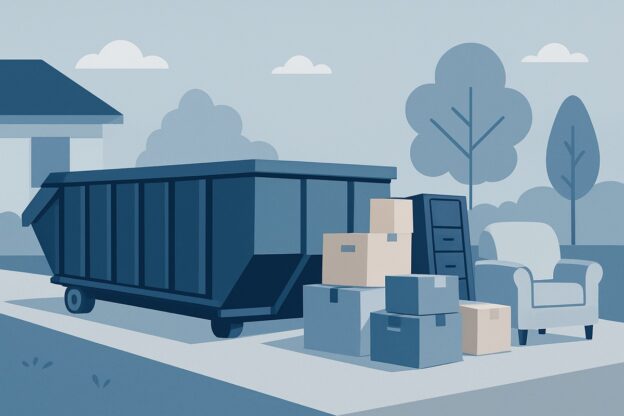
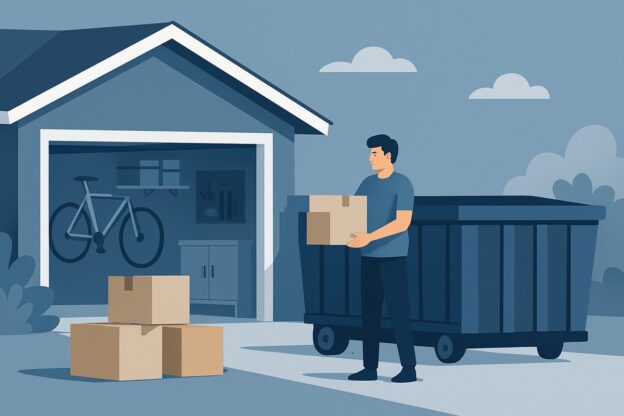
A whole home declutter dumpster is a large rental container (typically 10-40 cubic yards) that sits in your driveway for several days or weeks, letting you throw away years of accumulated belongings in one concentrated purge instead of making dozens of trips to the dump or waiting for weekly trash pickup. Most people underestimate the sheer volume of stuff hiding in their basements, garages, and closets until they actually start pulling it out — and then realize their regular garbage service can’t handle 15 bags of clothes, broken furniture, and boxes of mystery cables from 2003. Renting the right size dumpster changes a months-long decluttering nightmare into a manageable weekend project, but the cost varies wildly based on your location, what you’re tossing, and how long you need it. Getting the details right matters because ordering too small means paying for a second rental, while going too large wastes money on empty space you’re still charged for.

Renting a Dumpster for This Project?

Tell us about your project and local providers will follow up with pricing and availability.

Contact Form Demo

Planning a Whole-Home Declutter

Planning prevents the chaos that turns a productive cleanout into a frustrating mess. Start by mapping out which rooms you’ll tackle and in what order, then set daily or weekly targets based on the size of each space and how much you can realistically accomplish. This approach keeps you from getting overwhelmed and ensures your dumpster rental period doesn’t expire before you finish.

A Room-by-Room Approach

Start with the rooms that give you the quickest wins—spaces you use daily that will immediately improve your quality of life once cleared. Kitchens and living rooms typically work better as starting points than attics or basements because you’ll see the results every day, which builds momentum. Save storage areas and garages for later in the process; these spaces usually hold items you need to sort through when you’re already in a decision-making rhythm.

Work through one room completely before moving to the next. Jumping between spaces creates piles that migrate around your house and makes it harder to track progress. Within each room, sort items into four categories: keep, donate, sell, and trash. The 20 yard dumpster handles most whole-home projects, giving you space for furniture, appliances, and household junk without running out of room mid-project.

Setting Realistic Goals

Break your timeline into specific room targets rather than vague daily goals. “Clear out the master bedroom closet and bedroom furniture we’re replacing” works better than “work on bedroom.” A typical bedroom takes 4-6 hours to declutter thoroughly—not just surface cleaning, but pulling items from closets, sorting dresser drawers, and making final decisions. Kitchens often take twice as long because of the sheer number of small items.

Account for decision fatigue in your planning. Most people make good choices for about three to four hours before they start keeping things they’d have tossed earlier in the day. Schedule high-volume areas like basements or attics for days when you’re fresh, and plan lighter rooms for later in the week. If you’re coordinating donations, check pickup schedules before you start—many organizations book a week or more out during spring cleaning season, which affects your overall timeline.

What Size Dumpster for a Whole-Home Declutter?

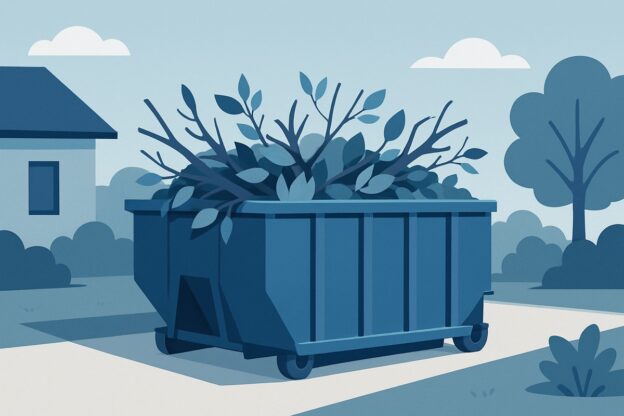
Most whole-home declutters require a 20 yard dumpster, which holds roughly 110-130 trash bags worth of material. This size handles furniture from 2-3 rooms, several years of accumulated garage items, and typical basement storage. If you’re clearing an estate, downsizing from a large home, or dealing with floor-to-ceiling hoarding situations, you’ll need a 30 or 40 yard container instead.

Typical Household Volumes

A standard three-bedroom house generates 3-6 tons of material during a full declutter. That number jumps when you’re clearing storage spaces people have filled over decades rather than just surface clutter from living areas.

One bedroom’s worth of furniture and belongings fills about one-quarter of a 20 yard dumpster. Add a living room set, and you’re at half capacity. The remaining space handles kitchen cabinets full of duplicate appliances, closets stuffed with old clothes, and that shelf in the garage where broken things go to die. Basements and attics push totals higher—a finished basement used for storage often adds another 1-2 tons by itself.

Count on 10-15 large trash bags per room for moderate decluttering. Heavy items matter more than bag count, though. An old sleeper sofa weighs 300 pounds. A treadmill that hasn’t moved in five years: 200 pounds. Particle board furniture from college disintegrates when you move it, but the pieces still take up space.

When to Size Up

Order a 30 yard dumpster if you’re clearing an entire household after someone passes away or moves to assisted living. These projects involve disposing of nearly everything—furniture, kitchenware, linens, books, decades of paperwork. You’re not just getting rid of excess; you’re emptying a home.

Homes over 2,500 square feet with full basements and attics consistently generate more waste than a 20 yard container holds. Same goes for properties where the previous owner was a collector or struggled to throw things away. Walk through before ordering. If you open a closet and can’t see the back wall, or if the garage requires turning sideways to reach the door, size up.

Spring cleaning differs from true decluttering. If you’re tossing worn-out patio furniture, last decade’s electronics, and things you meant to donate but never did, a 20 yard works. If you’re gutting spaces to reclaim them—turning a storage room back into a guest room, clearing a garage so cars fit again—the larger size prevents a second rental when you run out of space halfway through.

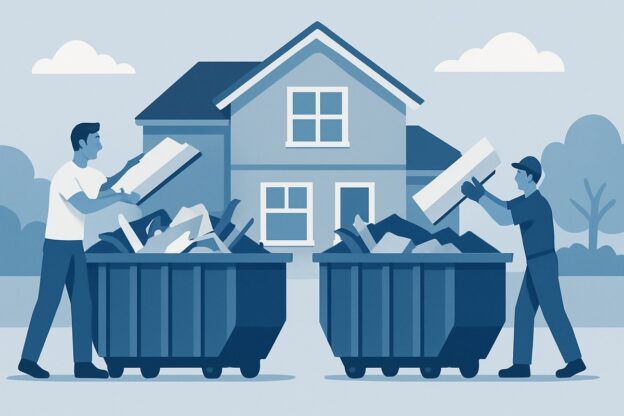
Sorting: Keep, Donate, Toss

The key to efficient sorting during a whole-home declutter is making decisions once. As you handle each item, immediately place it in one of three categories: keep (items you use or genuinely value), donate (functional items someone else can use), or toss (broken, expired, or unsalvageable items). This prevents the common trap of moving the same box from room to room for weeks.

What Belongs in the Dumpster

Broken furniture goes straight in. That wobbly chair you’ve been meaning to fix for two years, the desk with water damage, the mattress with a broken spring — these aren’t donation candidates. Most charities won’t accept damaged goods, and trying to sell them wastes time you could spend on the actual declutter.

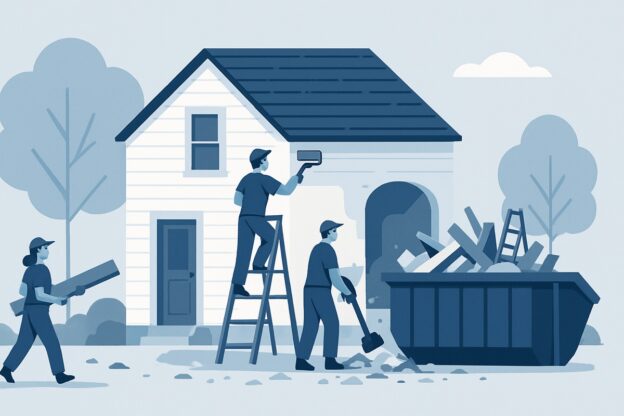
Old building materials, worn carpeting, and outdated fixtures fill dumpsters quickly. If you’re renovating while you declutter, a 20 yard dumpster handles both household junk and construction debris. The same goes for anything genuinely trash-adjacent: expired pantry items, old paint cans, deteriorated holiday decorations, moldy books. If you wouldn’t give it to a friend, it doesn’t belong in the donation pile.

Clothing in wearable condition, working electronics, and intact household items move to donation boxes immediately. Most people overfill their dumpster because they toss things that local charities would gladly take. A functional microwave, gently used cookware, books without water damage, children’s toys that aren’t broken — these have value to someone.

Set up a dedicated donation staging area in your garage or a spare room. As you work through each space, items go directly there instead of sitting in hallway piles. Electronics need special handling. Working computers, phones, and small appliances can go to e-waste recycling centers. Most cities offer free drop-off, which saves dumpster space and keeps harmful materials out of landfills. Call ahead to confirm what your local center accepts — some take printers and monitors, others don’t.

Dumpster Rental for Decluttering Projects

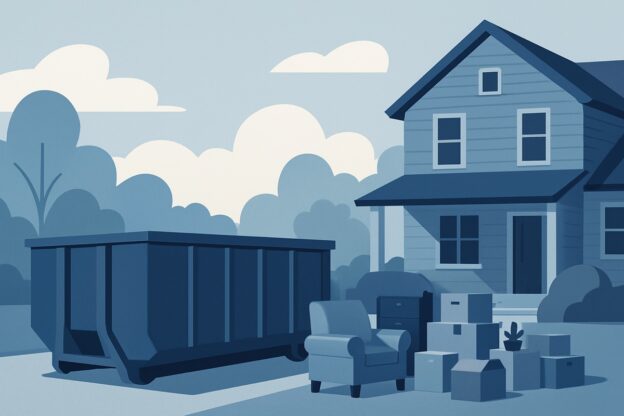
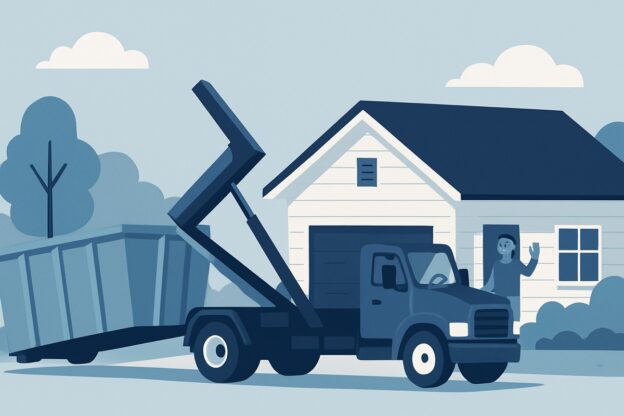
Renting a dumpster for a decluttering project requires planning where it goes and how long you need it. The container typically sits in your driveway for 7-14 days, though most companies offer flexible rental periods. You’ll need a flat surface with overhead clearance for delivery, plus enough space for the truck to maneuver during drop-off and pickup.

Placement and Access

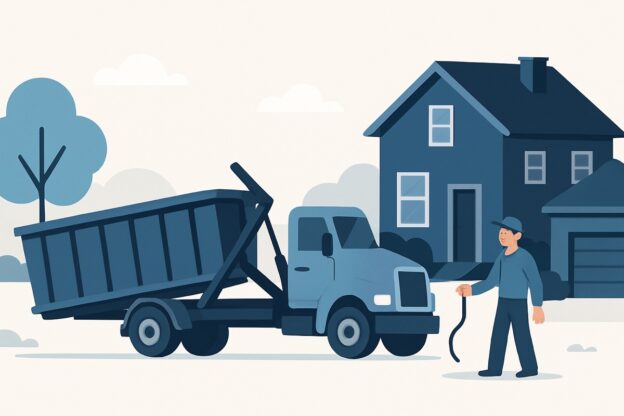
Your driveway is the most common placement spot for a roll-off dumpster, but the delivery driver needs about 60 feet of straight approach space and 23 feet of width for the truck to safely position the container. Measure your driveway width before scheduling delivery—many suburban driveways are only 16-20 feet wide, which works fine as long as cars aren’t parked there.

If your driveway won’t work, consider the street in front of your house. Most cities allow temporary dumpster placement on public streets with a permit, which the rental company can often obtain for you. The permit typically costs $50-100 and takes 2-3 business days to process. Check for overhead obstacles too: power lines, tree branches, or low-hanging garage door tracks create problems during delivery. A 20 yard dumpster stands about 4.5 feet tall on the truck bed, so you need at least 20 feet of vertical clearance along the delivery path.

Rental Timeline

Standard rental periods run 7-10 days, which gives you two weekends to sort through household junk, fill the container, and handle last-minute items. Most people underestimate how long decluttering takes—you’re not just tossing trash, you’re making decisions about what to keep, donate, or throw away for every item you touch.

If you’re tackling one room per day, a 10-day rental covers a four-bedroom house with time to spare. For faster projects like spring cleaning a garage or basement, a 3-5 day rental costs less and keeps you focused. Nearly all rental companies let you extend your timeline for $10-20 per extra day if you call before the scheduled pickup. The container doesn’t need to be full for pickup—you pay the same whether it’s 30% or 100% loaded, so don’t rush to fill empty space with items you could donate instead.

Ready to get started?

Find a Dumpster Near You


Illustration of a moving cleanout with a roll-off dumpster

Moving Cleanout Dumpster: Size Guide & Checklist

A moving cleanout dumpster is a temporary waste container, typically 10 to 30 cubic yards, that you rent and place on your property to dispose of unwanted furniture, appliances, boxes, and debris accumulated during a residential move or estate clearout. Most people underestimate how much junk a single household generates — attics, basements, and garages alone can fill a 20-yard container — which is why choosing the right dumpster size and understanding rental terms matters before you commit to a week-long rental. The wrong size means either paying for unused capacity or scrambling to rent a second container mid-move when you realize half your garage won’t fit. Rental costs vary based on your location, the container size, the rental period, and what you’re throwing away, since many companies restrict certain materials or charge extra for heavy loads like concrete or dirt. Getting a moving cleanout dumpster quote that reflects your actual needs requires knowing what you can legally dispose of, how weight limits work, and how to avoid surprise fees that can add hundreds to your final bill.

Renting a Dumpster for This Project?

Tell us about your project and local providers will follow up with pricing and availability.

Contact Form Demo

Planning Your Moving Cleanout

Start your moving cleanout at least three weeks before your move date. Sort belongings into four categories — keep, sell, donate, and trash — then order your dumpster to arrive after you’ve identified what’s leaving but before packing begins. This sequence prevents you from wasting time and boxes on items you’ll ultimately discard.

Decluttering Before You Pack

Walk through each room with a notepad and estimate what you’re throwing away. A bedroom closet you haven’t organized in five years might yield three large trash bags. An attic full of holiday decorations could fill half a dumpster once you pull out broken ornaments and collapsed boxes. These rough counts determine whether you need a 10 yard dumpster or something larger.

Sort one room completely before moving to the next. The living room might take an afternoon — pull books off shelves, empty entertainment centers, and decide what furniture makes the cut. Old particle board bookcases rarely survive a move intact. Stained couches cost more to move than replace. If you’re debating whether to keep something, photograph it and check what comparable items sell for locally. A dining set worth $75 isn’t worth a $200 moving charge.

Timing the Dumpster With Your Move

Schedule delivery for the middle weekend of your packing period. Order too early and you’ll fill it before your real purge begins. Order too late and you’re making multiple trips to the dump while trying to pack. Most rental periods run 7-14 days — enough time to work through the house methodically without rushing.

Plan the dumpster location before it arrives. Drivers need a flat surface at least 60 feet from obstacles, typically a driveway or street spot with your city’s approval. If you’re moving from an apartment, confirm with management where the roll-off dumpster can sit. One renter had their dumpster towed because it blocked a fire lane, costing an extra $400 in fees. Once it’s placed, load heavy furniture and appliances first. They create a stable base and prevent you from needing to rearrange everything when you’re ready to toss that old dresser on moving day.

What Size Dumpster for a Move?

Most apartments and small homes need a 10 yard dumpster, which holds roughly three pickup truck loads of debris. Larger households with 3+ bedrooms typically require a 20 yard dumpster to handle the accumulated items from years of living in one place. The difference comes down to square footage and how long you’ve lived there—more space and more time means more stuff to purge.

Apartments and Small Homes

A 10 yard dumpster handles what most people clear out from a one or two-bedroom space. This size works when you’re mainly tossing worn-out furniture, broken electronics, and the miscellaneous junk that collects in closets and storage areas. You’ll fit a couch, a mattress set, several boxes of kitchen items you never use, and the contents of a packed hall closet.

The exception: if you’re clearing out a hoarder situation or a property where nothing has been thrown away in years, bump up to a 15 or 20 yard. Apartments accumulate less volume than houses simply because there’s less storage space, but density matters. A studio apartment packed floor-to-ceiling with belongings generates more waste than a sparsely furnished two-bedroom.

Large Households

Houses with three or more bedrooms generate surprising amounts of disposal material during a move. A 20 yard dumpster is the starting point here. You’re dealing with furniture from multiple rooms, garage clutter, basement storage boxes, yard equipment, and the overflow from attics. Families who’ve lived in the same house for 5+ years almost always underestimate their volume.

A 20 yard container measures roughly 22 feet long by 8 feet wide by 4 feet high—about the size of three standard parking spaces. That capacity disappears faster than you’d expect once you start loading bulky items. Old swing sets, patio furniture sets, entertainment centers, and box springs eat up space quickly. If you’re also tackling yard waste removal or disposing of building materials from minor renovations before selling, consider a 30 yard dumpster instead. The cost difference between sizes is usually $50-75, far cheaper than ordering a second container mid-project.

Sorting and Removing What You Leave Behind

Sort items into three groups before anything goes in the dumpster: trash, donations, and large items that need special handling. This triage system keeps usable furniture out of landfills and makes the actual disposal process faster. Start in rooms you use least—attics, basements, garages—where you’re less emotionally attached to what you find.

Furniture and Large Items

Couches, mattresses, and dining sets eat up dumpster space fast. A standard sofa takes roughly 50 cubic feet, which means two couches can fill a third of a 10 yard dumpster. Break down what you can. Remove table legs. Flip couches on their side. Cut pressboard furniture into sections with a reciprocating saw—it’s already headed to the dump, so don’t be precious about it.

Mattresses and box springs create a specific problem. Many haulers charge extra fees for them because they require separate processing. If your area has a mattress recycling program, use it. Otherwise, wrap them in plastic mattress bags before loading to contain dust and potential bed bugs. Stack them flat against one wall of the container to maximize space.

Set a clear standard for donations: if you wouldn’t give it to a friend, it’s not donation-quality. Stained upholstery, wobbly chairs, and scratched-up pressboard dressers belong in the dumpster, not at the donation center. Thrift stores already refuse 20-30% of what people drop off, which just creates work for them.

Coordinate pickup timing with your moving timeline. Schedule donation pickups for midweek before your dumpster arrives. Most charities need 3-5 days’ notice and won’t take furniture from curbside—they require indoor pickup. Take photos of valuable items before donation for tax records. The IRS allows deductions based on fair market value, not what you originally paid, so a five-year-old couch in good condition might be worth $75, not the $800 you spent on it.

Dumpster Rental for Moving Projects

Renting a dumpster for a move means coordinating delivery location, timing, and pickup around your schedule. Most rental companies drop the container where you specify on your property, leave it for 3-7 days, and haul it away once you’re done loading. The process works best when you plan placement carefully and communicate realistic timeframes with the rental company.

Driveway Placement

Your driveway is the default spot for roll-off dumpster delivery, but not every driveway can handle the weight. A loaded 20 yard dumpster can weigh 10,000 pounds or more. Asphalt driveways may crack under this weight, especially in hot weather or if the asphalt is older than 15 years. Concrete holds up better but isn’t immune to damage.

Ask the rental company to place plywood boards under the dumpster if you’re worried about your driveway. Some companies include this automatically; others charge $50-75 for the boards. If your driveway slopes or doesn’t have enough clearance for the delivery truck (typically 23 feet long, 8.5 feet wide), you’ll need to identify an alternative spot. Street placement requires a permit in most municipalities—expect to pay $30-100 and wait 3-5 business days for approval.

Rental Period and Pickup

Standard rental periods run 3, 5, or 7 days. Three days works if you’re purging a single room or small apartment and can dedicate full days to the cleanout. Seven days makes sense when you’re emptying a whole house while also packing, coordinating movers, and handling closing logistics.

Most companies let you extend the rental for $10-20 per additional day, but you need to call before your pickup date. If you fill the dumpster before your rental period ends, you can request early pickup—useful when you’re trying to clear the driveway for moving trucks. Schedule pickup for the day after your move-out date, not the same day. You’ll inevitably find one more load of items once the movers leave or after you do a final walkthrough.

Dumpster Size

A 10 yard dumpster handles studio apartments or single-room cleanouts—about 30-40 trash bags worth of material. It works when you’re mostly packing belongings and only discarding a mattress, broken furniture, and garage debris.

A 20 yard dumpster fits two-bedroom homes or larger one-bedroom places with basements. You can toss old furniture, box springs, carpet remnants, and still have room for the accumulated junk from closets and storage areas. This size also accommodates items you meant to donate but ran out of time to haul to a donation center. Most movers purge more than they expect once they start pulling everything out of cabinets and storage spaces.

Ready to get started?

Find a Dumpster Near You


Illustration of an estate cleanout with a roll-off dumpster

Estate Cleanout Dumpster: Size Guide & Checklist

An estate cleanout dumpster is a large roll-off container, typically 15 to 30 cubic yards, that you rent to handle the massive volume of belongings, furniture, and debris generated when emptying a home after a death, downsizing, or preparing a property for sale. Most families underestimate the sheer amount of material involved—a lifetime’s accumulation doesn’t fit in your weekly trash pickup, and making dozens of trips to the dump costs more in time and vehicle wear than the rental itself. The difference between a smooth, week-long cleanout and a months-long ordeal often comes down to having the right size dumpster placed in the right spot with a clear plan for what actually belongs inside it. Choosing the wrong size means paying for a second delivery or scrambling to find alternative disposal when you’re already exhausted and on a deadline. This guide walks through how to size your estate cleanout dumpster correctly, what items require special handling, and how to work with both the rental company and local regulations to avoid costly surprises.

Renting a Dumpster for This Project?

Tell us about your project and local providers will follow up with pricing and availability.

Contact Form Demo

Planning Your Estate Cleanout

Estate cleanout planning starts with a systematic approach to sorting items and building a workable schedule. Most people underestimate both the emotional weight of sorting personal belongings and the physical volume of what needs removal. A clear plan for what stays, what goes, and how long each phase takes prevents the project from stalling halfway through.

Sorting Belongings and Keepsakes

Create three physical zones before you start: keep, sell/donate, and discard. The mistake most families make is trying to decide the fate of every single item as they encounter it. This turns a one-week project into a month-long ordeal. Instead, move quickly through rooms and place items in their zones. You can refine decisions later.

For the discard zone, separate true trash from items that might sell at an estate sale. Furniture in decent condition, working appliances, and collectibles can generate funds that offset your dumpster rental and labor costs. Local charities will often pick up furniture, books, and clothing—schedule these pickups before your dumpster arrives so you’re not paying to haul away items that could have left for free. What remains after donations and sales typically fills a 20 yard dumpster for an average three-bedroom home, though properties with basements, attics, or extensive garages often need a 30 yard dumpster.

Setting a Realistic Timeline

Block out at least one full weekend for initial sorting in a typical single-family home. Each additional floor or storage area adds another day. If you’re working around a job, expect the process to stretch across two to three weeks of evenings and weekends. Trying to complete everything in a single marathon day leads to hasty decisions you’ll regret and physical exhaustion that slows progress.

Schedule your roll-off dumpster to arrive after you’ve completed sorting and any estate sale. Having it sit in your driveway during the decision-making phase wastes rental days and creates pressure to fill it quickly rather than thoughtfully. Most rental periods run seven to ten days—enough time to load out after you know exactly what’s leaving. If the property needs to be cleared by a specific date for a sale or transfer, work backward from that deadline and add a one-week buffer for unexpected complications.

What Size Dumpster for an Estate Cleanout?

Most estate cleanouts require a 20 yard dumpster, which handles furniture, clothing, kitchenware, and personal items from a typical three-bedroom home. Larger properties or homes with accumulated belongings across multiple rooms need a 30 yard dumpster. The right size depends on how much you’re keeping versus discarding and whether you’ve already reduced volume through an estate sale or donations.

Small to Mid-Size Estates

A 10 or 15 yard dumpster works for apartments, condos, or small homes where family members have already removed valuables and sellable items. You’re dealing with leftover furniture, linens, kitchen items, and personal effects that didn’t make the cut. This size handles roughly 3-5 pickup truck loads of material.

Most single-family homes with three bedrooms need a 20 yard dumpster. This accommodates a full household worth of furniture—couches, beds, dressers, tables—plus boxes of clothing, kitchen goods, books, and miscellaneous items from closets and storage areas. If you’re clearing out a basement or garage in addition to living spaces, the 20 yard gives you enough capacity without paying for unused space.

Large Estates and Hoarding Situations

Properties over 3,000 square feet or homes where someone lived for decades without downsizing typically need a 30 yard dumpster. You’re not just clearing rooms—you’re emptying attics filled with holiday decorations and old luggage, basements packed with tools and furniture, and garages storing everything from lawn equipment to paint cans. The extra capacity prevents the frustration of running out of space halfway through.

Hoarding situations require a different calculation. A single room packed floor-to-ceiling can fill a 20 yard dumpster on its own. For moderate hoarding across multiple rooms, expect to need a 30 yard or multiple dumpsters. Severe cases often require 40 yard dumpsters or sequential rentals. The compacted nature of hoarded items—newspapers, boxes, bags stuffed into every available space—creates more volume than a typical estate cleanout. Plan on scheduling extra time too; sorting through densely packed spaces takes longer than clearing organized rooms.

Sorting and Removing Debris Efficiently

Sort items into four categories before anything hits the dumpster: trash, donations, recycling, and keepsakes. Work room by room with boxes or tarps labeled for each category. This system prevents valuable items from accidentally getting tossed and reduces landfill waste. Most people fill a 20 yard dumpster about 30% less when they separate donations and recyclables first.

What Can Go in the Dumpster

Most household debris goes in without issue: furniture, carpeting, clothing, books, and general household items. Mattresses and box springs are fine in most areas, though some haulers charge an extra $25-50 per piece. You can toss drywall, wood trim, old cabinetry, and small appliances.

Electronics need special attention. Newer rental agreements often prohibit TVs, monitors, and computer equipment because of disposal regulations. Many haulers will take them for a surcharge, typically $15-30 per screen. Paints, pesticides, propane tanks, and automotive fluids are universally banned. Take these to your county’s hazardous waste facility — most accept them free for residents. Tires usually need separate disposal unless your rental company specifically includes them.

Pull out anything usable before loading the dumpster. Estate sales work well when there’s furniture, collectibles, or vintage items worth selling. Even a modest sale can recover $500-2,000, enough to cover the dumpster rental and then some. For items that won’t sell but remain functional, local charities will often schedule pickup for furniture, working appliances, and boxed household goods.

Recycling centers take materials dumpsters won’t: scrap metal, electronics, cardboard, and clean wood. Many counties operate drop-off centers at no charge. Scrap yards actually pay for metal items like bed frames, filing cabinets, and old tools — usually $0.05-0.15 per pound. One estate cleanout might yield 300-800 pounds of scrap metal from bedframes, shelving units, and small appliances. That’s $20-120 back in your pocket for a 30-minute detour.

Dumpster Rental for Estate Cleanouts

Renting a dumpster for an estate cleanout requires coordinating delivery access, securing any necessary permits, and timing the rental period to match your sorting and disposal schedule. Most residential driveways can accommodate a roll-off dumpster, but you’ll need to confirm placement location with your rental company and check local permit requirements before the container arrives.

Placement and Permits

Choose a placement spot that balances convenience with property protection. Driveways work well because they put the dumpster close to the house while keeping it off grass or landscaping that could be damaged by the container’s weight. A 20 yard dumpster typically measures 22 feet long and 8 feet wide, so you’ll need a clear path for the delivery truck plus space for the container itself.

Check with your city or county about permit requirements before scheduling delivery. Many municipalities require permits for dumpsters placed on streets or public property, while placement on private property usually doesn’t need approval. Permit costs range from $10 to $100 depending on location, and processing can take several business days. Some rental companies handle the permit application for you, but confirm this upfront rather than assuming it’s included.

Scheduling Delivery and Pickup

Plan your delivery date after you’ve held any estate sale but before you start heavy-duty sorting. Having the dumpster on-site from day one of cleanout work prevents the frustration of accumulating piles of items you can’t dispose of yet. Most rental periods run seven to ten days, which gives you time to work through rooms methodically and make decisions about what to donate versus discard.

Request pickup once the container reaches about 90% capacity or when you’ve finished the cleanout, whichever comes first. Overfilling a dumpster creates safety hazards and may result in additional fees or the driver refusing to haul it away. If you’re working through a large estate and realize you need more time, call your rental company before the scheduled pickup date. Most providers will extend your rental for a daily fee, typically $5 to $15 per day. A 30 yard dumpster gives you more capacity upfront if you’re dealing with a house full of furniture and belongings, potentially eliminating the need for a rental extension.

Ready to get started?

Find a Dumpster Near You


Illustration comparing dumpster rental and junk removal

Dumpster Rental vs Junk Removal: Which Do You Need?

Dumpster rental and junk removal serve different project needs: rent a dumpster when you’re doing the work yourself over several days or weeks and need a container on-site, or hire junk removal when you want a crew to load and haul everything away in a single appointment. The choice directly affects your timeline, labor requirements, and total cost — pick wrong and you’ll either pay for convenience you didn’t need or end up hauling debris yourself when you’d rather not. Most homeowners underestimate how much physical work a cleanout actually involves, which is why half the dumpsters we deliver sit half-full while the customer calls for junk removal anyway. The decision comes down to three factors: how much control you want over the timeline, whether you’re willing to do the loading, and what the project is actually generating in terms of debris type and volume.

Renting a Dumpster for This Project?

Tell us about your project and local providers will follow up with pricing and availability.

Contact Form Demo

What Is Dumpster Rental?

Dumpster rental is a self-service waste removal option where a company delivers a large metal container to your property, you fill it on your own schedule, and the company hauls it away when you’re done. You pay for the container size, rental period, and disposal — typically a flat rate that includes delivery, pickup, and a set weight limit.

How Roll-Off Dumpster Rental Works

You reserve a dumpster size (usually 10, 20, 30, or 40 cubic yards), and the company drops it off using a specialized truck that rolls the container off its bed onto your driveway or designated spot. The rental period runs 7-14 days in most cases, though you can often extend for a daily fee. You load the dumpster yourself, keeping waste level with the top rail — overfilled containers won’t get picked up due to safety regulations.

When you’re ready for pickup, you call the company to schedule. They roll the full dumpster back onto the truck and haul it to a landfill or transfer station. Your quoted price covers a weight allowance (often 1-3 tons depending on size), with overage charges applying if you exceed it. Prohibited items like hazardous materials, tires, and electronics require separate disposal — companies will refuse to pick up a dumpster containing them.

Best Projects for Dumpster Rental

Dumpster rental works best when you generate large volumes of debris over several days or weeks. Whole-house cleanouts, estate clearing, and major decluttering projects benefit from having a container onsite — you can work room by room without rushing. Renovation work like kitchen remodels, bathroom tear-outs, or flooring replacement produces steady debris that fits the multi-day rental model.

Roofing projects are prime dumpster territory. A typical residential roof generates 2-4 tons of shingle waste, and roofers need a container sitting in the driveway throughout the job. Landscaping overhauls involving soil removal, concrete demolition, or extensive brush clearing also justify a roll-off dumpster. The key factor: you have enough material to fill a large container and enough time to load it yourself without paying workers to stand around.

What Is Junk Removal?

Junk removal is a full-service hauling option where a crew comes to your property, loads everything you want gone into their truck, and hauls it away the same day. You point at what needs to go — old furniture, appliances, yard waste, construction debris — and the team handles all the lifting, loading, and disposal. Most companies charge based on how much space your items take up in their truck.

How Full-Service Junk Removal Works

You schedule an appointment, and a two-person crew arrives in a truck at the agreed time. Before they touch anything, they walk through your space with you and provide a price quote based on volume. Most companies use a truck-volume pricing system — a quarter truck, half truck, three-quarters, or full truck. Once you approve the price, they load everything immediately.

The crew does the physical work. They’ll carry a couch down three flights of stairs, disconnect a washing machine, break down a swing set in the backyard. Most services include a standard amount of labor in their base price, though some charge extra for particularly difficult removals like hot tubs or items requiring special disposal. The entire process typically takes 15 minutes to two hours depending on how much you’re removing. When they leave, your items leave with them.

Best Projects for Junk Removal

Junk removal works best when you need something gone right now and don’t want to handle any of the work yourself. Estate cleanouts after a family member passes fit this category — you’re dealing with emotional stress and don’t need the added burden of physically hauling decades of belongings. Single-item removals make sense too: that broken refrigerator in your garage, the treadmill you’ll never use again, the sectional sofa that won’t fit through your new apartment door.

Small renovation projects often suit junk removal better than renting a dumpster. Tearing out one bathroom? Replacing kitchen cabinets? You’ll generate waste over a few days, not weeks, and the total volume stays relatively small. A crew can remove everything in one trip once the work wraps up. Foreclosure cleanouts, hoarder situations, and garage cleanouts also tend to work well with full-service — these jobs involve sorting through mixed materials (some trash, some donations, some recycling) where having help makes the process manageable rather than overwhelming.

Cost Comparison: Dumpster Rental vs Junk Removal

Dumpster rental typically costs $300-$600 for a week-long rental of a 10-20 yard container, with you handling all loading. Junk removal services charge $150-$800 per load based on volume and labor, with crews doing the heavy lifting. Your total spend depends on how much debris you have and whether your time or your back matters more than the price difference.

Typical Dumpster Rental Cost

Most rental companies price by container size and rental period. A 10-yard dumpster runs $250-$400 for seven days — enough for a bathroom remodel or garage cleanout. A 20-yard dumpster, which holds roughly three pickup truck loads, costs $350-$550 for the same period. A 30-yard container jumps to $450-$700. These base rates include delivery, pickup, and a set weight limit (usually 2-4 tons depending on size).

Overages add up quickly. Exceed the weight limit and you’ll pay $40-$100 per additional ton. Keep the dumpster past your rental period and expect daily fees of $10-$20. Certain materials trigger surcharges — mattresses might cost $25 each, appliances $50, and tires $15-$25 per tire. Concrete, dirt, and brick often require separate pricing since they’re heavy and sent to different facilities. If the delivery truck can’t place the dumpster where you want it due to overhead wires, narrow driveways, or soft ground, you might need a smaller size or a different solution entirely.

Typical Junk Removal Cost

Full-service junk removal companies charge based on how much space your stuff takes up in their truck. A quarter load (about what fits in a standard closet) runs $150-$250. A half load costs $250-$450. Three-quarters of a truck sits around $350-$600, and a full truckload reaches $500-$800. This covers labor, loading, hauling, disposal fees, and usually same-day or next-day service.

The pricing model rewards efficiency. If you’ve already sorted and piled everything by the curb or garage, some companies knock $50-$100 off the quote since their crew spends less time on site. Single-item pickups work differently — hauling away one refrigerator costs $100-$150, a sofa $75-$125, and a hot tub $300-$500 depending on size and accessibility. Jobs requiring extra labor, like carrying furniture down three flights of stairs or dismantling a deck before removal, often include hourly add-ons of $50-$75 per person. Most junk removal services won’t take hazardous materials (paint, chemicals, asbestos), so you’ll need a specialized disposal service for those items regardless of what you’re willing to pay.

Which Option Should You Choose?

Choose dumpster rental when you control the timeline and can do the physical work yourself. Choose junk removal when you need the job done immediately, can’t lift heavy items, or want zero involvement in the hauling process. The right choice depends on your project timeline, physical capability, and whether you value cost savings over convenience.

Choose Dumpster Rental When

You’re managing a multi-day or multi-week project where debris accumulates gradually. Renovations, major cleanouts, and roofing jobs generate waste over time — a dumpster sits on-site ready whenever you need it. If you’re tearing out a kitchen over three weekends, you fill the container at your own pace without coordinating pickup appointments.

You have the physical ability to haul items to the container yourself. Roll-off dumpsters typically sit in your driveway, meaning you carry everything from the house. A second-floor bathroom demo means hauling tile, fixtures, and vanities down stairs and out to the bin. If you have help or don’t mind the workout, a dumpster rental costs 40-60% less than full-service removal for the same volume of debris.

Choose Junk Removal When

You need everything gone today. Junk removal teams arrive with a truck, load your items in 1-3 hours, and drive away. This matters when you’re closing on a house sale, preparing for tenants to move in, or clearing an estate on a deadline. There’s no waiting for delivery, no rental period to manage, no return pickup to schedule.

Heavy items make the job dangerous or impossible to handle alone. A team of two can safely remove furniture, appliances, and bulk items you physically cannot lift or maneuver through doorways. If your garage cleanout includes a broken treadmill, old water heater, and metal shelving units, junk removal means you point and they load. You also avoid the risk of throwing your back out wrestling a couch into a container.

Ready to get started?

Find a Dumpster Near You


Illustration of dumpster rental for this project

How to Dispose of a Grill (2026 Guide)

You can dispose of a grill by breaking it down into its component materials — metal grates and bodies go to scrap recycling centers, propane tanks require special handling at hazardous waste facilities or tank exchanges, and any remaining ash or grease-soaked parts belong in household trash after proper cleanup. Most people underestimate how much usable scrap metal a single grill contains, which means you might actually get paid a few dollars at the right facility instead of paying dump fees. The challenge is that grills don’t fit neatly into one disposal category — a typical gas grill combines recyclable steel, non-recyclable ceramics, potentially hazardous fuel components, and enough caked-on grease to complicate everything. Knowing how to dispose of a grill properly means understanding which parts go where, how to safely disconnect fuel sources, and when renting a roll-off dumpster makes sense if you’re clearing out multiple large items at once. The process takes less than an hour once you know the steps, and you’ll avoid the common mistakes that lead to rejection at recycling centers or safety hazards in your garage.

Renting a Dumpster for This Project?

For most of these jobs, a roll-off dumpster delivered to your driveway is the simplest, cheapest way to handle the haul. Compare local providers and get a free quote in minutes.

Find Dumpster Rental in Your City →

Contact Form Demo

Preparing Your Grill for Disposal

Preparing Your Grill for Disposal

Before you dispose of a grill, disconnect the gas line and remove any propane tanks completely—these can’t go in regular trash or most dumpsters. Clean out all grease traps, drip pans, and cooking grates to prevent fires during transport and make the unit acceptable for scrap metal recycling or municipal pickup.

Disconnect Gas and Remove Propane Tanks

Natural gas grills need the supply line disconnected at the shutoff valve, usually located where the line enters your house or at the grill’s connection point. Turn the valve perpendicular to the pipe, then use two wrenches—one to hold the fitting steady, one to loosen the connector—to avoid twisting the gas line itself.

For propane grills, close the tank valve by turning it clockwise until hand-tight. Disconnect the regulator by turning the coupling nut counterclockwise. Most propane exchanges (like those at hardware stores) accept old tanks for recycling, or your local hazardous waste facility will take them. Never throw a propane tank in the trash or leave it attached to a grill headed for disposal—even “empty” tanks contain residual gas that creates explosion risks during crushing or processing.

Clean Out Grease and Food Debris

Pull out the grease tray and dump accumulated fat into a sealed container—not down your drain. Scrape the tray with a putty knife if buildup has hardened, then wipe it down with paper towels. Remove cooking grates and scrape off carbonized residue; these can usually go straight into your household trash once cleaned.

Check beneath the burner covers for grease that’s dripped through over the years. This matters because haulers and scrap yards reject grills that pose fire hazards, and a grease-coated firebox can ignite during transport. Use a shop vacuum to clear out ash, rust flakes, and debris from the bottom of the firebox. If you’re renting a roll-off dumpster for a larger cleanout project, this cleaning step makes the grill acceptable for disposal alongside other bulky items, though you should confirm grease-removal requirements with your rental company first.

Recycling Metal Components

Recycling Metal Components

Most scrap metal recyclers accept grills and will pay you by weight for steel and aluminum parts. Call local scrapyards to confirm they take grills—some require you to remove non-metal parts first, while others accept them intact. You’ll typically earn $5-15 for a standard grill, with stainless steel models fetching higher prices.

Finding Scrap Metal Recyclers Near You

Search “scrap metal recycler” plus your city name to locate facilities within driving distance. Check their accepted materials list on their website or call ahead—most yards take carbon steel and cast iron grill bodies, but policies vary on stainless steel or grills with attached wooden handles and plastic knobs.

Visit the recycler’s site during business hours with your grill loaded in a truck bed or trailer. Bring a photo ID since most facilities require it for payment. The yard will weigh your grill on a drive-through scale, inspect it briefly, and issue payment based on current metal prices. If you’re disposing of multiple large items at once—like old patio furniture, a fire pit, and your grill—consider a dumpster rental for the bulkier debris while taking just the metal components to the scrapyard for cash back. Some recyclers offer pickup services for larger quantities, though individual grills rarely qualify unless you’re hauling several at once.

Donation and Resale Options

Even a worn grill has value to someone else. Charities, secondhand retailers, and online marketplaces all accept functional grills and sometimes non-working ones for parts or refurbishment. Your timing matters—donate before spring when demand peaks, or list online when local buyers are actively searching. Most pickup services require you to clean the grill and have it accessible from the curb or driveway.

Charitable Organizations That Accept Grills

Habitat for Humanity ReStores accept working grills year-round, though acceptance varies by location. Call ahead to confirm your local store takes outdoor cooking equipment—some only accept building materials and appliances. Goodwill and Salvation Army typically accept grills in working condition with all parts intact. They’ll refuse units with rust holes, missing grates, or broken ignition systems that pose safety issues.

Veteran organizations sometimes collect grills for transitional housing programs. VFW posts and American Legion chapters occasionally run drives before Memorial Day and Independence Day. These smaller organizations often provide pickup for bulky items, saving you the trip.

Online Resale Platforms

Facebook Marketplace moves grills faster than any other platform in most areas. Price a working gas grill at 30-40% of its original retail value if it’s less than five years old. A Weber kettle in decent shape sells quickly at $40-$60. List it on Thursday or Friday when weekend planners are browsing.

Craigslist still works for free listings in cities where the platform remains active. OfferUp and Nextdoor reach neighborhood buyers who can pick up the same day. Include specific details: BTU output for gas models, cooking surface dimensions, brand name, and what works versus what doesn’t. A photo showing the grill assembled and clean gets three times the responses as one lying in pieces in your garage.

Free Pickup Services

Freecycle and Buy Nothing groups on Facebook give away items to local members at no cost. Post your grill with a clear pickup window—”Available Saturday 9am-noon, first come”—to avoid endless rescheduling. Someone who needs a grill for parts will claim a rusted unit you’d otherwise need to dispose of through other means.

1-800-GOT-JUNK and similar haulers take grills as part of larger cleanouts, though you’ll pay $100-$150 minimum for the service. This makes sense if you’re clearing a garage or yard and have other items going out. For a single grill, you’re better off with donation or a targeted online listing. When you have construction debris or other bulk waste alongside the grill, a roll-off dumpster rental handles everything at once during home renovation projects.

Dumpster Rental for Large Grill Disposal

Dumpster Rental for Large Grill Disposal

Renting a roll-off dumpster makes sense when you’re disposing of multiple grills during a restaurant closure, clearing out an apartment complex’s shared grilling area, or tackling a major property cleanout that includes outdoor cooking equipment. A 10-yard dumpster typically handles 3-5 standard grills plus other debris, while larger renovation projects might need a 20-yard container. Rental periods generally run 7-14 days, giving you time to complete the work without rushing.

A dumpster rental works best when grill disposal is part of a bigger project. If you’re renovating a backyard, demolishing a deck, or clearing out a commercial kitchen, adding grills to the container is more efficient than making separate disposal trips. The cost generally ranges from $300-$500 for a week-long rental in most metro areas, though prices vary by location and container size.

Plan your placement carefully. The container needs level ground and clear overhead space—no tree branches or power lines within 20 feet. Most rental companies will drop the dumpster on your driveway or property line, but concrete surfaces may require protective boards to prevent damage. If you’re disposing of gas grills, remove the propane tanks before loading. Rental agreements specifically prohibit pressurized containers, and leaving tanks attached can void your contract or trigger additional fees.

Load grills strategically to maximize space. Break down what you can—remove side tables, wheels, and warming racks. Place the largest components along the dumpster’s sides first, then fit smaller pieces into gaps. This approach often doubles the effective capacity compared to just tossing items in randomly. If you’re dealing with charcoal residue or grease-caked grates, bag them separately to keep the container cleaner and avoid potential disposal surcharges for excessive contamination.

Timing matters for multi-unit properties or commercial cleanouts. Schedule the delivery for early in your project timeline so crews can work continuously without waiting for disposal options. A landscaping company clearing out a community space, for instance, might coordinate the dumpster arrival with their scheduled workdays to handle grills, old patio furniture, and overgrown vegetation in one efficient push.

Ready to get started?

Find a Dumpster Near You


Illustration of dumpster rental for this project

Garage Cleanout: Dumpster Size Guide & Checklist

A garage cleanout involves systematically removing unwanted items, organizing what you’re keeping, and disposing of junk through donation, recycling, or hauling services—typically requiring a roll-off dumpster for efficiency if you’re tackling years of accumulated clutter in one go. Most homeowners underestimate the time and physical effort involved, then find themselves overwhelmed when they realize a Saturday afternoon won’t cut it for a space that’s become a catch-all for broken furniture, old paint cans, and mystery boxes from three moves ago. The decision to finally clear out your garage usually comes from a specific trigger: needing the space for a workshop, preparing to sell your home, or simply being unable to park your car where it belongs. What separates a successful garage cleanout from an abandoned half-effort comes down to having a clear sorting system, knowing your disposal options before you start, and being ruthlessly honest about what actually deserves to stay.

Renting a Dumpster for This Project?

For most of these jobs, a roll-off dumpster delivered to your driveway is the simplest, cheapest way to handle the haul. Compare local providers and get a free quote in minutes.

Find Dumpster Rental in Your City →

Contact Form Demo

Planning Your Garage Cleanout

Planning Your Garage Cleanout

Planning transforms a garage cleanout from an overwhelming weekend project into a manageable process. Start by sorting everything into clear categories—keep, donate, sell, and trash—then calculate how much debris you’ll generate to secure the right disposal method. Most homeowners underestimate volume by half, so measure your space and multiply by the percentage you’re clearing out before committing to a dumpster size.

What to Keep and What to Toss

Apply the eighteen-month rule: if you haven’t used something in a year and a half, you won’t miss it. Exceptions exist for seasonal equipment (snow blowers in warm months, beach gear in winter) and sentimental items, but that camping stove you swore you’d fix three years ago? Gone. Tools you actually use, functioning sports equipment, and items with genuine resale value earn their shelf space. Everything else becomes clutter that’ll creep back into the corners within six months.

Create four distinct zones in your driveway or yard. Trash goes in one area—broken furniture, cracked storage bins, moldy cardboard boxes, paint cans dried solid. Donations get another spot: clothes that still fit someone, working appliances, books your kids outgrew. Set aside obvious resale items like power tools, bikes, or vintage signs. What remains goes back inside, but be ruthless. That bread maker gathering dust since 2019 isn’t suddenly going to start earning its square footage.

Choosing the Right Dumpster Size

A 10-yard dumpster handles cleanouts where you’re tossing maybe 30% of what’s in a standard two-car garage—think broken shelving, accumulated junk, and bags of trash. This size works when you’re organizing more than purging. A 20-yard dumpster suits full-scale cleanouts where you’re clearing 60% or more, especially if you’re disposing of bulky items like old water heaters, workbenches, or multiple filing cabinets.

Measure your pile before calling for a dumpster rental. Stack everything you’re tossing in your driveway and estimate the footprint. A 10-yard dumpster holds roughly three pickup truck loads; a 20-yard holds six. Round up if you’re demolishing built-in storage or dealing with dense materials like concrete blocks or stacks of old tile. Running out of room mid-project means either a second rental or that pile of debris sitting in your yard for another week while you wait for pickup.

Sorting and Removing Debris Efficiently

Sorting and Removing Debris Efficiently

Most garage debris splits into three simple categories: trash for the dumpster, items worth donating or selling, and things you’ll keep. Start by clearing a staging area where you can physically separate everything, then work section by section rather than bouncing around randomly. This systematic approach prevents the common mistake of shuffling the same boxes five times without making real progress.

Handling Hazardous Materials Safely

Paint cans, motor oil, antifreeze, pesticides, and old batteries cannot go in a standard roll-off dumpster. These materials require separate disposal through your municipality’s hazardous waste program. Most counties run collection events quarterly or maintain permanent drop-off sites—check your local solid waste authority’s website for schedules and accepted items.

Aerosol cans present a gray area. Empty cans with no pressure remaining typically qualify as regular trash, but half-full cans of spray paint or starting fluid need hazardous disposal. Press the nozzle—if nothing comes out and you hear no hiss, it’s empty. Propane tanks, even small camping cylinders, also require special handling. Many hardware stores and propane retailers accept them for exchange or proper disposal, sometimes for a small fee.

Old fluorescent bulbs and compact fluorescents contain mercury. Home improvement stores often have free recycling bins near the entrance. Car batteries have value—auto parts stores will take them at no charge and some pay a core deposit. The same goes for used motor oil: most quick-lube shops and auto parts retailers accept it free. Separating these materials before your rental dumpster arrives saves you from contaminating a full load, which can trigger disposal surcharges or rejection at the landfill.

Dumpster Rental for Garage Projects

A roll-off dumpster removes the biggest friction point in garage cleanout: figuring out what to do with everything you’re getting rid of. Instead of making multiple dump runs, sorting items for different disposal methods, or waiting weeks for bulk trash pickup, you throw everything into one container and have it hauled away when you’re done.

Most garage projects work well with a 10-yard or 15-yard dumpster. A 10-yard handles the typical single-car garage worth of accumulated stuff—old paint cans, broken tools, cardboard boxes, and a few pieces of unwanted furniture. Move up to a 15-yard if you’re clearing a two-car garage or dealing with heavier debris like old workbenches, metal shelving units, or construction materials from a partial renovation.

Rental periods typically run seven to ten days, though many companies offer flexible scheduling. That timeline works for most people tackling a garage on weekends—you can work at your own pace without the pressure of same-day disposal. If you’re methodical and the project takes longer, you can usually extend for an additional fee.

The container sits in your driveway, ideally positioned close to the garage door. You want it near enough to minimize carrying distance but with clearance for the delivery truck (about 60 feet of straight access with 14 feet of overhead clearance for the boom). Place plywood under the dumpster if you’re concerned about driveway staining or surface damage, though this matters more with asphalt than concrete.

Most dumpster rentals for garage projects generally range from $300 to $500 in 2026, varying by location and size. That price typically covers delivery, pickup, disposal fees for a set weight limit (often one to two tons), and the rental period. You’ll pay overage fees if you exceed the weight limit—usually $50 to $100 per ton—so estimate your debris volume honestly when ordering.

What you can’t put in: hazardous materials like oil-based paint, pesticides, car batteries, or propane tanks. Most companies also prohibit tires and electronics. These items require separate disposal through hazardous waste facilities or retailer take-back programs. Everything else—broken furniture, scrap wood, metal shelving, old sports equipment, boxes of miscellaneous junk—goes in the dumpster without sorting.

After the Cleanout: Organizing Your Garage

A clean garage stays functional only if you establish systems that prevent clutter from returning. The key is creating designated zones for different activities and storage types, then using vertical space and proper containers to keep everything accessible and visible. Most people who skip this step find their garage just as messy within six months.

Create Functional Zones

Divide your garage into distinct areas based on how you actually use the space. A sports equipment zone near the door makes sense if your kids grab bikes and balls daily. Lawn care equipment belongs near the garage door you use to access the yard. Seasonal storage can occupy harder-to-reach corners because you only need it a few times per year.

Mark these zones on the floor with tape or paint if it helps you commit to the system. One homeowner I know uses different colored floor sections — blue for automotive, green for yard tools, red for sports gear. It sounds excessive until you realize his three teenagers can now find anything without asking.

Maximize Vertical Storage

Wall-mounted systems reclaim the most usable space after a cleanout. Pegboards work well for hand tools and small items you reach for frequently. Slatwall panels with adjustable hooks accommodate everything from ladders to garden hoses. Heavy-duty shelving units should mount to wall studs, not just drywall, especially if you’re storing paint cans or bulk supplies.

Overhead racks make sense for items you use seasonally — holiday decorations, camping gear, winter sports equipment. Install them high enough to clear your car but low enough that you can safely retrieve bins without a ladder. The 4×8-foot ceiling racks hold roughly 600 pounds when properly installed, enough for most household seasonal storage.

Label and Containerize

Clear plastic bins beat cardboard boxes because you can see what’s inside without opening them. Label all four sides of each bin, not just the top — you’ll often stack them or view them from different angles. Use a label maker if your handwriting is hard to read in dim garage lighting.

Group similar items together: all automotive fluids in one bin, all camping cookware in another, all pet supplies in a third. This sounds obvious, but most garages accumulate random catch-all boxes that become useless after a few months. If you can’t describe a bin’s contents in three words or less, it’s too broad a category.

Skip the bins entirely for items you use weekly. Bikes, frequently-used tools, and active sports equipment should hang on hooks where you can grab them in seconds. Containerizing something you touch often just creates an extra step that you’ll eventually ignore.

Ready to get started?

Find a Dumpster Near You


Illustration of dumpster rental for this project

Home Remodel Debris Removal: Dumpster Guide

Home remodel debris removal involves hauling away construction waste like drywall, flooring, cabinets, and fixtures—either by renting a roll-off dumpster for DIY disposal, hiring a junk removal service for full-service pickup, or making multiple trips to a local landfill or transfer station yourself. How you handle this step directly affects your project timeline and budget: a kitchen gut job can generate two to three tons of material in a weekend, and without a clear disposal plan, debris piles up fast, blocking work areas and stalling contractors. Most homeowners underestimate the volume and weight of demolition waste, which leads to last-minute scrambling for truck rentals or overpaying for same-day hauling. The right home remodel debris removal approach depends on your project size, how quickly you need the waste gone, and whether you have the time and vehicle access to handle it yourself. This guide walks through each disposal method, what debris types cost the most to dump, and how to size a dumpster so you’re not left with a half-full container or an overflowing pile.

Renting a Dumpster for This Project?

For most of these jobs, a roll-off dumpster delivered to your driveway is the simplest, cheapest way to handle the haul. Compare local providers and get a free quote in minutes.

Find Dumpster Rental in Your City →

Contact Form Demo

What Counts as Remodel Debris

What Counts as Remodel Debris

Remodel debris includes any materials removed or replaced during renovation work — drywall, framing lumber, old cabinets, flooring, fixtures, and roofing materials. Most construction waste from gutting kitchens, tearing out bathrooms, or demolishing walls can go straight into a roll-off dumpster. However, certain items like asbestos-containing materials, paint cans with liquid residue, and some appliances require separate handling through specialized disposal channels.

Common Materials Generated During Remodeling

The bulk of what you’ll haul away consists of structural materials and finishes. Drywall scraps and ceiling tiles pile up fast during interior demo — a single bathroom gut can produce half a ton of gypsum board alone. Framing lumber, subflooring, and old decking make up another major category, along with broken concrete from removed patios or foundation work.

Finish materials fill the rest of the space: carpet padding and tack strips, vinyl or laminate flooring, ceramic tile and grout, wood trim and baseboards. Kitchen and bathroom remodels add old countertops (laminate, tile, or stone), cabinets, vanities, and outdated fixtures. Roofing projects generate bundles of asphalt shingles, felt paper, and flashing. Windows, doors, and their frames round out typical debris loads. All of these materials work fine for standard dumpster rental as long as they’re free of hazardous substances.

Items That Require Special Disposal

Some materials cannot legally go into a construction debris dumpster and need separate arrangements. Anything containing asbestos — older floor tiles, popcorn ceilings, pipe insulation, siding — must be tested, abated by certified professionals, and disposed of at approved facilities. Paint cans still holding liquid need to dry out completely or go to a household hazardous waste center; dried-out cans are usually acceptable in regular disposal.

Refrigerators, air conditioners, and other appliances with refrigerants require technicians to recover the coolant before disposal. Most appliance retailers offer haul-away services when delivering replacements, which solves this problem. Light fixtures containing ballasts (especially older fluorescent units with PCBs) and mercury-containing items like thermostats belong in special waste streams. Treated lumber, particularly wood with creosote or certain chemical preservatives, may face restrictions depending on your location. Check local regulations before loading these materials — disposal companies will reject contaminated loads and may charge you for the truck roll anyway.

Choosing the Right Dumpster Rental Size

Choosing the Right Dumpster Rental Size

The right dumpster size depends on your remodel’s square footage and the materials you’re removing. A bathroom gut typically needs a 10-yard container, while a full kitchen tearout requires 20 yards. Match the container to what you’re actually removing—cabinets and drywall compress differently than tile and hardwood—to avoid paying for a second haul or renting more capacity than you’ll use.

Matching Container Size to Project Scope

Start by measuring the space you’re gutting, not just estimating. A 10-by-12-foot bathroom generates roughly 2-3 cubic yards of debris when you’re pulling vanities, toilets, and surface materials. Add another 1-2 yards if you’re ripping out tile flooring and cement backer board. That puts most bathroom remodels comfortably in a 10-yard dumpster, with room for the inevitable extra debris you’ll discover behind walls.

Kitchen remodels scale up fast because you’re removing heavier, bulkier items. A standard kitchen demolition—cabinets, countertops, appliances, flooring—fills a 20-yard container about halfway when you break down the cabinets and stack materials efficiently. If you’re also removing an island, opening a wall, or tearing out two layers of flooring, book the 20-yard from the start. The cost difference between a 15-yard and 20-yard rental typically ranges from $50-$100 in most markets, but a second pickup runs $200-$400. One larger container beats two smaller ones unless your driveway physically can’t fit it.

Whole-house projects need different math. Count the rooms you’re touching, then add 30% for framing lumber, unexpected subflooring, and the trim work people always forget about. A three-room gut (two bedrooms and a hallway, for example) generates 12-15 cubic yards of material. That means a 20-yard dumpster if you’re disciplined about breaking down materials, or a 30-yard if you’re prioritizing speed over space efficiency. The 30-yard also makes sense when you’re working with a crew—multiple people demolishing simultaneously fill containers faster than one careful DIYer.

Debris Removal Costs and Planning

Expect to spend between $300 and $800 for a week-long dumpster rental during a typical home remodel, with the final cost depending on container size, your location, debris weight, and rental duration. Most homeowners benefit from booking their rental 5-7 days before demo work begins and choosing a container size one step larger than their initial estimate to avoid overage fees or last-minute extensions.

Understanding What Drives Your Rental Costs

Container size represents your baseline expense. A 10-yard dumpster—suitable for a single bathroom gut—typically ranges from $250 to $400 for a week. A 20-yard unit, which handles most kitchen remodels, generally runs $350 to $550. Full-house renovations often require a 30-yard container at $450 to $750. These prices assume you stay within the included weight limit, usually 2-4 tons depending on the rental company and your market.

Weight overages add $40-$100 per ton beyond your included allowance. Drywall, concrete, and tile demolitions create surprisingly heavy loads. A small bathroom floor removal might produce half a ton of tile and underlayment debris. If you’re tearing out kitchen cabinets plus flooring in a 200-square-foot space, plan for 1.5 to 2 tons of material. Ask your rental provider for the included weight limit upfront—some companies build in more tonnage than others at the base price.

Sizing Your Container Correctly

Homeowners consistently underestimate volume. A 10-yard dumpster holds roughly three pickup truck loads, which sounds substantial until you’re standing in a gutted bathroom surrounded by old vanity, flooring, drywall chunks, and fixtures. The debris pile always looks smaller while it’s still installed.

Match container size to your specific project scope. Single-room renovations—one bathroom, one bedroom, or a small kitchen—fit comfortably in a 15-yard unit. Whole-floor remodels or large kitchen-plus-dining overhauls call for a 20-yard container. Multi-room renovations spanning different areas of your house need a 30-yard dumpster. Contractors working on your project can usually predict volume based on square footage, but if you’re managing the remodel yourself, choose the next size up from your estimate. The size premium costs less than scheduling a second rental or paying daily overage fees.

Timing Your Rental Period

Book your dumpster for delivery 2-3 days before demolition starts. This gives you a buffer if weather delays delivery and lets you immediately dispose of material as you tear it out rather than stockpiling debris in your garage or driveway. The standard rental period runs seven days, which works well for most homeowner-paced projects where you’re working evenings and weekends.

Assess whether you need an extension before your initial period expires. Rental companies typically charge $10-$20 per additional day. If your remodel hits unexpected complications—hidden water damage requiring subfloor replacement or electrical work that takes longer than planned—call for an extension early. Waiting until the pickup date creates scheduling friction and may force you to rush debris removal or pay premium rates for immediate extension approval.

Best Practices for Efficient Debris Disposal

Efficient debris disposal during a home remodel requires front-loading your planning. Order your dumpster rental before demolition starts, designate separate zones for salvageable materials versus trash, and schedule pickups around major demolition phases rather than waiting until the container overflows. These three moves prevent the most common bottlenecks: work stoppages, double-handling materials, and last-minute scrambling for disposal options.

Plan Your Disposal Timeline Before Demo Day

Map your debris generation to your project phases. Kitchen gut jobs generate 70-90% of their waste in the first three days—you’ll pull out cabinets, tear up flooring, and demolish countertops before any new work begins. Order a roll-off dumpster to arrive the day before demo starts, not the day of. Contractors lose half a day or more when they have to pile debris in the driveway while waiting for a container to show up.

For multi-room remodels, break the timeline into disposal windows. If you’re renovating a bathroom and two bedrooms over six weeks, you might need one dumpster for the demo phase and a second for construction waste later. Trying to manage everything with a single container that sits for the entire project usually costs more than two strategically timed rentals.

Separate Materials as You Work

Set up sorting stations before the first hammer swings. Create distinct piles: one for metal (copper pipes, aluminum siding, steel ductwork), one for clean wood that might be reusable, one for everything else. Metal recycling centers often pay for scrap—copper plumbing from a bathroom remodel can offset $50-150 of your disposal costs. Clean dimensional lumber that’s not rotted or painted can go to salvage yards or even back into your project for blocking and temporary bracing.

Place your dumpster within 20 feet of the main work area, but not so close that it blocks material deliveries. Workers will toss debris in the nearest pile when the walk to the proper disposal spot feels too long. That’s how recyclable metal ends up buried under drywall scraps, and why you’ll spend an extra hour sorting through mixed waste that could have been separated from the start.

Load Strategically to Maximize Space

Break down materials before they go in the container. A stack of intact kitchen cabinets eats up three times the space of the same cabinets dismantled and nested. Flatten cardboard boxes immediately—most remodels generate a surprising volume of packaging from new fixtures, appliances, and materials. One contractor’s rule: if it takes up more space whole than broken, break it before it goes in.

Distribute weight evenly across the container floor. Load heavy materials like concrete, tile, or plaster first, spread across the entire bottom. Then layer lighter bulky materials on top. This prevents the “pyramid problem” where debris piles high in the middle but leaves empty space along the walls. Fill voids as you go—stuff insulation scraps or packaging material into gaps between larger items.

Know What Doesn’t Belong in a Standard Dumpster

Rental companies reject loads contaminated with prohibited items, and you’ll pay for a wasted trip plus disposal fees for the rejected material. Hazardous waste never goes in: no paint cans with liquid still inside, no asbestos-containing materials, no batteries or electronics, no fuel containers. Most localities have specific collection days or drop-off centers for these items.

Appliances containing refrigerants require special handling. That old window AC unit or basement freezer needs professional refrigerant recovery before disposal. Some dumpster companies accept appliances for an extra fee; others don’t take them at all. Confirm this before your kitchen demo, not after you’ve already disconnected the refrigerator. Mattresses, tires, and propane tanks also commonly get rejected—check your rental agreement’s exclusion list before loading anything questionable.

Part of our Construction Site Cleanout: Dumpster Size Guide & Checklist series.

Ready to get started?

Find a Dumpster Near You


Illustration of dumpster rental for this project

How to Dispose of a Dryer (2026 Guide)

You can dispose of a dryer through curbside bulk pickup (if your city offers it), by scheduling a haul-away with an appliance retailer when you buy a replacement, by hauling it yourself to a municipal transfer station or scrap metal recycler, or by renting a roll-off dumpster if you’re clearing out multiple large items during a renovation or cleanout. The method you choose depends on whether the dryer still works, how quickly you need it gone, and what other junk you’re dealing with at the same time. A working dryer often qualifies for free retailer pickup or donation, while a broken one typically ends up as scrap metal or landfill-bound bulk waste. Knowing how to dispose of a dryer properly saves you from paying unnecessary fees, prevents code violations if your city restricts curbside appliance disposal, and ensures refrigerant-containing models get handled correctly. This guide walks through each disposal method with real costs, timing, and eligibility rules so you can pick the option that fits your situation.

Renting a Dumpster for This Project?

For most of these jobs, a roll-off dumpster delivered to your driveway is the simplest, cheapest way to handle the haul. Compare local providers and get a free quote in minutes.

Find Dumpster Rental in Your City →

Contact Form Demo

Best Methods for Dryer Disposal

Best Methods for Dryer Disposal

The most practical dryer disposal methods include taking the unit to a metal recycling center where you’ll often get paid for scrap value, using retailer haul-away services when buying a replacement, or donating working dryers to charitable organizations. Each option handles the heavy lifting differently—recycling centers require you to transport the unit yourself, while retailers typically remove your old dryer during new appliance delivery.

Recycling Centers and Scrap Metal Yards

Metal recycling facilities accept dryers because the units contain valuable steel, copper wiring, and aluminum components. Call ahead to confirm they take appliances and ask about their scrap metal rates—dryers typically weigh 100-150 pounds, which translates to actual cash payment at most yards. You’ll need to transport the dryer yourself, so bring a truck or trailer and at least one person to help with loading.

Before heading to the facility, remove the power cord if it’s detachable (some yards pay separately for copper wire) and check whether they require the dryer drum to be empty. Most scrap yards accept dryers as-is, but a few require you to drain any residual moisture from steam models. If you’re clearing out multiple large items during a renovation or estate cleanout, a roll-off dumpster rental might make more sense than multiple trips to the recycling center—just verify that your dumpster service allows appliances, as some require separate handling for items containing refrigerants.

Retailer Haul-Away and Donation Programs

Major appliance retailers—Home Depot, Lowe’s, Best Buy—typically offer haul-away service for $20-$50 when you purchase a new dryer, with delivery teams removing your old unit during installation. Some retailers waive the fee entirely during promotional periods. Schedule the haul-away when placing your order, as adding it later often costs more or requires a separate appointment.

Working dryers make excellent donation candidates for Habitat for Humanity ReStores, Goodwill, or local homeless shelters. These organizations usually require you to drop off the appliance yourself, though some ReStore locations offer pickup for large items if you’re within their service area. Test the dryer before donating to confirm it heats properly and completes full cycles—charities won’t accept broken units. You’ll receive a donation receipt for tax purposes, though you’ll need to determine fair market value yourself. If the dryer works but shows cosmetic wear, mention this when arranging donation so the organization can decide whether it meets their acceptance standards.

Using a Dumpster Rental for Dryer Disposal

A roll-off dumpster rental makes the most practical sense when you’re disposing of multiple appliances or managing a larger cleanout project. If you’re only getting rid of a single dryer and nothing else, the cost typically outweighs the convenience. But when you’re renovating a laundry room, clearing out an estate, or replacing several appliances at once, a dumpster becomes the most efficient option.

When a Roll-Off Dumpster Makes Sense

Renting a dumpster pays off during whole-home cleanouts where the dryer is just one item among dozens. Picture clearing out a deceased relative’s house: you’ll have the dryer, a matching washer, old furniture, boxes of clothing, and garage debris. In these situations, a 10- or 15-yard dumpster parked in the driveway gives you a central disposal point for everything at once. You make one call, one payment, and everything goes.

The same logic applies to renovation projects. If you’re gutting a basement or tearing out an old laundry setup, you’ll generate construction debris alongside the appliance disposal. A dumpster handles both the dryer and the pile of drywall, old cabinets, and flooring in a single container. Contractors often already have a rental on-site during remodels, making it simple to toss the old dryer in with everything else.

Property managers and landlords also find dumpster rentals worthwhile when turning over multiple units. Replacing three dryers across different apartments means coordinating three separate haul-away services — or dropping all three in one dumpster during a scheduled turnover week. The math changes when you’re dealing with volume.

For a single dryer disposal with no other projects happening, you’re better off with retailer haul-away, a scrap metal buyer, or curbside pickup. Dumpster rentals generally run several hundred dollars for a week, which doesn’t make economic sense for one 150-pound appliance. But when you need that container anyway, the dryer becomes one more item checked off the list rather than a separate errand.

Preparing Your Dryer for Removal

Before you move your dryer, disconnect it from all utilities and clear the surrounding area. Electric dryers need to be unplugged, while gas dryers require shutting off the gas valve and detaching the supply line. Remove the vent hose, clean out lint buildup, and secure the drum and door. These steps prevent damage during transport and make the unit safer to handle.

Disconnecting an Electric Dryer

Unplug the dryer from the wall outlet. Most electric dryers use a 240-volt connection with a three- or four-prong plug. If the plug won’t budge, check whether it’s a locking type that requires pressing a release tab before pulling. Never yank on the cord itself—grip the plug housing and pull straight out.

Once disconnected, coil the power cord and tape it to the back of the dryer. This keeps it from dragging on the ground or getting caught during removal. If you plan to install the dryer elsewhere, inspect the cord for fraying or burn marks near the plug. Replace damaged cords before reconnecting.

Disconnecting a Gas Dryer

Turn off the gas supply valve located on the wall behind the dryer. The valve handle should sit perpendicular to the pipe when closed. Use an adjustable wrench to loosen the flexible gas line connection at the dryer, turning counterclockwise. Have a bucket or towel ready—residual gas in the line may release as a brief hiss.

After detaching the gas line, cap the wall connection to prevent gas leaks. Hardware stores sell inexpensive caps that thread onto standard gas fittings. If you smell gas after disconnecting, open windows and leave the area immediately. Don’t attempt to reconnect gas lines yourself unless you’re qualified—most jurisdictions require licensed plumbers for gas appliance installations.

Removing the Dryer Vent Hose

Loosen the clamp securing the vent hose to the dryer’s exhaust port. Most clamps use a screwdriver or nut driver to release. Pull the hose straight off—it may resist if lint buildup has created a seal. Clean visible lint from both the hose and the dryer’s exhaust opening using a vacuum with a crevice attachment.

Check inside the wall vent opening while you have access. Lint accumulation here creates fire hazards and reduces airflow in your next dryer. A dryer vent brush (available for $15-25) can reach several feet into the ductwork. If you’re disposing of the old vent hose along with the dryer, a dumpster rental makes sense when you’re tackling other home projects simultaneously.

Securing Loose Parts

Tape the dryer door shut with packing tape or a bungee cord looped through the handle. An unsecured door swings open during transport, potentially damaging hinges or striking nearby objects. Some dryers have drum-locking bolts installed during manufacturing—check your owner’s manual to see if yours shipped with these bolts. Reinstalling them prevents the drum from shifting and damaging internal components.

Remove or secure the lint trap. These plastic trays crack easily if the dryer tips during removal. Store it inside the drum or tape it to the top of the unit where it won’t fall out.

What You Cannot Do With an Old Dryer

Local regulations and environmental laws restrict how you can dispose of a dryer. You cannot leave it on the curb in most cities without scheduling a bulky item pickup. You cannot dump it in a standard dumpster rental without confirming the company accepts appliances. You cannot abandon it on public or private property. Breaking these rules typically results in fines ranging from $100 to $500.

Don’t Leave It at the Curb Without Authorization

Placing a dryer on the curb without notifying your waste management provider violates municipal codes in most areas. Sanitation workers driving standard routes won’t pick up appliances that weren’t scheduled in advance. The dryer sits there, sometimes for weeks, while you accumulate citations.

Many cities require a phone call or online request at least 24-48 hours before bulky item collection. Some municipalities charge $25-$50 per appliance pickup. Others include one or two free pickups per year but enforce strict placement rules—the dryer must sit a certain distance from mailboxes, fire hydrants, or parked cars. Miss these details and the truck drives past your house.

Don’t Put It in Any Dumpster Without Permission

Roll-off dumpster rental companies often prohibit appliances or charge extra fees for them. A dryer contains components that require special handling—motor oils, capacitors, refrigerants in some combination washer-dryer units. If you toss one into a rental dumpster without clearing it first, the company may refuse to haul the container or add a $75-$150 disposal surcharge when they discover it.

Some dumpster services explicitly accept appliances if you notify them during booking. They route that debris to facilities equipped to process metal and hazardous components. Always ask before the dumpster arrives. Trying to bury a dryer under other debris rarely works—drivers inspect loads before hauling them away.

Don’t Abandon It on Someone Else’s Property

Dumping a dryer behind a shopping center, in a vacant lot, or at a construction site is illegal dumping. Prosecutors treat it as a misdemeanor in most states. Property owners install cameras specifically to catch this behavior, and municipalities actively pursue violators because cleanup costs fall on taxpayers.

The same applies to leaving a dryer outside a recycling center after hours. Even if you assume workers will handle it the next morning, you’re creating an unauthorized disposal situation. Facilities post clear operating hours and accepted items for a reason. Anything outside those parameters becomes your legal liability until properly transferred during business hours.

Ready to get started?

Find a Dumpster Near You


Illustration of dumpster rental for this project

Can You Put Yard Waste in a Dumpster?

Yes, you can put yard waste in a dumpster, but whether you should depends on your rental company’s policies, local regulations, and how you plan to dispose of the material — some haulers accept mixed loads while others require yard debris to go in dedicated green waste containers, and certain jurisdictions ban organic material from landfills entirely. This distinction matters because loading the wrong type of waste can result in rejected pickup, additional fees, or disposal charges that double your project cost. Homeowners tackling landscaping overhauls, contractors clearing job sites, and property managers handling seasonal cleanups all face the same question: can you put yard waste in a dumpster without creating problems downstream? The answer hinges on understanding what qualifies as acceptable yard debris, how different rental companies handle organic materials, when a roll-off dumpster makes sense versus curbside pickup or composting, and what regulations apply in your area. Getting this right from the start saves time, money, and the frustration of dealing with a dumpster your hauler refuses to empty.

Renting a Dumpster for This Project?

For most of these jobs, a roll-off dumpster delivered to your driveway is the simplest, cheapest way to handle the haul. Compare local providers and get a free quote in minutes.

Find Dumpster Rental in Your City →

Contact Form Demo

What Yard Waste Can Go in a Dumpster

What Yard Waste Can Go in a Dumpster

Most yard waste goes into a dumpster without issue—grass clippings, leaves, branches, shrubs, and soil all qualify as accepted materials. The key is understanding your rental provider’s diameter limits for branches and whether they accept heavy materials like dirt and sod, which some companies classify separately due to weight restrictions. Always confirm specific guidelines before loading, since a few organic materials face universal restrictions.

Accepted Green Waste and Debris

Standard dumpster rentals handle the bulk of residential landscaping debris. Grass clippings from mowing, bags of leaves, hedge trimmings, and pulled weeds represent the most common loads. Branch diameter matters more than you’d think—most providers accept limbs up to 6 inches in diameter, though some set the threshold at 4 inches. Anything thicker typically requires separate processing at a wood recycling facility.

Shrub removals, small tree stumps (usually under 12 inches in diameter), brush piles, and plant material from garden beds all qualify. Dirt and sod fall into a gray area. Many companies accept limited amounts mixed with other yard waste, but a dumpster filled primarily with soil often incurs surcharges because of the extreme weight. A 10-yard container packed with dirt can exceed weight limits designed for lighter organic material.

Common Restrictions and Prohibited Items

Treated lumber from old landscaping structures can’t go in with green waste—pressure-treated wood contains chemicals that contaminate organic disposal streams. This includes railroad ties used as garden borders, treated fence posts, and composite decking materials. The same restriction applies to painted or stained wood from arbors or trellises.

Stumps larger than 12 inches in diameter face rejection at most facilities, as do logs cut for firewood. These require specialized grinding equipment. Rocks, concrete, and landscaping pavers need separate disposal even though they come from your yard. Food waste, even from a compost pile, stays out of debris dumpsters—it attracts pests and belongs in municipal composting programs. Some areas prohibit diseased plant material, particularly invasive species like Japanese knotweed, which must go to designated containment facilities to prevent spread.

When Yard Waste Isn’t Allowed in Dumpsters

When Yard Waste Isn’t Allowed in Dumpsters

Not all dumpster rentals accept yard waste. Many municipalities ban organic materials from landfills to reduce methane emissions and encourage composting. Even when landfills technically accept yard debris, rental companies may restrict it because of weight limits, disposal fees, or local ordinances that require separate processing. Before loading grass clippings, branches, or leaves into a roll-off dumpster, confirm both your municipality’s regulations and your rental provider’s specific policies.

Local Regulations and Landfill Policies

Cities and counties impose varying restrictions on yard waste disposal based on their waste management infrastructure. Some areas mandate that all organic yard materials go to designated composting facilities rather than landfills. Others allow limited amounts but prohibit specific items like stumps over a certain diameter or whole trees. You’ll find these rules in municipal codes or on your city’s solid waste department website.

What makes this complicated is that landfill policies often differ from municipal rules. A landfill might accept grass clippings but charge substantially higher tipping fees for them because of processing requirements. Some facilities categorize yard waste as “clean fill” and route it to separate processing areas, while others treat it as contamination if mixed with construction debris. Your dumpster rental company follows whichever set of restrictions is strictest—municipal law, landfill policy, or their own operational limits. That’s why a provider might tell you “no yard waste” even if your neighbor’s company allows it. They’re using different disposal facilities with different rules.

Weight Restrictions and Additional Fees

Yard waste becomes surprisingly heavy once compressed in a dumpster, especially when wet. A 20-yard container filled with damp soil and sod can easily exceed weight limits that would accommodate the same volume of household junk. Most rental agreements cap total weight between 2 and 4 tons, and organic materials push past that threshold quickly.

Exceeding weight limits triggers overage charges that typically range from $50 to $100 per ton in 2026. If you load a dumpster with dense materials like dirt, logs, or root balls, you might face several hundred dollars in unexpected fees. Some companies prevent this by prohibiting yard waste entirely. Others offer separate pricing structures for “dirt and concrete” or “green waste only” containers, with different weight allowances and disposal costs built into the base rate.

Choosing the Right Dumpster for Yard Debris

Choosing the Right Dumpster for Yard Debris

Most yard cleanup projects need a 10-yard or 20-yard roll-off dumpster, depending on volume and debris type. Light materials like leaves and grass clippings compress well in smaller containers, while bulky items such as branches and shrubs require more space. The right size prevents overfilling fees and keeps your project moving efficiently without mid-job pickups.

Size Considerations for Different Projects

A 10-yard dumpster handles routine maintenance like seasonal leaf removal, small hedge trimming, or clearing a single flower bed. This size works for most weekend projects that generate three to five pickup truck loads of material. You’ll have room for roughly 1,500 pounds of yard debris—enough for pruning a few trees or cleaning out overgrown landscaping along a fence line.

Step up to a 20-yard dumpster when you’re tackling larger jobs like removing an old garden, clearing brush from a neglected corner of your property, or taking down multiple small trees. This size accommodates debris from projects that would fill eight to ten pickup truck loads. Storm cleanup after a severe weather event typically falls into this category, especially when dealing with downed limbs and scattered branches across a yard.

Weight Limits and Load Distribution

Weight becomes critical with dense organic material. A dumpster filled to the brim with wet soil or thick logs can exceed weight limits even when it looks like you have space to spare. Rental agreements typically allow 2,000 to 4,000 pounds for yard debris, with overage fees kicking in beyond that threshold.

Distribute weight evenly across the container floor rather than piling everything in one corner. Break down branches into manageable pieces—aim for lengths under four feet when possible. This approach maximizes space and prevents shifting during transport. If you’re disposing of both light materials like leaves and heavy items like root balls, layer them. Put denser debris on the bottom, then fill remaining space with lighter materials that compress easily.

Rental Duration for Yard Projects

Most dumpster rental companies offer seven-day standard periods, which gives you a comfortable window for projects you can complete over a long weekend. You can typically extend the rental by the day or week if weather delays your work or the project grows larger than anticipated.

Plan for a longer rental if you’re clearing an overgrown property section by section or waiting for brush to dry before disposal. Green wood and fresh-cut vegetation weigh significantly more than dried material, so some property owners prefer cutting debris and letting it sit in the dumpster for a few days before adding more. This strategy works well for maximizing capacity within weight limits, though it requires coordination with your rental provider about duration.

Alternatives to Dumpster Rental for Yard Waste

If a roll-off dumpster isn’t the right fit for your project, several practical alternatives exist. Municipal yard waste collection programs handle regular lawn maintenance debris at minimal cost, while drop-off centers accept larger quantities during specific hours. For immediate removal, curbside pickup services and composting transform organic material into usable soil amendments right on your property.

Municipal Yard Waste Programs

Most cities offer seasonal curbside collection for grass clippings, leaves, and small branches. You’ll bag or bundle materials according to local specifications—typically paper yard waste bags or bundles tied with twine, never plastic bags. Collection runs weekly or biweekly during growing season, usually April through November in northern climates.

The catch: strict material limits and preparation requirements. Branches often max out at four feet long and two inches in diameter. One large tree removal generates far more debris than these programs handle in a single pickup. You’ll also wait days or weeks between collections, meaning piles sit in your yard if you’re clearing multiple areas at once.

Yard Waste Drop-Off Centers

County-operated drop-off sites let you haul yard waste directly to a central facility. These centers accept larger quantities than curbside programs—think truckloads rather than bags—and often take materials year-round. Some facilities process the debris into free mulch or compost you can pick up later.

Expect to show proof of residency and possibly pay a small fee per load, though many municipalities include several free visits annually for residents. Hours are limited, usually weekends only, and you’ll need a truck or trailer to transport materials yourself. Lines get long on Saturday mornings in spring and fall when everyone’s doing yard work.

Composting and Mulching On-Site

Converting grass clippings and leaves into compost eliminates disposal entirely while creating free soil amendment. A basic three-bin system processes yard waste in three to six months with regular turning. Mulching mowers chop grass fine enough to decompose on the lawn, returning nitrogen to the soil without bagging.

This works for routine maintenance but not major cleanups. Tree limbs, stumps, and diseased plant material don’t belong in home compost piles. You’ll still need another solution when you’re removing an overgrown hedge or clearing a wooded lot for construction. The process also requires space—compost bins occupy at least 9-12 square feet of your yard.

Hiring Junk Removal or Landscaping Services

Full-service haulers load and remove yard waste the same day you call. They’ll handle everything from bagged leaves to entire tree removals, charging by volume or weight. This eliminates all physical labor on your end—no hauling branches, no tying bundles, no driving to drop-off centers.

The convenience costs significantly more than self-service options. A single truckload runs $150-400 depending on your market and material type, while a week-long dumpster rental typically ranges $300-600 for comparable capacity. You’re also working around their schedule rather than filling and emptying a container at your own pace across several days or weeks.

Ready to get started?

Find a Dumpster Near You


Illustration of dumpster rental for this project

Attic Cleanout: Dumpster Size Guide & Checklist

An attic cleanout involves systematically removing unwanted items, sorting what stays or goes, disposing of debris responsibly, and often renting a roll-off dumpster to handle the volume of junk that’s accumulated over years of out-of-sight storage. Most homeowners underestimate the scope until they’re face-to-face with decades of holiday decorations, broken furniture, and mystery boxes—then realize they need a plan for the physical labor, the disposal logistics, and the sheer decision fatigue of processing hundreds of items. The difference between a weekend project and a month-long ordeal comes down to how you approach sorting, whether you have the right disposal method lined up, and how honest you are about what actually deserves to stay. This guide walks through the preparation work that saves you time, the sorting system that prevents paralysis, the disposal options that fit different budgets and timelines, and the safety considerations that keep you from ending up in the ER with a back injury or heat exhaustion.

Renting a Dumpster for This Project?

For most of these jobs, a roll-off dumpster delivered to your driveway is the simplest, cheapest way to handle the haul. Compare local providers and get a free quote in minutes.

Find Dumpster Rental in Your City →

Contact Form Demo

Planning Your Attic Cleanout Project

A successful attic cleanout requires sorting items into keep, donate, sell, and trash categories before you start hauling things downstairs. Focus first on protecting yourself with proper safety gear, then create a systematic plan for moving items out of the space. Most projects take 6-12 hours of active work depending on attic size and how long items have accumulated.

What to Remove and Keep

Start by identifying items that have actual value or use. Working holiday decorations, family photos, important documents, and childhood memorabilia you’ve looked at in the past five years belong in the keep pile. Tools, sports equipment, and seasonal items you rotate regularly also stay.

Everything else deserves scrutiny. Clothes no one has worn in three years, broken electronics, college textbooks, and dried-out paint cans all go. Water-damaged items, moldy boxes, and anything with rodent damage goes straight to disposal. Furniture you’ve been meaning to refinish for a decade but haven’t touched goes too. Create a “maybe” pile for mid-value items you could sell or donate, but be ruthless—if you haven’t missed it while it sat in the attic, you won’t miss it when it’s gone. A dumpster rental makes sense for projects with substantial debris, especially when dealing with damaged insulation, broken furniture, or construction materials from past renovations.

Safety Gear and Preparation Steps

Wear a N95 respirator or better—attics accumulate decades of dust, insulation fibers, and rodent droppings that become airborne when disturbed. Add safety glasses, work gloves, and a headlamp since attic lighting is usually minimal. Long sleeves and pants protect your skin from fiberglass insulation, even if you’re not planning to handle it directly.

Check the attic floor before you commit your full weight. Walk only on joists or installed flooring, never on drywall or insulation between joists. Bring a sturdy flashlight to inspect dark corners for wasp nests, exposed wiring, or structural issues before you start moving boxes. Set up a staging area at the base of the attic stairs where you can sort items as they come down—this prevents multiple trips up and down and keeps your main living space clear. If temperatures are above 80°F, schedule work for early morning or evening. Attic temperatures can hit 150°F in summer, creating real heat exhaustion risk within 30 minutes.

Sorting and Organizing Attic Items

Sorting and Organizing Attic Items

The most effective way to sort attic items is by creating clear categories before you start: keep, donate, sell, recycle, and trash. Work through one zone at a time rather than jumping around the space, and make decisions quickly — if you haven’t used something in two years and don’t have a concrete plan for it, it probably doesn’t belong in your home.

Categories for Disposal and Donation

Set up five distinct zones in your attic or in the space below. Label them clearly and commit to placing every item in one category. The “keep” pile should only include things you’ll actually use or display within the next six months. If something is “just in case” storage, question whether you’d really miss it — most people realize they wouldn’t.

Donation items need subcategories. Furniture and clothing in good condition go to general charities. Specialized items like old sports equipment, craft supplies, or working electronics often find better homes through targeted organizations. A local youth sports league might want those baseball gloves your kids outgrew. Art teachers frequently accept unused craft materials. Working power tools, even older models, have value to vocational training programs.

Disposal requires the most thought. Broken furniture, water-damaged boxes, and genuine trash go straight to a dumpster rental. Separate out anything with special disposal requirements — old paint cans, chemical products, electronics with screens, or fluorescent bulbs. These need your municipal hazardous waste facility, not your regular trash pickup. Timing a roll-off dumpster delivery for the day you start sorting makes the biggest difference in project momentum. When debris piles up with nowhere to go, the whole process stalls.

Debris Removal and Disposal Options

After sorting through decades of accumulated items, you’ll face the practical question of how to actually get everything out of your house. Most homeowners use a combination of methods: a roll-off dumpster for bulk items and trash, donation pickups for usable goods, and specialty haulers for items like electronics or hazardous materials. The right approach depends on your timeline, the volume of debris, and what you’re throwing away.

Renting a Roll-Off Dumpster

A 10-yard or 15-yard dumpster handles most residential attic projects. The 10-yard size works for spaces under 800 square feet with moderate accumulation—think old insulation, broken furniture, and several dozen boxes of miscellaneous items. The 15-yard container makes sense when you’re dealing with a larger attic or know you’re removing everything, including old flooring or built-in storage units.

Rental periods typically run 7-14 days, which gives you flexibility to work in stages rather than rushing through a single exhausting weekend. Driveway placement is standard, though some companies can position smaller units in tight side yards. Weight limits matter more than you’d expect—that rotted plywood and water-damaged drywall adds up quickly. Most residential rentals in 2026 generally range from $300-$500 depending on your location and the rental period.

Donation and Resale Pickups

Charitable organizations will schedule pickups for furniture, working appliances, and boxed household goods, but they’re selective about condition. Goodwill and Habitat for Humanity ReStores accept items they can actually resell—no torn upholstery, missing hardware, or obsolete electronics from the 1990s. Call ahead with specific descriptions rather than assuming they’ll take everything.

Estate sale companies handle pickup differently. They want volume and variety: vintage items, collectibles, tools, and anything with resale potential. You’ll typically split proceeds 30-50% with the company, and they manage the entire removal process. This makes financial sense when you’ve discovered an attic full of mid-century furniture or inherited collections rather than typical household castoffs.

Specialized Disposal Services

Electronics require separate handling in most municipalities. Old CRT monitors, tube televisions, and computer equipment contain materials that can’t go in standard disposal. Many communities run quarterly collection events, or you can use services like Best Buy’s recycling program for smaller items. Plan for this ahead of time—discovering three ancient computer towers on cleanout day leaves you scrambling.

Hazardous materials follow strict disposal rules. Paint cans (even dried latex), solvents, pesticides, and old car batteries need hazmat collection days or approved drop-off facilities. Asbestos insulation requires professional assessment and removal—never attempt this yourself. These specialty items represent maybe 5% of a typical attic’s contents, but they demand 50% of your disposal planning attention.

Choosing the Right Dumpster Rental Size

Most attic cleanouts require a 10-yard or 15-yard dumpster. A 10-yard container handles moderate cleanouts in standard attics—old clothes, boxes, small furniture, and general household items. If you’re clearing decades of accumulated belongings, dismantling built-in storage, or dealing with water-damaged materials, a 15-yard or 20-yard dumpster prevents the frustration of running out of space mid-project.

10-Yard Dumpster: Standard Attic Projects

A 10-yard container holds roughly 50-60 standard trash bags, which translates to clearing out a typical residential attic in one go. This size works when you’re removing normal household storage—holiday decorations, outdated electronics, clothing, and boxes of paperwork. The footprint measures about 14 feet long by 7.5 feet wide, fitting in most driveways without blocking garage access.

Where this size falls short: bulky items like old mattresses, large pieces of furniture, or extensive insulation removal. Three or four mattresses alone can fill half the container. If you’re keeping furniture to donate but tossing broken storage units and damaged boxes, a 10-yard works. If everything goes, consider sizing up.

15-Yard Dumpster: Heavy or Bulky Cleanouts

This size handles attics packed floor-to-ceiling or projects involving demolition. Removing old wood paneling, pulling out damaged subflooring, or clearing an attic that served as long-term storage for furniture all generate more debris than you’d expect. A 15-yard dumpster holds about 75-90 trash bags and accommodates awkward items without playing Tetris every time you haul something up from the house.

The extra capacity matters most when you discover problems mid-project. Finding water damage means removing and disposing of soaked insulation, warped boards, and contaminated belongings. That additional volume keeps the project moving instead of forcing you to stop and arrange a second rental.

When You Might Need a 20-Yard

Full attic renovations or estate cleanouts sometimes require a 20-yard container. If you’re gutting the space down to the studs, removing all insulation, and tossing everything stored up there, the larger size prevents underestimating. This also applies when you’re clearing an attic that was partially finished—ripping out drywall, old carpeting, and built-in cabinets generates substantial disposal volume.

The tradeoff is space. A 20-yard dumpster stretches about 22 feet long, which won’t fit on every property. Before committing to this size, confirm your driveway or street parking can accommodate it. For most standard residential attic cleanouts, though, you’ll waste money on unused capacity—stick with the 15-yard unless the scope clearly demands more.

Ready to get started?

Find a Dumpster Near You