Disposing of a pool table requires either disassembling it yourself and hauling the pieces to a landfill or recycling center, hiring professional movers to handle removal, donating it to a local charity or community center, selling it through classifieds, or renting a roll-off dumpster for large-scale cleanouts where the table is just one item among many. The choice you make depends on the table’s condition, your timeline, and whether you’re tackling other demolition or renovation work at the same time. A slate table can weigh 700-1,000 pounds, and that weight is distributed across fragile rails, a three-piece slate bed, and a wooden frame that doesn’t come apart easily without the right tools and a crew. How to dispose of a pool table the right way means understanding what parts can be salvaged or recycled, which services actually show up when they say they will, and what a dumpster rental company will accept without charging extra fees. This guide walks through each disposal method with the specific steps, costs, and gotchas that come up when you’re actually doing the work.
Renting a Dumpster for This Project?
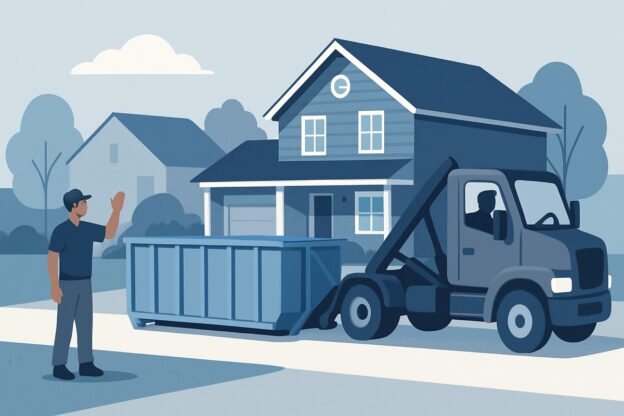
For most of these jobs, a roll-off dumpster delivered to your driveway is the simplest, cheapest way to handle the haul. Compare local providers and get a free quote in minutes.
Find Dumpster Rental in Your City →
Assess Your Pool Table Before Disposal
Before you commit to any disposal method, inspect your pool table’s condition and evaluate whether it can physically exit your home. A table in good shape with minimal damage might be worth selling or donating, while a warped slate or water-damaged frame makes disposal the only realistic option. You also need to measure doorways, hallways, and staircases to confirm the disassembled pieces will actually fit through your house.
Determine Table Condition and Value
Check the slate for cracks by running your hand across the surface and looking for uneven seams or chips along the edges. Even hairline cracks make a table nearly worthless for resale since slate replacement costs more than most used tables sell for. Inspect the felt for tears, stains, or worn patches where the nap has flattened—replacing felt runs $200-$400, which cuts into resale value significantly.
Look at the frame and legs for water damage, warping, or loose joints. Press down on each corner of the table to test for wobbling. A solid hardwood table with intact slate and decent felt might fetch $500-$1,500 if you find a buyer, while particle board frames or damaged slates make the table scrap material. If you’re looking at substantial damage and no realistic buyer interest, disposal becomes straightforward—disassemble it and load the pieces into a roll-off dumpster rather than spending weeks trying to give it away.
Measure Access Points and Clearances
Measure every doorway, hallway width, and stairwell the table needs to pass through. Most pool table slates are 1-inch thick and measure around 4.5 feet wide for a 7-foot table, 5 feet wide for an 8-foot table, and 5.5 feet wide for a 9-foot table. The frame sections typically break down to 3-4 foot segments, but you need at least 6-12 inches of clearance beyond the piece dimensions to maneuver around corners.
Measure ceiling height in stairwells and basement doorways. When carrying a slate piece at an angle, you’ll need roughly 7-8 feet of vertical clearance to avoid scraping walls or getting wedged. If your table went into a finished basement through a bulkhead or exterior entrance that’s since been modified, you might discover the only exit route involves cutting the slate into smaller pieces with a circular saw and masonry blade. That makes keeping the table intact for resale impossible, but creates manageable chunks for disposal.
Disassemble the Pool Table Safely
Disassemble the Pool Table Safely
Disassembling a pool table requires a socket wrench set, staple remover, power drill, and at least two strong helpers. The slate alone weighs 400-800 pounds depending on whether it’s a single piece or three-piece construction, making this genuinely dangerous to attempt alone. You’ll also need moving blankets, plastic wrap, and enough floor space to lay out components as you work.
Tools and Help You’ll Need
Start with the right socket set — most pool tables use 9/16″ or 5/8″ bolts to secure the rails and legs. A staple remover (the kind upholsterers use, not the office supply version) makes pulling felt staples far easier than screwdrivers or pliers. Bring a cordless drill with a screwdriver bit for the dozens of screws holding the frame together. Keep a headlamp or work light handy since you’ll be working underneath the table where overhead lighting doesn’t reach.
For helpers, you need people who can actually lift heavy weight in awkward positions. Each slate section on a three-piece table weighs 150-250 pounds and sits flush with no good grip points. Two people can handle single slate sections if they’re both capable of deadlifting their body weight, but three is safer. One-piece slates require four people minimum — there’s no workaround. If you’re renting a roll-off dumpster for the disposal afterward, confirm the rental includes enough labor or plan to have your crew help with loading, since slate pieces don’t slide or roll.
Disposal Options for Pool Tables
Pool tables can be donated to community centers or sold online if they’re in working condition, hauled away by junk removal services for $150–$400, disassembled and taken to the landfill yourself, or broken down and placed in a roll-off dumpster for renovation projects. The right choice depends on the table’s condition, your timeline, and whether you’re handling other demolition work at the same time.
Donate or Sell if the Table Still Works
Community centers, youth organizations, and bars often accept pool tables in decent shape. Call ahead—most want to see photos first and will only pick up if the slate isn’t cracked and the felt is salvageable. Churches with recreation rooms and veteran halls are also worth trying. You’ll need to handle disassembly yourself in most cases, which means recruiting help or hiring movers.
Online marketplaces work if you price appropriately. Tables in playable condition typically sell for 20–40% of their original value, but buyers almost always expect you to have it ready to move. List it as “you disassemble and haul” to attract serious buyers with trucks. Bar-size tables move faster than full-size models simply because more people can fit them through doorways.
Hire a Junk Removal Service
Junk haulers will disassemble, load, and dispose of your pool table in one visit. Most companies charge $150–$400 depending on table size and your location. They handle the slate (which can weigh 450–800 pounds), the frame, and the felt. You get your space back within hours.
This option makes sense if the table is your only large disposal project. If you’re already renting a dumpster for a basement cleanout or renovation, adding the table yourself costs nothing extra beyond the breakdown labor.
Disassemble and Haul It Yourself
You can break down the table and transport pieces to the landfill in a pickup truck, but plan for multiple trips. The slate alone requires two to four people and furniture dollies—drop it and you’re dealing with shattered stone. Remove the felt first (stapled or glued underneath), then unbolt the rails. The slate sits on the frame in sections, usually three pieces for a standard 8-foot table.
Landfills typically charge by weight for construction debris. Expect $40–$80 per ton in most areas as of 2026. The slate counts as inert material at some facilities, which may have lower tipping fees than mixed waste. Call ahead to confirm they accept slate and ask about any minimum fees.
Use a Dumpster Rental for Larger Projects
If you’re gutting a game room, finishing a basement, or handling other demolition, a 10- or 15-yard roll-off dumpster handles the pool table alongside everything else. Break the table into manageable pieces—slate can go in, but distribute the weight to avoid overloading one section of the container. Most residential dumpster rentals allow mixed materials, so the wooden frame, rails, and pockets all go in together.
This approach only pencils out if you’re already renting for another reason. The cost to rent a dumpster generally ranges from $300–$600 for a week, depending on size and location. For a single pool table, that’s expensive compared to a junk service. But when you’re pulling out old carpet, drywall, and built-in shelving at the same time, adding the table costs you nothing but the effort to break it down.
Using a Dumpster for Pool Table Disposal
Renting a roll-off dumpster makes pool table disposal straightforward when you’re handling the demolition yourself. A 10-yard dumpster typically accommodates a fully disassembled standard 8-foot table, including the slate, frame, and felt. This option works best when you’re tackling other cleanout projects simultaneously or when local waste services won’t accept oversized items during regular pickup.
Choosing the Right Dumpster Size
An 8-foot pool table broken down into its components fits comfortably in a 10-yard dumpster with room to spare. The slate sections are the bulkiest component—three pieces for most tables, each roughly 1 inch thick and weighing 150-250 pounds. The wooden frame, rails, and legs add another 200-300 pounds but compress into a smaller footprint once separated.
A 15-yard or 20-yard dumpster becomes cost-effective if you’re clearing out a game room, basement, or garage at the same time. Pool table disposal pairs well with getting rid of old furniture, boxes of stored items, or construction debris from a renovation. The incremental cost difference between a 10-yard and 15-yard rental—generally $50-100 in most markets—often justifies the extra capacity when you’re already paying delivery and haul-away fees.
Weight Limits and Slate Considerations
Slate creates the main weight concern with dumpster disposal. A standard three-piece slate set weighs 450-750 pounds total, which counts against your weight allowance. Most 10-yard dumpsters include a 2-3 ton weight limit, leaving plenty of capacity after accounting for slate and framing materials.
Place slate pieces flat on the dumpster floor rather than standing them upright or leaning them against walls. Flat placement distributes weight evenly and prevents shifting during transport. Break or cut the wooden frame into manageable sections—2 to 3 feet long—so they stack efficiently around the slate. This approach maximizes space and keeps heavier materials low in the container where they belong.
Timing Your Rental Period
Disassembling a pool table takes 3-6 hours for two people working at a steady pace. Factor in an extra day if you’re removing the table from a basement and need to navigate stairs or tight doorways. A standard 7-day dumpster rental gives you enough buffer to work at a comfortable pace without rushing the demolition.
Same-day or next-day delivery works when you’ve already started disassembly and need immediate disposal. Schedule delivery for the morning of your planned work day so the dumpster arrives before you begin breaking down the table. Most rental companies pick up within 24 hours of your call, which means you’re not paying for days you don’t need the container sitting in your driveway.
Ready to get started?
Find a Dumpster Near You