Author Archives: houston.barnettgearhart

Illustration of dumpster rental for this project

Dumpster Weight Limits & Overage Fees Explained

Dumpster weight limits specify the maximum tonnage allowed in your container before triggering overage fees, and they vary by dumpster size and rental company — a 10-yard dumpster typically holds 1-2 tons, a 20-yard holds 2-3 tons, a 30-yard holds 3-4 tons, and a 40-yard holds 4-5 tons, though these limits shift based on what you’re throwing away. Misjudging your debris weight is one of the fastest ways to blow past your quoted price, since most companies charge $50-$100 per ton over your limit. The problem isn’t just math — a cubic yard of asphalt weighs seven times more than a cubic yard of furniture, so intuition fails here. Understanding how rental companies set these limits, what actually counts toward your weight total, and how to estimate your debris type before you load helps you pick the right container size and avoid surprise charges when the truck arrives to haul it away.

Renting a Dumpster for This Project?

For most of these jobs, a roll-off dumpster delivered to your driveway is the simplest, cheapest way to handle the haul. Compare local providers and get a free quote in minutes.

Find Dumpster Rental in Your City →

Contact Form Demo

How Weight Limits Work for Roll-Off Dumpsters

How Weight Limits Work for Roll-Off Dumpsters

Roll-off dumpsters come with a maximum weight allowance, typically measured in tons, that varies by container size. Rental companies weigh the dumpster when they drop it off and again at pickup, charging you for the difference. If your debris exceeds the included weight limit—say, 2 tons for a 10-yard or 4 tons for a 30-yard—you’ll pay overage fees, which generally range from $40 to $100 per additional ton in 2026.

Weight Allowances by Dumpster Size

A 10-yard dumpster typically includes 1 to 2 tons of weight in the base rental price. This works for lighter debris like household junk or yard waste, but fills up fast with dense materials. Most contractors skip this size for anything involving concrete or dirt.

The 20-yard sits at 2 to 3 tons included, while a 30-yard usually covers 3 to 4 tons. A 40-yard dumpster often allows 5 to 6 tons, though some companies cap it lower depending on local landfill restrictions. The allowance doesn’t scale linearly with size—doubling the container volume doesn’t double the weight limit. That mismatch catches people off guard when they rent a larger dumpster assuming they can load it with heavy material to the brim.

How Rental Companies Calculate Weight

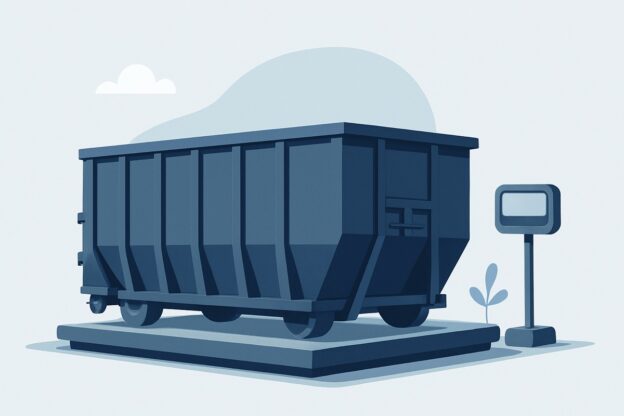
The truck driver records the vehicle’s weight at a certified scale before delivery, then weighs again after picking up your loaded dumpster. The difference is your debris weight. Some companies use onboard truck scales; others route through a landfill or transfer station scale. Either way, you’ll see the weight on your final invoice.

Rental companies set their base weight limits based on what their trucks can legally haul and what landfills accept per load. A standard roll-off truck maxes out around 10 tons total—truck plus dumpster plus debris. If the dumpster itself weighs 3 to 4 tons empty, that leaves 6 to 7 tons for your materials before hitting legal road limits. Companies build in a margin to avoid overweight violations, which explains why a 40-yard dumpster doesn’t come with an 8-ton allowance even though the physical container could theoretically hold it.

Common Materials and Their Weights

Common Materials and Their Weights

Understanding what different materials weigh helps you choose the right dumpster size and avoid overweight fees. Construction debris like concrete and dirt are deceptively heavy — a cubic yard of concrete weighs around 4,000 pounds, while the same volume of drywall weighs only about 500 pounds. Household junk and lighter renovation debris weigh significantly less than dense construction materials, meaning you can typically fill the container higher without hitting weight restrictions.

Estimating Debris Weight by Material Type

Heavy construction materials concentrate weight fast. Concrete, asphalt, brick, and stone all clock in at roughly 3,000-4,000 pounds per cubic yard. A 10-yard dumpster filled completely with concrete debris would weigh around 20 tons — well over most weight limits for that size. Dirt and soil are equally dense, particularly when wet. Even clean fill dirt runs about 2,200 pounds per cubic yard when dry, and that number climbs when moisture is present.

Wood framing and dimensional lumber sit in the middle range at approximately 500-750 pounds per cubic yard for clean wood. That estimate jumps for treated lumber, which holds more moisture and often includes hardware. Roofing shingles are surprisingly heavy for their size — asphalt shingles weigh roughly 800 pounds per square (100 square feet of coverage), and tearing off multiple layers from an older roof adds up quickly. Drywall and plaster are lighter than most people expect. Standard drywall runs about 500 pounds per cubic yard, though older plaster walls with wood lath can be heavier. Household items like furniture, clothing, and general junk typically weigh 300-400 pounds per cubic yard — light enough that you’ll run out of space before hitting dumpster weight limits in most cases.

What Happens When You Exceed the Limit

What Happens When You Exceed the Limit

Exceeding your dumpster’s weight limit triggers overage fees that typically range from $50 to $100 per ton over the agreed limit in 2026. The rental company weighs your container at the landfill, calculates the excess tonnage, and bills you for the difference. In extreme cases where weight creates safety hazards during transport, drivers may refuse to haul the dumpster until you remove material.

Safety Risks During Transport

An overloaded roll-off dumpster becomes unstable on the truck bed. The hydraulic lift strains under excessive weight, creating potential failure points that put the driver and other motorists at risk. Drivers perform visual assessments before loading—if debris is piled above the fill line or the container visibly sags, they’ll note the concern on your service ticket.

Material can shift or fall during transit when containers carry too much weight. A 30-yard dumpster loaded with 8 tons of concrete, for example, might shed chunks on residential streets if not properly secured. Most rental agreements include language allowing drivers to refuse transport when they judge the load unsafe, leaving you responsible for lightening the container before pickup.

Damage to Driveways and Property

Overweight containers concentrate enormous force on small contact points. A 10-yard dumpster holding 6 tons of roofing shingles—well above its typical 2-3 ton limit—can crack asphalt driveways or punch through weakened concrete. The pressure intensifies when the truck’s hydraulic system tilts the container for loading, shifting the entire weight onto the front wheels.

Rental companies don’t typically cover property damage caused by overweight dumpsters. Your homeowner’s insurance might apply, but you’ll need to prove the damage wasn’t preventable. Placing plywood sheets under the container distributes weight more evenly, but that only helps if you stay within reasonable limits. Once you’ve exceeded capacity by a full ton or more, even reinforcement won’t prevent surface damage on standard residential driveways.

Additional Fees and Charges

Overage calculations happen at the landfill scale. If you rented a container with a 2-ton limit and the scale reads 3.4 tons, you’re paying for 1.4 tons of excess. At $75 per ton—a common rate in many markets—that’s an extra $105 on top of your base rental fee. Some companies round up to the nearest half-ton, so 3.2 tons becomes 3.5 tons for billing purposes.

Redelivery fees apply when drivers can’t safely transport your dumpster. If the driver red-tags your container as overweight and you need to remove material before they’ll attempt pickup again, expect charges between $100 and $200 for the return trip. This stacks on top of any overage fees you’ll still owe once the container reaches an acceptable weight. Heavy materials like dirt, concrete, and stone trigger these situations most often—a single yard of soil weighs roughly half a ton, making it easy to misjudge total weight in larger containers.

Choosing the Right Size to Avoid Overages

Choosing the Right Size to Avoid Overages

Matching dumpster size to your project’s debris volume and weight prevents overage fees and the hassle of ordering a second container mid-job. Estimate your material type and total volume first, then select a container size with enough weight capacity for that specific debris—a 20-yard dumpster works for most household cleanouts, while dense materials like concrete require smaller containers with higher weight limits.

Calculate Volume Before You Rent

Walk through your space and measure the footprint of what you’re removing. A standard bedroom’s worth of furniture and belongings fills roughly 10-12 cubic yards. Multiply room dimensions (length × width × height) and divide by 27 to convert cubic feet to cubic yards. For renovation debris, account for wall thickness and the air gaps between broken materials—demolished drywall takes up more space than the original square footage suggests.

Contractors often photograph debris piles and compare them to familiar references. A pickup truck bed holds about 2 cubic yards, so a pile equivalent to five truck loads means you need a 10-yard roll-off dumpster. When estimating roofing projects, use the square footage of your roof—every 100 square feet of shingles produces roughly one cubic yard of debris.

Match Container Capacity to Material Density

Heavy materials require smaller containers even when volume seems minimal. A 10-yard dumpster handles approximately 2-3 tons of asphalt, brick, or concrete—filling it completely would exceed the weight limit. For these jobs, request a container specifically rated for heavy debris, which typically includes reinforced floors and higher weight allowances.

Light household items like furniture, carpet, or yard waste fill space without approaching weight limits. You can safely fill a 30-yard or 40-yard container to the rim with these materials. Mixed loads require judgment—if you’re combining kitchen cabinets with tile and countertops, size up to ensure both volume and weight capacity. A dumpster rental company can provide weight guidelines based on your specific material mix, helping you avoid the common mistake of underestimating how quickly dense debris adds up.

More Weight Limit Guides

Ready to get started?

Find a Dumpster Near You


Illustration of dumpster rental for this project

How to Dispose of a Water Heater (2026 Guide)

Most municipalities require you to dispose of a water heater through a licensed plumber who handles removal, a specialized recycling facility that accepts appliances, or a scheduled bulk trash pickup—though availability and rules vary widely by location, and improper disposal can result in fines or refused service. The decision matters because water heaters contain materials that can’t go in standard trash bins, and choosing the wrong disposal method can leave you scrambling to move a 150-pound steel tank back out of your driveway on collection day. Whether you’re replacing a failing unit or upgrading to a more efficient model, knowing how to dispose of a water heater correctly saves you time, potential penalties, and the headache of a rejected pickup. This guide covers practical disposal routes based on your situation—including when a dumpster rental makes sense for larger renovation projects—plus steps to safely drain and disconnect the unit before it leaves your property. Disposal isn’t complicated once you understand what your city allows and what scrap yards or retailers will actually take.

Renting a Dumpster for This Project?

For most of these jobs, a roll-off dumpster delivered to your driveway is the simplest, cheapest way to handle the haul. Compare local providers and get a free quote in minutes.

Find Dumpster Rental in Your City →

Contact Form Demo

Preparing Your Water Heater for Removal

Before you can haul a water heater to the curb or load it into a roll-off dumpster, you need to drain the tank and disconnect all utility lines. A full 40-gallon tank weighs over 300 pounds — draining it first makes the unit manageable for one or two people to move safely. Disconnecting gas or electric properly prevents leaks, sparks, and potential code violations that could complicate disposal.

Draining the Tank Completely

Turn off the power supply at the circuit breaker for electric units or set the gas valve to “off” for gas models. Let the water cool for at least two hours — scalding water straight from an active heater can cause serious burns. Once cool, shut off the cold water inlet valve at the top of the tank.

Attach a garden hose to the drain valve near the bottom of the unit. Run the hose to a floor drain, sump pump basin, or outside where 40-50 gallons of water won’t cause problems. Open the drain valve and the pressure relief valve at the top to let air in — without that air inlet, the tank drains slowly or not at all. Expect the process to take 20-30 minutes. If sediment clogs the valve partway through, briefly open and close the cold water inlet to flush it clear.

Disconnecting Gas or Electric Lines

For electric water heaters, confirm the breaker is off, then remove the access panel and disconnect the wires from the heating elements. Use a voltage tester to verify no current before touching anything — even a switched-off breaker can fail. Cap the wire ends with wire nuts so they don’t contact metal while you’re moving the unit.

Gas disconnections require more caution. Turn off the gas supply valve on the pipe leading to the heater — it typically sits within two feet of the unit. Use two wrenches to loosen the union fitting: one to hold the pipe steady, one to turn the nut. If you smell gas at any point, stop immediately and call your utility company. Most municipalities allow homeowners to disconnect their own water heaters, but if you’re uncertain about working with gas lines, hire a licensed plumber for this step. The $75-150 service call is cheaper than repairing gas leak damage.

Disposal Options for Old Water Heaters

Most scrap metal recycling centers accept old water heaters and will pay you for the metal content, typically between $7 and $15 for a standard 40-50 gallon tank. Steel tanks are particularly valuable because they’re made from recyclable materials, and the recycling process is straightforward once you drain the unit and remove any non-metal components. This option converts an old appliance into cash while keeping materials out of landfills.

Scrap Metal Recycling Centers

Call ahead before loading your water heater. Most facilities accept tanks without requiring you to disassemble them first, but some want the brass drain valve removed or insist that gas units arrive without the burner assembly attached. You’ll need to know whether your unit is electric or gas-powered and confirm it’s completely drained — even a few gallons of residual water adds weight that cuts into the per-pound payment you’ll receive.

The payout depends on current scrap steel prices and the tank’s size. A 40-gallon electric water heater weighs roughly 100-120 pounds empty, while a 50-gallon gas unit typically comes in around 130-150 pounds because of the additional burner components. Scrap yards generally pay by weight, so larger tanks fetch more money. Expect the process to take about 15 minutes once you arrive: you’ll drive onto the scale, unload the tank, then drive back across to weigh your empty vehicle. Some yards issue payment immediately as cash; others mail checks within a week. If you’re replacing multiple water heaters during a renovation project or managing several units from rental properties, a roll-off dumpster might make more sense than multiple trips to the recycling center.

Using a Roll-Off Dumpster for Large Projects

A roll-off dumpster makes sense when you’re replacing multiple water heaters in a commercial building, renovating an entire basement or utility room, or tackling a whole-house demolition that includes water heater removal. These containers handle the combined weight of metal tanks, demolished drywall, old piping, flooring, and other construction debris in one pickup. For a single residential water heater replacement, you’ll likely spend more than necessary—most homeowners find cheaper disposal routes for standalone units.

When Multiple Units or Major Renovations Justify Rental

Property managers replacing three or four water heaters across an apartment complex benefit from having a dumpster on site for a week. The container absorbs not just the tanks but also corroded supply lines, water-damaged ceiling tiles, rusted mounting brackets, and packaging from new units. Commercial HVAC contractors doing system-wide upgrades often keep a 20-yard dumpster at the job site because they’re pulling out boilers, expansion tanks, outdated water heaters, and ductwork simultaneously.

The math shifts during gut renovations. If you’re ripping out bathroom tile, removing a cast-iron tub, demolishing shower walls, and replacing the water heater in the same project, a roll-off dumpster consolidates disposal into one flat fee rather than multiple dump runs. Contractors working on basement finishing projects typically rent a dumpster anyway for concrete rubble and framing scraps—the water heater becomes one more item in a much larger debris stream.

Choosing the Right Size for Your Project Scope

A 10-yard dumpster holds roughly three pickup truck loads and works for projects where the water heater is a minor component—like a bathroom remodel with limited demolition. Most companies deliver these to standard driveways without special access requirements. A 20-yard container, about the size of a standard parking space, fits whole-house cleanouts that include a water heater plus furniture, carpeting, appliances, and general household junk. Construction projects that generate drywall, lumber, and roofing materials alongside plumbing fixtures usually need a 30-yard unit.

The weight matters more than volume with water heaters. A standard 50-gallon residential tank weighs around 120-150 pounds empty, which barely registers in a dumpster’s typical weight allowance of one to three tons. The real weight comes from concrete, tile, or saturated materials you’re disposing of simultaneously. Rental companies generally allow mixed loads for renovation debris, but confirm they accept water heaters—some prohibit appliances with residual water or require you to drain tanks completely before loading.

Local Regulations and Permit Requirements

Most municipalities don’t require permits specifically for water heater disposal, but you’ll need to follow local rules about how and where you can dispose of them. Check with your city or county waste management department before removal — some areas ban tank-style heaters from regular trash pickup, require recycling through approved facilities, or mandate that licensed professionals handle the disconnection. Breaking these rules can result in fines ranging from $100 to $500 in many jurisdictions.

Municipal Collection Programs and Restrictions

Your local waste management department likely runs a bulky item pickup program that accepts old water heaters, but the rules vary significantly between communities. Some cities include water heaters in their standard bulk pickup schedule at no extra charge — you simply place the unit curbside on designated collection days. Others charge fees between $25 and $75 per item or limit pickups to certain months. Call your local department directly rather than relying on their website, which often lags behind current policies.

Certain municipalities prohibit water heaters in standard trash entirely. In these areas, you must take the unit to a designated drop-off facility or recycling center. Some cities require proof that a licensed plumber disconnected the unit before they’ll accept it. If you’re renting a roll-off dumpster for a larger renovation project, confirm with the rental company that water heaters are allowed — most accept them, but some contracts specifically exclude appliances with remaining water or gas connections.

State-Level Disposal Requirements

State environmental agencies sometimes impose stricter standards than local rules, particularly for gas water heaters. California, for example, requires that anyone removing a gas appliance must be a licensed contractor or work under direct supervision of one. Several northeastern states classify water heaters as recyclable metals and prohibit landfill disposal outright — you must bring them to scrap metal facilities or certified recyclers.

Tankless units with electronic components fall under e-waste regulations in states like Washington, New York, and Illinois. These laws require special handling for circuit boards and digital controls, even though the bulk of the unit is recyclable metal. Check your state’s Department of Environmental Quality or equivalent agency website for appliance-specific guidance. When regulations conflict between state and local levels, the stricter rule applies.

HOA and Rental Property Policies

Homeowners associations often regulate what you can place at the curb and when, regardless of what municipal code allows. Review your HOA covenants before setting an old water heater outside — many communities require advance notice, restrict visible placement to specific hours before pickup, or mandate that you cover the unit. Some HOAs prohibit curbside disposal altogether and require you to haul items away yourself or use a private removal service.

Rental properties add another layer of requirements. Your lease probably specifies who handles appliance removal — typically the landlord for equipment that came with the property. If you installed the water heater yourself or you’re responsible per your lease terms, get written approval before disposal. Some landlords require you to use their preferred contractors or restoration companies to avoid liability issues. Document the unit’s condition before removal with photos, particularly if your security deposit might be affected.

Ready to get started?

Find a Dumpster Near You


Illustration of dumpster rental for this project

How to Dispose of a Television (2026 Guide)

To dispose of a television properly, you need to take it to an electronics recycler, a manufacturer take-back program, or a municipal hazardous waste facility — never throw it in the trash or a standard dumpster, since TVs contain toxic materials like lead and mercury that are illegal to landfill in most states. That legal restriction catches people off guard, especially during moves or home cleanouts when the instinct is to toss everything bulky into a roll-off dumpster. The consequences aren’t trivial: fines can reach several hundred dollars, and improper disposal creates real environmental harm when heavy metals leach into soil and groundwater. Understanding how to dispose of a television the right way means knowing which recycling options actually accept your specific TV type, whether you’ll pay a fee, and how to handle the logistics if you’re clearing out a whole household. This guide walks through the practical steps, costs, and restrictions so you can get rid of that old TV legally and without hassle.

Renting a Dumpster for This Project?

For most of these jobs, a roll-off dumpster delivered to your driveway is the simplest, cheapest way to handle the haul. Compare local providers and get a free quote in minutes.

Find Dumpster Rental in Your City →

Contact Form Demo

Why Televisions Require Special Disposal

Why Televisions Require Special Disposal

Televisions contain toxic materials like lead, mercury, and cadmium that leach into soil and groundwater when dumped in landfills. Federal and state laws classify TVs as electronic waste, banning them from standard trash collection and imposing fines for improper disposal. These regulations exist because a single cathode ray tube television can contain up to eight pounds of lead.

Hazardous Materials Inside TVs

Older CRT televisions house leaded glass in the screen and funnel, designed to shield viewers from radiation during use. When crushed in a landfill, this lead becomes bioavailable. A 27-inch CRT contains roughly four to eight pounds of the metal—enough to contaminate local water supplies if disposal sites lack proper barriers.

Flat-screen models pose different risks. LCD panels use mercury in backlighting tubes, while circuit boards across all TV types carry cadmium, beryllium, and brominated flame retardants. These substances persist in the environment for decades. Mercury exposure damages the nervous system; cadmium accumulates in kidneys and bones. The plastics housing most televisions also contain chemicals that off-gas as they break down, contributing to air pollution near disposal sites.

Twenty-five states prohibit televisions in household garbage and landfills outright. California, New York, Illinois, and Pennsylvania enforce some of the strictest bans, treating violation as a misdemeanor with fines ranging from $100 to $10,000 depending on the jurisdiction and disposal volume. Businesses face steeper penalties than residents.

Most electronics disposal laws fall under Extended Producer Responsibility programs, which require manufacturers to fund take-back systems. This means retailers and manufacturers often provide free recycling options—Best Buy accepts up to three items per household per day, while manufacturers like Samsung and LG maintain mail-back programs for their branded products. When planning a home cleanout that involves bulky items, a roll-off dumpster works for furniture and general debris, but you’ll need a separate plan for electronics. Rental companies exclude e-waste from acceptable materials because accepting it puts them in legal jeopardy alongside their customers.

Best Ways to Recycle or Donate Your TV

Best Ways to Recycle or Donate Your TV

Electronics recycling centers accept old televisions and safely extract hazardous materials like lead, mercury, and phosphor while recovering valuable metals and plastics. Most centers take all TV types for free, though some charge $15-30 for CRT models due to complex dismantling requirements. You’ll find centers through municipal programs, retailer take-back services, and certified e-waste facilities that meet environmental standards.

Local Electronics Recycling Centers

Start with your city or county’s solid waste department website. Many municipalities operate dedicated drop-off sites that accept electronics during regular hours or at quarterly collection events. These programs typically cost nothing for residents and handle the logistics of moving your TV from the collection point to certified processors.

The certification matters. Look for facilities displaying R2 (Responsible Recycling) or e-Stewards credentials. These third-party verifications mean the center follows strict protocols for worker safety, data security, and environmental protection. They won’t ship your TV overseas to be burned in unsafe conditions or dumped in landfills. Call ahead to confirm they’re currently accepting televisions — some centers pause intake when storage fills up, particularly after holidays when donation volumes spike. Ask about any size restrictions too, since projection TVs over 50 inches sometimes require special handling appointments.

Retailer Take-Back and Manufacturer Programs

Many retailers and TV manufacturers run free take-back programs when you buy a new television or need to dispose of an old one. Big-box stores like Best Buy accept TVs at dedicated recycling kiosks regardless of purchase location, while retailers such as Walmart and Target often haul away your old set when delivering a new one. Manufacturers including Samsung, LG, and Sony partner with certified recyclers to handle units they produced.

How Best Buy’s Electronics Recycling Works

Best Buy accepts tube and flat-screen TVs up to 50 inches at their in-store recycling centers. You don’t need to have purchased the TV from them, and there’s no appointment required. Just bring the unit to the customer service desk during business hours. They’ll process it for free for most items under 50 inches, though some larger or specialty electronics may carry a small handling fee.

The retailer extracts valuable materials like copper wiring and circuit boards, then sends hazardous components to certified processors. If you’re buying a new TV, they’ll also haul away up to two old units from your home during delivery for a standard service charge that typically covers transportation and recycling costs.

Manufacturer Mail-Back and Partner Programs

Samsung, LG, Sony, and Vizio all maintain partnerships with recycling networks across the country. Visit the manufacturer’s website and enter your ZIP code to find the nearest authorized drop-off location. These facilities accept the brand’s products at no charge and ensure proper handling of mercury-containing backlights and lead-based components.

Some manufacturers run seasonal mail-back programs for smaller electronics, though TVs generally exceed size limits for prepaid shipping. If you’re replacing multiple televisions during a home renovation or office upgrade, check whether the manufacturer offers bulk pickup for commercial accounts. When you’re clearing out several units alongside other debris, a roll-off dumpster rental might seem convenient, but electronics don’t belong in standard waste containers—the hazardous materials inside require specialized processing that landfills can’t provide.

Using a Roll-Off Dumpster for Large Cleanouts

Using a Roll-Off Dumpster for Large Cleanouts

When you’re tackling a whole-house cleanout, estate sale, or major renovation, a roll-off dumpster rental lets you dispose of TVs alongside furniture, appliances, and construction debris in one container. Rental periods typically run 7-14 days, giving you time to sort through items without multiple disposal trips. Most residential dumpsters (10-20 cubic yards) accept televisions when electronics represent a small portion of the total load, though you’ll pay disposal fees that generally range from $50-100 per TV added to your base rental cost.

This approach makes sense when the TV represents one item among dozens. A family clearing out a deceased relative’s home might fill a 15-yard dumpster with furniture, clothing, kitchenware, and yard waste—adding two old TVs to that load costs less than making separate recycling center trips. The same logic applies to basement cleanouts where you’re removing water-damaged drywall, old carpeting, and stored items that include a CRT television from the 1990s.

Before scheduling your dumpster, call the rental company to confirm their electronics policy. Some require advance notice for any TV, regardless of quantity. Others allow one or two sets without special arrangements but charge extra disposal fees beyond that. The company typically handles the recycling logistics—they’ll separate electronics at their facility or transfer station rather than expecting you to deliver the TV elsewhere. You simply toss it in with everything else, and they ensure proper processing through certified e-waste handlers.

The math works when convenience justifies the premium. A 10-yard dumpster for a weekend might cost $300-450 in most markets. Adding TV disposal fees brings the total to $350-550, but you’ve eliminated separate trips, saved hours of sorting, and avoided the headache of coordinating pickup schedules with municipal programs. For smaller jobs involving just one or two TVs, dedicated electronics recycling remains cheaper—but when you’re already renting for bulk waste, the incremental cost often makes sense.

Ready to get started?

Find a Dumpster Near You


Illustration of dumpster rental for this project

How to Dispose of a Washing Machine (2026 Guide)

You can dispose of a washing machine through several proven methods: schedule a bulk trash pickup with your municipal waste service, hire a junk removal company, return it to a retailer during appliance delivery, recycle it at a scrap metal facility, or donate it if it still works — with costs ranging from free municipal pickup to $150+ for professional hauling.

The method you choose affects both your wallet and timeline, since hauling a 200-pound appliance down basement stairs isn’t a one-person job, and some disposal options take weeks to schedule while others happen same-day. Most washing machines contain recyclable steel and copper worth recovering, but they also hold residual water and need proper disconnection to avoid damaging your home. Getting the disposal method wrong means either overpaying for convenience you don’t need or underestimating the physical requirements and creating a safety hazard. This guide walks through each disposal option’s real costs, logistics, and trade-offs so you can match the right method to your situation — whether you’re replacing a broken machine, clearing out a rental property, or managing a renovation timeline.

Renting a Dumpster for This Project?

For most of these jobs, a roll-off dumpster delivered to your driveway is the simplest, cheapest way to handle the haul. Compare local providers and get a free quote in minutes.

Find Dumpster Rental in Your City →

Contact Form Demo

Disposal Options for Old Washing Machines

Disposal Options for Old Washing Machines

You have three primary disposal routes for an old washing machine: drop it at a recycling center or scrap yard that accepts appliances, arrange retailer haul-away when purchasing a replacement, or rent a roll-off dumpster for bulk disposal during a larger cleanout. Each option works best in specific situations—recycling centers handle single appliances for free or a small fee, retailers simplify the swap process, and dumpsters make sense when you’re clearing out multiple items.

Recycling Centers and Scrap Metal Yards

Most municipal recycling centers accept washing machines at no charge or for a small drop-off fee, typically $5-15. Call ahead to confirm they take appliances and ask about any preparation requirements. Some facilities require you to remove the power cord or drain any remaining water. You’ll need a truck or trailer to transport the machine, and many centers ask you to unload it yourself at a designated appliance area.

Scrap metal yards pay you for the washing machine based on current steel prices, usually $10-30 for a standard top-loader. The payout depends on weight and metal market rates, which fluctuate. Unlike recycling centers, scrap yards focus purely on material recovery—they’ll strip out motors, drums, and metal components. Most yards accept machines “as-is” without requiring you to disassemble anything. Bring a photo ID, as many facilities require it for scrap transactions.

Retailer Haul-Away and Trade-In Programs

Major appliance retailers—Home Depot, Lowe’s, Best Buy—generally offer haul-away service when you purchase a new washing machine. The fee typically ranges from $30-50, though some retailers waive it during promotional periods or bundle it into delivery charges. The delivery crew disconnects your old machine and removes it the same day they install the new one. This eliminates the transportation problem and coordinates everything in a single appointment.

Some retailers run trade-in programs that discount your new appliance purchase when you surrender the old one. These programs are less common for washing machines than for electronics, but check during sale events or when buying energy-efficient models that qualify for rebate programs. The trade-in value rarely exceeds $25-50, but combined with haul-away convenience, it streamlines the replacement process. Confirm the details before purchase day—policies vary by location and some exclude machines older than 10-15 years.

Using a Roll-Off Dumpster for Appliance Removal

A roll-off dumpster makes sense when you’re tackling multiple disposal tasks simultaneously—renovating a laundry room, clearing out a basement, or managing an estate cleanout. Renting one becomes cost-effective when you have more than just a washing machine to discard, as you pay for container space rather than per-item hauling fees.

When Dumpster Rental Makes Sense

The math shifts in favor of a dumpster when your project generates substantial waste beyond a single appliance. Gutting a laundry room typically produces demolished drywall, old flooring, cabinetry, and potentially both a washer and dryer. A 10-yard dumpster handles this volume while sitting in your driveway for days or weeks, letting you work at your own pace instead of coordinating pickup schedules.

Estate cleanouts represent another scenario where dumpster rental outperforms other disposal methods. When emptying a deceased relative’s home, you’re often dealing with decades of accumulated belongings alongside outdated appliances. Having a roll-off dumpster onsite means you can sort through items methodically, making keep-or-toss decisions without rushing to meet a junk hauler’s appointment window. The container accepts everything from the washing machine to water-damaged cardboard boxes in the basement.

Multi-unit property managers find dumpsters particularly practical during tenant turnovers. Replacing appliances in three apartments simultaneously generates enough bulk waste to justify rental costs, and you avoid scheduling separate pickups for each unit. The container stays accessible throughout the turnover period, accommodating whatever tenants leave behind—broken furniture, old window treatments, and yes, that washing machine they swore still worked.

Preparing Your Washing Machine for Disposal

Before you move a washing machine out of your home, disconnect all water and power connections, drain any remaining water from the drum and hoses, and secure the drum if possible. Clean out the detergent dispenser and remove personal items. If you’re hauling it yourself, tape or zip-tie the power cord to the back panel so it doesn’t drag. These steps prevent water damage during transport and make the appliance safer to handle.

Disconnecting Water and Power Lines

Unplug the machine from the wall outlet first—never work around a washing machine that’s still connected to power. Turn off both hot and cold water supply valves, usually located on the wall behind the unit. Unscrew the fill hoses from the back of the machine using pliers if hand-tightening won’t budge them. Keep a bucket or towels nearby since residual water will spill out when you disconnect the hoses.

For the drain hose, pull it out of the standpipe or floor drain. If your drain hose was clamped into place, you’ll need to loosen that connection first. Tilt the machine slightly backward to let gravity empty any water still sitting in the drain line. This saves you from a puddle on your truck bed or in a roll-off dumpster later.

Draining Remaining Water

Even after disconnecting hoses, washing machines hold water in hidden spots—the pump, the drum’s bottom seal, and the drain trap. Locate the small drain filter or pump access panel near the bottom front of the machine. Place a shallow pan underneath, then slowly unscrew the filter cap. Expect anywhere from a few cups to a half-gallon of water to drain out, depending on your model.

After draining the filter, manually spin the drum a few times to shake loose any water clinging to the interior basket. Front-loaders especially trap water in the rubber door gasket—pull it back and wipe it dry. If you’re transporting the machine in freezing weather, this step matters more since trapped water can freeze and crack plastic components during the move.

Cleaning and Securing Loose Parts

Pull out the detergent drawer completely and check inside the cavity for forgotten items—lint, coins, and small socks often hide there. Wipe down the drawer slot and the exterior so whoever handles the machine next isn’t dealing with crusty detergent residue on their hands or truck.

If your washing machine has transit bolts (usually included with new machines and stored somewhere in your garage), reinstall them now. These metal rods lock the drum in place so it doesn’t bang around during transport. Without them, the drum can damage internal components or crack the outer tub if the machine tips over. No transit bolts? Wedge old towels or foam padding between the drum and the cabinet walls, then tape the door shut on front-loaders to keep everything stationary. The machine will shift less in transit and be easier to load into a dumpster rental if that’s your chosen disposal method.

What Happens to Washing Machines After Disposal

When you dispose of a washing machine, it typically enters a regulated recycling stream where trained technicians remove hazardous materials like refrigerants and mercury switches, then separate the unit into component materials. Steel drums and frames go to scrap metal processors, copper wiring gets stripped for reuse, and plastic components either enter specialty recycling facilities or landfills depending on local capabilities.

The Journey Through a Metal Recycling Facility

Washing machines arriving at scrap yards face immediate processing to maximize material recovery. Workers first drain any remaining water and remove external panels to access internal components. The motor—containing valuable copper windings—gets extracted separately from the steel housing. Modern facilities use heavy-duty shears and hydraulic crushers to break down the main drum and frame into manageable pieces.

The separated steel typically moves through magnetic sorting systems that pull ferrous metals onto conveyor belts bound for melting facilities. A single washing machine yields roughly 100-150 pounds of recyclable steel, which steel mills can process back into raw material within weeks. The drum alone, usually stainless steel or porcelain-coated steel, commands higher scrap value than standard sheet metal.

What Gets Salvaged vs. What Gets Landfilled

Electric motors, copper wiring, and aluminum components rarely see landfills—they’re too valuable. Recyclers pull motors apart to separate copper from steel casings, often recovering 5-8 pounds of copper per washing machine. Circuit boards containing small amounts of precious metals get aggregated and sent to specialized electronics recyclers who extract gold, silver, and palladium.

Plastic components present a harder problem. While the outer cabinet plastic is often recyclable, mixed plastics from hoses, knobs, and interior fittings usually end up in landfills. The rubber door gasket on front-load washers rarely finds a second life unless you removed it beforehand for reuse. Concrete counterweights in modern machines—sometimes 50-70 pounds worth—typically go straight to construction debris facilities or landfills since processing them costs more than raw concrete.

Environmental Impact of Proper Recycling

Recycling a washing machine prevents roughly 300-400 pounds of material from entering landfills while avoiding the environmental cost of mining virgin steel and copper. Steel recycling uses 60-70% less energy than producing new steel from iron ore, translating to measurable emissions reductions. Each ton of recycled steel prevents about 2,500 pounds of iron ore extraction and 1,400 pounds of coal consumption.

The real environmental win comes from refrigerant recovery in older machines. Units manufactured before 2011 may contain HFC refrigerants in their water-heating systems—substances with global warming potential thousands of times greater than carbon dioxide. Licensed recyclers capture and properly destroy these refrigerants rather than letting them escape during crushing. If you’re clearing out old appliances during a renovation and using a roll-off dumpster, keeping the washing machine separate for proper recycling ensures these refrigerants don’t vent into the atmosphere when the dumpster contents reach a landfill.

Ready to get started?

Find a Dumpster Near You


Illustration of dumpster rental for this project

Do I Need a Permit for a Dumpster?

Whether you need a permit for a dumpster depends on where you plan to place it — if the roll-off sits on private property like your driveway or yard, you typically won’t need one, but placing it on public property such as a street, sidewalk, or alley almost always requires a permit from your local municipality. This matters because skipping the permit process can result in fines, forced removal of the dumpster mid-project, or delays that stall your entire renovation or cleanup timeline. The rules vary dramatically by city and county, with some jurisdictions charging minimal fees and issuing permits within hours, while others require detailed applications, proof of insurance, and days of processing time. Understanding when you need a permit for a dumpster — and how to get one quickly — prevents costly surprises and keeps your project moving forward. This guide breaks down the placement scenarios that trigger permit requirements, walks through the typical application process, and shows you how to avoid the most common permitting mistakes that trip up homeowners and contractors.

Renting a Dumpster for This Project?

For most of these jobs, a roll-off dumpster delivered to your driveway is the simplest, cheapest way to handle the haul. Compare local providers and get a free quote in minutes.

Find Dumpster Rental in Your City →

Contact Form Demo

When Dumpster Permits Are Required

When Dumpster Permits Are Required

Most municipalities require permits when a dumpster sits on public property like streets, sidewalks, or curbs. Private property placement — your driveway, yard, or parking lot — typically needs no permit, though some cities enforce exceptions for visible containers in residential areas. The difference comes down to who owns the ground beneath the dumpster and whether local codes restrict large containers in certain zones.

Public Property vs Private Property

If your roll-off dumpster sits entirely on property you own or control, you’ll likely skip the permit process. A driveway placement rarely triggers regulations because the container occupies private space and doesn’t interfere with public access. The calculation changes the moment any part of the dumpster extends onto a public right-of-way. Streets, sidewalks, grass strips between sidewalks and curbs (often called tree lawns or parkways), and even portions of alleys usually fall under city jurisdiction.

Cities regulate public space strictly because containers block pedestrian paths, occupy parking spots, and create potential hazards for drivers and cyclists. A dumpster in the street might narrow traffic lanes or obstruct sightlines at intersections. Even a container partially overhanging a sidewalk can force pedestrians into the street. That’s why permit applications often require site diagrams showing exact placement, traffic control plans for busy roads, and proof of liability insurance. Fees typically range from $50 to $300 for a seven-to-fourteen-day permit in 2026, with daily extensions costing $10 to $25.

Local Ordinances and Restrictions

Cities layer additional rules beyond the public-private distinction. Historic districts frequently ban visible dumpsters outright or require screening with fencing or tarps. Homeowner associations enforce similar aesthetic standards, sometimes prohibiting containers in front yards or limiting rental periods to 72 hours. Coastal communities often restrict dumpster rental during peak tourist seasons to preserve street access.

Some municipalities require permits even for private property placement in specific zones. Residential neighborhoods might mandate setback distances from property lines or prohibit containers visible from the street without approval. Commercial districts may require permits for any dumpster over a certain size, regardless of placement. Fire codes add another layer — containers must maintain minimum clearances from buildings, fire hydrants, and emergency access routes. A 20-yard dumpster blocking a fire lane will get tagged for removal whether you have a permit or not.

How to Get a Dumpster Permit

Getting a dumpster permit typically requires submitting an application to your city’s building or public works department, either online or in person, with details about the dumpster size, placement location, and project duration. Most municipalities charge between $25 and $150 for the permit and require 2-5 business days for approval, though some issue permits same-day if you apply in person.

Application Process and Timeline

Start by contacting your local building department or visiting their website to access the permit application. You’ll need to provide the exact address where the dumpster will sit, measurements of the unit (a standard 20-yard roll-off dumpster runs about 22 feet long and 8 feet wide), and the dates you’ll have it on site. Many cities also ask for a site diagram showing the dumpster’s position relative to the street, sidewalk, and property lines.

Bring proof that you own the property or have permission to place a dumpster there—a lease agreement or letter from the property owner works. If the dumpster will block a parking space, bike lane, or bus stop, expect additional scrutiny and possibly denial. Some jurisdictions require you to submit photos of the proposed location or show that you’ve notified adjacent businesses if you’re working on a commercial street. Your dumpster rental company can often provide the specifications and placement details the permit office needs, which speeds up the process considerably.

Timeline

Most routine dumpster permits get approved within three to five business days if you submit everything correctly the first time. Cities with online portals often process faster—some approve within 24 hours for straightforward requests. Walk-in applications at smaller municipal offices sometimes get approved on the spot if a clerk can review everything while you wait.

Plan for delays if your project involves a busy downtown area, a historic district, or streets with heavy pedestrian traffic. These placements trigger additional review layers that can stretch approval to two weeks. Missing information causes the biggest slowdowns—an incomplete application goes to the back of the queue once you resubmit. Apply at least a week before you need the dumpster delivered. If you’re working on a tight deadline and the permit hasn’t arrived, call the department directly rather than assuming it’s approved. Operating without the permit in hand, even if you’ve applied, still counts as a violation in most places.

Avoiding Fines and Penalties

Operating without proper permits exposes you to municipal fines that typically start at $100 to $500 for first offenses but can escalate quickly with repeat violations or extended non-compliance. Code enforcement officers patrol neighborhoods and respond to neighbor complaints, so an unpermitted dumpster rarely goes unnoticed for long. The financial hit from penalties often exceeds what you’d have paid for the permit itself, and enforcement actions can halt your project until you resolve the violation.

Most municipalities impose progressive penalty structures. A first violation might carry a $150 fine with a 72-hour correction window. If the dumpster remains unpermitted after that grace period, daily fines of $50 to $250 can accrue. A homeowner who ignores an initial notice for a week could face $500 to $1,900 in accumulated penalties before even addressing the core violation.

Beyond monetary fines, code enforcement can issue stop-work orders that freeze your entire project. If you’re mid-renovation with contractors scheduled and materials ordered, a work stoppage creates a cascade of delays and additional costs. Contractors may charge standby fees while waiting for permit resolution. Your dumpster rental company may assess extension fees if the container sits longer than your initial rental period while you sort out compliance issues.

Property liens represent the nuclear option for persistent violations. Some jurisdictions place liens on properties with unresolved code violations, which must be satisfied before you can sell or refinance. This turns a simple oversight into a legal encumbrance that affects your property rights and can complicate future transactions for years.

The enforcement process usually starts with a notice of violation giving you 3 to 10 days to obtain required permits or remove the dumpster. Responding promptly at this stage typically results in minimal penalties—sometimes just the cost of the permit itself. Ignoring notices triggers the escalation process. Code enforcement doesn’t always warn you twice.

What Your Dumpster Rental Company Can Tell You

Your dumpster rental company maintains working relationships with local permitting offices and handles permit questions daily across different municipalities. They know which cities require permits for street placements, what documentation the local office typically requests, and how long approvals take in your area. Most companies will either handle the permit application on your behalf or walk you through the exact steps, fees, and timeline for your specific address.

Rental companies operate in these jurisdictions week after week. They’ve placed dumpsters on your street before, dealt with your city’s permitting staff, and encountered the same questions you’re asking. That accumulated knowledge means they can usually tell you within minutes whether you need a permit, based solely on your address and where you plan to put the roll-off dumpster.

The company’s local expertise extends beyond yes-or-no answers. They know quirks that won’t appear in municipal code: which neighborhoods have stricter enforcement, which streets are too narrow for certain dumpster sizes even with a permit, or whether your township requires the application two weeks in advance versus three business days. A national company might give you generic guidance and a phone number to call, but a regional operator who services your county regularly will have specific intel.

Many rental companies offer to obtain the permit for you as part of their service. They’ll add the permit fee to your invoice, submit the application with photos or property details, and coordinate the approval timing with your delivery date. This removes the hassle of navigating an unfamiliar government process, especially if the permit office has limited hours or requires in-person submission. The company benefits too—ensuring proper permits protects them from fines and prevents delivery delays that disrupt their schedule.

Even if they don’t handle permits directly, expect your rental company to provide the permit office’s contact information, explain what documents you’ll need (site photos, homeowner authorization, proof of insurance), and clarify how far in advance to apply. They’ll also tell you if certain placement spots—like your driveway versus the curb—let you avoid the permit requirement entirely. That guidance helps you make smarter decisions before booking, rather than discovering permit issues the morning of delivery.

More Permit Guides

Ready to get started?

Find a Dumpster Near You


Illustration of dumpster rental for this project

What Can’t Go in a Dumpster? Prohibited Items List

You cannot put hazardous materials like paint, chemicals, asbestos, tires, electronics, appliances with refrigerants, certain batteries, medical waste, or yard waste in most roll-off dumpsters — rental companies refuse these items because they require specialized disposal methods, create safety risks during transport, or violate landfill regulations that could result in steep fines. These restrictions exist for good reason: a single leaking paint can or improperly disposed battery can contaminate an entire load, forcing the hauler to reject it at the landfill and charge you disposal fees that often exceed the original rental cost. What makes these rules frustrating is that they vary by location and rental company, so an item acceptable in one county might be prohibited in another. The types of prohibited materials generally fall into categories based on environmental regulations, disposal facility requirements, and transportation safety laws. Understanding what you cannot put in a dumpster before your rental arrives prevents project delays, surprise fees, and the hassle of finding alternative disposal options mid-cleanup.

Renting a Dumpster for This Project?

For most of these jobs, a roll-off dumpster delivered to your driveway is the simplest, cheapest way to handle the haul. Compare local providers and get a free quote in minutes.

Find Dumpster Rental in Your City →

Contact Form Demo

Hazardous Materials and Chemicals

Hazardous Materials and Chemicals

Hazardous materials and chemicals pose serious risks to sanitation workers, the environment, and waste facilities. Roll-off dumpsters cannot accept substances that are flammable, corrosive, reactive, or toxic—this includes common items like gasoline, paint thinner, pesticides, and cleaning chemicals. Most dumpster rental companies will refuse pickup or charge substantial fees if hazardous materials are discovered in your container.

Flammable and Toxic Substances

Flammable liquids create fire hazards during transport and at disposal facilities. Gas cans with residual fuel, propane tanks, lighter fluid, and oil-based paints all fall into this category. Even small amounts can ignite from static electricity or compression during the compaction process. The same applies to toxic substances like antifreeze, motor oil, transmission fluid, and brake cleaner—these contaminate soil and groundwater if they leak during hauling or at the landfill.

Aerosol cans present a dual problem. They’re both flammable and pressurized, meaning they can explode when crushed. This includes spray paint, WD-40, air fresheners, and cooking sprays. The exception: completely empty aerosol cans with the nozzles removed are sometimes acceptable, but check with your provider first.

Household Hazardous Waste

Your garage and basement likely contain dozens of items that qualify as household hazardous waste. Pesticides, herbicides, and fertilizers contain concentrated chemicals designed to kill organisms—exactly what you don’t want seeping into the water table. Old batteries, whether alkaline or rechargeable, contain heavy metals like mercury, lead, and cadmium. Car batteries are particularly problematic due to their sulfuric acid content.

Cleaning supplies like drain opener, oven cleaner, and toilet bowl cleaner are highly caustic. Pool chemicals such as chlorine tablets and muriatic acid remain reactive even in small quantities. Most municipalities operate collection events or permanent drop-off sites specifically for these materials. Some retailers also accept certain items for recycling—auto parts stores typically take used motor oil and batteries, while hardware stores often accept old paint. Rather than risk contaminating a dumpster, use these free or low-cost alternatives for proper disposal.

Electronics and Appliances

Electronics and Appliances

Most electronics and appliances cannot go in a standard roll-off dumpster because they contain hazardous materials like mercury, lead, and refrigerants that require specialized handling. Items like TVs, computer monitors, refrigerators, air conditioners, and microwaves fall under e-waste regulations that mandate separate disposal channels. Violating these rules can result in fines for both you and the rental company.

E-Waste Disposal Requirements

Federal and state regulations classify most electronics as hazardous waste due to their internal components. Cathode ray tube (CRT) televisions and monitors contain up to eight pounds of lead in the glass. Fluorescent backlights in LCD screens use mercury vapor. These materials leach into groundwater when dumped in landfills, which is why the EPA prohibits their disposal in standard waste streams.

Your local municipality likely operates an e-waste collection program with drop-off sites or scheduled pickup days. Retailers like Best Buy accept electronics for recycling regardless of where you bought them—they’ll take old TVs, computers, printers, and small appliances at no charge. Manufacturers of larger items sometimes run take-back programs when you purchase a replacement. If you’re clearing out an office or dealing with bulk electronics from a renovation, dedicated e-waste recyclers will schedule pickups and provide certificates of destruction for items containing sensitive data. Before renting a dumpster for a cleanout project, separate your electronics first and arrange alternative disposal. The hour you spend doing this prevents disposal fees, potential fines, and the headache of having your dumpster rental flagged for contamination.

Automotive Fluids and Batteries

Automotive Fluids and Batteries

Automotive fluids—motor oil, transmission fluid, antifreeze, brake fluid, and gasoline—cannot go in a dumpster rental because they’re classified as hazardous waste. Car batteries are also prohibited due to their lead-acid content and potential to leak corrosive materials. These items require specialized disposal through auto parts retailers, household hazardous waste programs, or dedicated recycling centers that can handle toxic substances safely.

Most motor oil from a single oil change contains enough contaminants to pollute one million gallons of groundwater. That’s why disposal regulations treat used automotive fluids so seriously. When these liquids enter landfills through regular waste streams, they leach through soil and eventually reach water tables. The same applies to transmission fluid and brake fluid—both petroleum-based products that persist in the environment and harm ecosystems.

Antifreeze presents its own risks. The ethylene glycol in most antifreeze formulations tastes sweet, which makes accidental poisoning common among pets and wildlife. Even small amounts cause kidney failure. Many auto parts stores accept used antifreeze for recycling into new product, a closed-loop system that keeps this chemical out of landfills entirely.

Gasoline and diesel fuel create immediate fire hazards in roll-off dumpsters. The fumes alone can ignite from a discarded cigarette or spontaneous combustion in hot weather. Beyond the explosion risk, petroleum fuels contaminate everything they touch in the container, making that entire load potentially hazardous. If you’re cleaning out a garage or workshop, drain gas tanks completely before disposing of lawn equipment or generators.

Car batteries belong at auto parts retailers or scrap metal yards, not in dumpsters. Lead-acid batteries contain sulfuric acid and lead plates—both regulated as hazardous materials. Most states actually ban battery disposal in regular trash. The good news: batteries have significant scrap value. Many retailers offer a credit toward a new battery when you return the old one, and scrap yards often pay by weight for spent batteries.

Medical Waste and Biohazards

Medical Waste and Biohazards

Medical waste, biohazardous materials, and anything contaminated with bodily fluids cannot go in a standard roll-off dumpster. This includes syringes, used bandages, laboratory specimens, surgical materials, chemotherapy drugs, and items exposed to infectious diseases. These materials require specialized medical waste disposal services that follow strict regulatory protocols to prevent disease transmission and environmental contamination.

Standard dumpster rental services are not licensed or equipped to handle medical waste. The distinction matters because improper disposal can expose waste haulers, landfill workers, and the public to serious health risks. Hepatitis, HIV, and antibiotic-resistant bacteria can survive on improperly discarded medical materials for days or weeks.

Home healthcare supplies present a gray area that catches many people off guard. Unopened, unused medical supplies like gauze, gloves, or bandages are generally safe for regular disposal. Once they’ve contacted blood, wound drainage, or other bodily fluids, they become biohazardous waste requiring special handling. The same applies to adult diapers, incontinence products, and sanitary materials from home care situations.

Sharps—needles, lancets, scalpels, and broken glass from medical use—pose immediate physical danger in addition to contamination risk. Even if you place them in a puncture-resistant container, they don’t belong in a dumpster. Most pharmacies and many municipal waste facilities offer sharps disposal programs at little or no cost. Some home healthcare services provide mail-back sharps containers that meet Department of Transportation regulations for sending biohazardous materials through the postal system.

Medications, both prescription and over-the-counter, also fall outside what rental dumpsters can accept. Pharmaceutical waste can leach into groundwater at landfills, contaminating drinking water supplies. Chemotherapy drugs and antibiotics are particularly problematic—trace amounts can affect wildlife and contribute to drug-resistant bacteria. Police stations, pharmacies, and designated take-back events provide safe disposal options for unwanted medications. The DEA sponsors National Prescription Drug Take-Back Days twice yearly, though many locations accept medications year-round.

More What Can & Can’t Go in a Dumpster

Ready to get started?

Find a Dumpster Near You


Illustration of dumpster rental for this project

How to Dispose of a Dishwasher (2026 Guide)

You can dispose of a dishwasher by scheduling a bulk pickup through your local waste service, dropping it at a recycling center or landfill, selling or donating it if functional, hiring a junk removal company, or renting a roll-off dumpster during a larger renovation project. The method you choose depends mainly on whether you’re replacing just the dishwasher or tackling a full kitchen remodel, since a single appliance rarely justifies renting equipment while multiple demolition debris makes hauling it yourself impractical. Most dishwashers contain recyclable steel and copper, so disposal sites often handle them differently than regular trash—some municipalities require removal of the door latch as a safety measure, and many retailers offer haul-away when delivering your replacement. Knowing how to dispose of a dishwasher correctly saves you from code violations (some areas ban appliances in standard garbage), wasted trips to facilities that won’t accept them, and the back strain of wrestling a 100-pound metal box down basement stairs only to realize you picked the wrong disposal route. This guide covers what actually works for different scenarios, what each option costs, and the preparation steps most people miss until they’re standing in a landfill parking lot.

Renting a Dumpster for This Project?

For most of these jobs, a roll-off dumpster delivered to your driveway is the simplest, cheapest way to handle the haul. Compare local providers and get a free quote in minutes.

Find Dumpster Rental in Your City →

Contact Form Demo

Preparation: Disconnecting and Removing Your Dishwasher

Before you can dispose of your old dishwasher, you need to disconnect it from the water supply and electrical system, then physically remove it from its cabinet space. This process requires turning off two utility connections, detaching three connection points (water line, drain hose, and power), and sliding the unit out from under the counter. Most homeowners can complete this in 30-45 minutes with basic hand tools.

Shutting Off Water and Power

Locate the hot water shut-off valve under your sink — it’s typically a small valve on the line that branches toward the dishwasher. Turn it clockwise until it stops. If you can’t find a dedicated valve, you’ll need to shut off the main water supply to your kitchen. Once closed, turn on your kitchen faucet’s hot water to verify the line is off and drain any remaining pressure.

For electrical disconnection, find your home’s circuit breaker panel and flip off the breaker labeled for the dishwasher. If the breakers aren’t labeled, look for a 15 or 20-amp breaker and test by trying to start the dishwasher after flipping it off. Never assume the unit is unpowered — always verify with a voltage tester at the junction box under the sink or inside the dishwasher’s front panel before touching any wires.

Safely Removing the Unit

Open the dishwasher door and locate the mounting brackets at the top edge where the unit attaches to the underside of your countertop. Remove these screws — usually two or four — with a screwdriver. Next, access the connections at the front base by removing the kick plate. You’ll see the water supply line (typically copper or braided steel), the drain hose (rubber or plastic), and the electrical junction box.

Disconnect the water line with an adjustable wrench, keeping a shallow pan or towels nearby to catch residual water. Pull the drain hose off its connection to the sink’s garbage disposal or drain pipe. For the electrical, remove the junction box cover and disconnect the wire nuts joining the dishwasher’s wires to your home’s circuit. Once all three connections are free, slide the dishwasher forward. These units typically weigh 60-80 pounds, and older models with cast-iron pump housings can exceed 100 pounds. If you’re renting a roll-off dumpster for a larger renovation project, you can wheel the disconnected unit directly to the container rather than wrestling it into a vehicle for a separate disposal trip.

Retailer Haul-Away and Trade-In Programs

Most major appliance retailers will remove your old dishwasher when they deliver a new one, typically for $25 to $100. This service handles disconnection, removal, and proper disposal in one transaction. Some retailers waive the fee if you purchase a new dishwasher above a certain price point, while others include haul-away automatically with delivery.

What Major Retailers Offer

Home Depot charges a flat haul-away fee for dishwashers when you purchase a replacement unit. Their delivery team disconnects the old appliance, carries it out, and ensures it reaches an approved recycling facility. The service works well if you’re already buying from them, though you’ll need to schedule delivery at least a few days out. Their teams won’t haul away an old dishwasher without delivering a new one—it’s strictly a replacement service.

Lowe’s operates similarly but often bundles haul-away into their delivery fee structure. Best Buy provides appliance haul-away for major purchases, though dishwashers fall into a category where availability varies by market. The key advantage with these retailers is convenience: one appointment handles installation and removal. The drawback is timing—you’re locked into their delivery schedule, which may not work if you need the old unit out immediately. For contractors managing a kitchen renovation timeline, that delay can complicate the schedule. In those cases, arranging a dumpster rental for the broader project gives you control over when the dishwasher leaves the site.

Municipal Recycling and Special Collection Events

Many municipalities operate recycling centers that accept appliances like dishwashers for free or a minimal fee, typically $10-25. These facilities separate metal components for scrap and properly dispose of insulation, wiring, and electronic parts. Some cities also run quarterly or bi-annual special collection events where residents can drop off bulky items curbside on designated dates, eliminating the need for transport.

Start by checking your local government’s solid waste department website or calling their main office. Most counties maintain a list of accepted materials at their recycling centers, along with hours and any associated fees. Some facilities require appointments, especially for appliances containing refrigerants or oils, though dishwashers don’t fall into these restricted categories. If your dishwasher still has the power cord attached, you’ll typically receive a slightly higher scrap value since copper wiring fetches a premium.

Special collection events work differently across regions, but they follow a predictable pattern. Your city announces dates several weeks in advance — usually through utility bill inserts, municipal websites, or local news outlets. Residents place appliances at the curb on the specified morning, and collection crews pick them up throughout the day. These events handle items that regular trash service won’t touch: water heaters, refrigerators, stoves, and dishwashers. The major limitation is timing. If you’re mid-renovation and need the dishwasher gone immediately, waiting two months for the next collection day might not work. In those situations, a roll-off dumpster for the entire project or a same-day hauling service makes more sense.

One detail often overlooked: remove the dishwasher door before dropping it at a recycling center or putting it curbside. Many facilities require this for safety reasons, preventing children from becoming trapped inside discarded appliances. It takes less than five minutes with a screwdriver and eliminates potential rejection at the drop-off point.

Using a Dumpster Rental for Appliance Disposal

A dumpster rental offers the simplest solution when you’re tackling a kitchen remodel, clearing out multiple appliances, or dealing with a dishwasher that’s too bulky for curbside pickup. You rent a roll-off dumpster sized to your project, place the dishwasher inside along with other renovation debris, and the rental company hauls everything away on your schedule. This approach works particularly well when standard disposal methods aren’t available or when you’re generating enough waste to justify the container.

Most homeowners rent a 10-yard or 15-yard dumpster for kitchen projects—large enough for cabinets, countertops, flooring, and appliances without paying for unused space. The dishwasher goes in alongside everything else, eliminating multiple trips to the landfill or coordination with different pickup services. Rental periods typically run 7-14 days, giving you flexibility to work at your own pace rather than rushing to meet a single pickup date.

The upfront cost generally ranges from $250 to $450 for a week, varying by your location and container size. That price includes delivery, pickup, disposal fees, and a weight allowance—usually one to two tons for smaller dumpsters. You’re paying for convenience and capacity, which makes the most sense when you have substantial debris beyond just the dishwasher. Using a dumpster rental for a single appliance rarely pencils out unless your municipality charges high bulk item fees or offers no pickup service at all.

Before the container arrives, disconnect and move your dishwasher to an accessible spot near where the dumpster will sit—typically your driveway or street frontage. Most rental companies drop the container and leave; they’re not there to help load it. The dishwasher can go in at any point during your rental period, though placing heavier items like appliances on the bottom creates a more stable load. Remove the door if young children have access to your property, since an open dumpster with a dishwasher door creates an entrapment hazard.

Check your rental agreement for prohibited items. Some companies don’t accept appliances with refrigerants, though dishwashers don’t have this issue. A few municipalities require appliances to be separated from construction debris for recycling, which would disqualify dumpster disposal entirely. Call your rental company before booking if you’re uncertain—most can tell you immediately whether appliances are acceptable in your area and if any preparation is required.

Ready to get started?

Find a Dumpster Near You


Illustration of dumpster rental for this project

How to Dispose of a Freezer (2026 Guide)

To dispose of a freezer properly, you need to have the refrigerant professionally removed by a certified technician, then either schedule a bulk pickup through your municipal waste service, take it to a designated appliance recycling facility, or arrange removal through a retailer when purchasing a replacement unit. Most people underestimate this process—tossing an old freezer on the curb isn’t just illegal in most places, it’s an environmental hazard that can result in fines up to several hundred dollars. The refrigerants in older freezers contain chemicals that deplete the ozone layer, which is why federal law requires certified handling before disposal. This guide walks through your disposal options based on your situation, explains the refrigerant removal requirement that trips up most people, and covers how to dispose of a freezer efficiently whether you’re replacing it, clearing out a property, or finally getting rid of that non-working unit taking up garage space.

Renting a Dumpster for This Project?

For most of these jobs, a roll-off dumpster delivered to your driveway is the simplest, cheapest way to handle the haul. Compare local providers and get a free quote in minutes.

Find Dumpster Rental in Your City →

Contact Form Demo

Why Freezers Require Special Disposal

Why Freezers Require Special Disposal

Freezers contain refrigerants that deplete the ozone layer and contribute to climate change when released into the atmosphere. Federal law requires certified technicians to recover these chemicals before disposal, and most states ban freezers from landfills entirely. The foam insulation inside also contains blowing agents that pose environmental risks, making curbside pickup or standard trash removal illegal in most jurisdictions.

Refrigerant and Environmental Hazards

The refrigerant circulating through your freezer’s coils—typically R-134a in units made after 1995 or older CFCs in earlier models—acts as a potent greenhouse gas. R-134a has a global warming potential 1,430 times greater than carbon dioxide. When a freezer breaks or gets crushed in a landfill, these chemicals escape into the air.

Beyond the refrigerant lines, the polyurethane foam insulation packed between the inner and outer walls contains hydrofluorocarbons used as blowing agents during manufacturing. A standard chest freezer holds roughly two to four pounds of this foam, which releases its trapped gases when damaged. Certified recyclers use specialized equipment to extract both the liquid refrigerant and these foam-bound chemicals—a process that prevents approximately 4,000 pounds of CO2-equivalent emissions per appliance.

Federal and State Disposal Laws

Section 608 of the Clean Air Act makes it illegal for anyone to knowingly vent refrigerants during appliance disposal or servicing. Only EPA-certified technicians can recover these chemicals, and violations carry fines up to $44,539 per day. This federal baseline means you cannot legally place a freezer at the curb in any U.S. state without professional refrigerant recovery first.

State laws add another layer. California’s Appliance Recycling Act requires retailers to take back old freezers when delivering new ones. Connecticut bans all appliances containing refrigerants from landfills and incinerators. Massachusetts charges disposal facilities $10 per appliance to fund proper recycling programs. Many municipalities run seasonal collection events where certified contractors handle the refrigerant extraction—check your local solid waste district’s schedule before considering alternatives like a roll-off dumpster, which typically cannot accept appliances with intact refrigerant systems.

Municipal Pickup and Utility Programs

Municipal Pickup and Utility Programs

Most municipalities offer scheduled bulk waste collection for appliances like freezers, either as part of regular service or through special request. Contact your local waste management department to confirm eligibility, schedule a pickup date, and learn any preparation requirements — most programs require appliances to be placed curbside on specific days and may charge fees between $25 and $50 per item.

Scheduling Bulk Waste Collection

Call your city or county’s solid waste division at least a week before you need the freezer removed. Many municipalities run bulk collection on a monthly cycle tied to your regular trash route, so timing matters. You’ll typically get a specific date — say, the second Tuesday of the month — when crews handle oversized items in your zone.

Ask about preparation rules during that call. Some programs want the freezer door removed or taped shut. Others require you to place the unit no more than five feet from the curb by 6 a.m. on collection day. If your freezer weighs over 200 pounds or you’re clearing out multiple appliances during a renovation, a roll-off dumpster might prove more practical than waiting for the next scheduled bulk pickup date. Confirm whether your program includes refrigerant removal — older freezers with CFCs need EPA-certified technicians to extract coolant before disposal, and not all municipal crews provide this service.

Retailer Haul-Away and Recycling Centers

Most appliance retailers will remove your old freezer when they deliver a new one, typically for $50-$150. Municipal recycling centers also accept freezers free or for a nominal fee, though you’ll need to transport it yourself. Both options ensure proper refrigerant recovery and recycling, which federal law requires for all appliances containing coolants.

Retailer Take-Back Programs

Major appliance chains—Home Depot, Lowe’s, Best Buy—include haul-away services with most deliveries. The delivery crew disconnects your old freezer, loads it onto their truck, and handles the recycling paperwork. You pay the haul-away fee at checkout, usually as a line item separate from delivery charges.

Schedule conflicts happen. If you’re not replacing the freezer immediately or bought from a retailer without haul-away, some chains offer standalone pickup services. You call to schedule, pay the fee, and they collect the appliance within a few days. This costs more than bundled haul-away—expect $100-$200—but eliminates the logistics of moving a 200-pound appliance yourself.

Local Recycling and HHW Facilities

County recycling centers and household hazardous waste (HHW) facilities process freezers alongside other appliances. Drop-off is typically free for residents, though some charge $10-$25 per unit. Call ahead to confirm they accept freezers—not all locations have certified technicians to extract refrigerants.

You’ll need a truck or trailer to transport the freezer. Most facilities require you to unload it yourself at a designated bay. Arrive during posted hours with proof of residency; some counties restrict access to prevent commercial dumping. If you’re clearing out multiple appliances or doing a kitchen renovation, a roll-off dumpster rental makes sense for the larger job, but refrigerated appliances always require separate handling due to environmental regulations.

Using a Roll-Off Dumpster for Appliance Disposal

A roll-off dumpster works well when you’re disposing of a freezer alongside other bulky items during a renovation, cleanout, or property clearing. You get dedicated space for several days to a week, which means you can tackle the project at your own pace without rushing to meet a single pickup window. Most rental companies accept appliances in their containers, though you’ll need to confirm refrigerant removal requirements and any additional appliance fees before scheduling delivery.

When a Dumpster Rental Makes Sense

Renting makes the most economic sense when you’re already clearing out a basement, garage, or entire property. If you’re hauling the freezer plus old furniture, construction debris, or yard waste, splitting the cost across multiple disposal items brings the per-item expense down significantly. A 10-yard dumpster typically runs $300-$500 for a week in most markets, and that same container can hold roughly 3-4 refrigerators worth of space alongside other household junk.

The timing flexibility matters more than most people expect. You can prep the freezer for disposal over a weekend, coordinate refrigerant removal on your schedule, and load everything without watching the clock. Compare that to junk removal services that charge by the hour or curbside pickup that demands you have everything ready on a specific morning.

Choosing the Right Dumpster Size

A 10-yard container handles most single-appliance disposal jobs with room for additional items. That’s roughly the size of four pickup truck loads. If you’re clearing an entire kitchen during a remodel or emptying a rental property, step up to a 15 or 20-yard option. The freezer itself only takes up about 50-80 cubic feet depending on whether it’s an upright or chest model, but you want headroom for boxes, old cabinets, or other bulky waste.

Don’t oversize out of caution. A 30-yard dumpster costs $100-$200 more than a 10-yard in most areas, and you’ll pay for empty space. Walk through your project and list everything going in the container. One freezer plus a couch, some scrap wood, and household clutter fits comfortably in the smallest size. You’re adding a water heater and kitchen cabinets? Go to 15 yards.

Loading and Placement Considerations

Position the dumpster as close to your exit point as possible while keeping it on a hard, level surface. Gravel and grass work in dry conditions, but soft ground causes the container to sink once you start loading weight. Most rental companies include plywood boards to protect driveways from metal edges and weight damage—confirm this before delivery.

Load the freezer early in your rental period, ideally right after refrigerant removal when you can still move it easily. Place it in first if it’s the largest single item. Chest freezers sit flat and create a stable base for lighter debris on top. Upright models go against a wall of the container. Break down cardboard boxes flat, and fill voids with smaller items to maximize space. The dumpster rental company makes more money when they compact loads efficiently at the transfer station, so tight packing benefits everyone.

Ready to get started?

Find a Dumpster Near You


Illustration of dumpster rental for this project

How to Dispose of a Stove (2026 Guide)

To dispose of a stove, you have four main options: hire a junk removal service, schedule a bulk pickup through your municipal waste program, deliver it to a metal recycling facility, or arrange removal when a retailer delivers your replacement unit. The method you choose depends on whether your stove still works, how quickly you need it gone, and whether you’re willing to handle the physical labor of moving a 200-pound appliance down stairs or through doorways. Getting this decision wrong means either paying more than necessary or creating a safety hazard in your home while an old range sits disconnected in your kitchen for weeks. Most stoves contain valuable scrap metal and components that recycling centers will accept for free, but accessing those options requires understanding disconnection requirements and local disposal regulations. Each removal method comes with specific costs and logistics that affect your timeline and budget.

Renting a Dumpster for This Project?

For most of these jobs, a roll-off dumpster delivered to your driveway is the simplest, cheapest way to handle the haul. Compare local providers and get a free quote in minutes.

Find Dumpster Rental in Your City →

Contact Form Demo

Preparing Your Stove for Removal

Preparing Your Stove for Removal

Before moving your stove, you must disconnect it from its power or fuel source and strip away removable components. Gas stoves require shutting off the supply valve and disconnecting the flex line, while electric models need the power cut at the breaker and the cord unplugged. Remove racks, burner grates, drip pans, and control knobs to reduce weight and prevent parts from breaking loose during transport.

Disconnect Gas or Electric Lines Safely

For electric stoves, flip the dedicated breaker in your electrical panel to the off position. Pull the stove forward just enough to reach behind it—most models slide on adjustable feet. Unplug the power cord from the wall outlet. If your stove is hardwired directly into a junction box, you’ll need to remove the access panel, disconnect the wires, and cap them with wire nuts. This is a job for someone comfortable working with electrical systems, or you can hire an electrician for $75-$150.

Gas stoves demand more caution. Turn the shut-off valve behind the stove clockwise until it stops—the valve handle should sit perpendicular to the gas line. Use two wrenches to disconnect the flexible gas line: one to hold the fitting on the stove steady, the other to turn the coupling nut counterclockwise. You’ll smell a small amount of residual gas when you break the connection—this is normal. If you smell gas before you start, or if the valve won’t turn easily, call a plumber or gas technician. Gas line work isn’t worth the risk if you’re uncertain.

Clean and Remove Detachable Parts

Pull out oven racks, pizza stones, and any baking sheets you’ve stored inside. Remove burner grates and lift out the drip pans underneath—these often clip or simply rest in place. On gas stoves, burner caps and heads typically lift straight up once the grates are gone. Electric coil burners unplug from their receptacles with a firm pull and slight wiggle.

Take off control knobs by pulling them straight toward you. Most friction-fit onto metal stems, though some have small set screws on the underside. Check the storage drawer beneath the oven—pull it all the way out and lift the front edge to clear the glide tracks. All these parts can go in a box for your next stove, or into the trash if the appliance is headed for disposal. A stove stripped of loose parts weighs 50-100 pounds less and won’t rattle or shed pieces when you load it into a truck or roll-off dumpster.

Where to Recycle or Donate an Old Stove

Where to Recycle or Donate an Old Stove

Most scrap metal recycling centers accept old stoves and will often pay you for the metal content, though electric models typically fetch more than gas ranges. Call ahead to confirm acceptance policies and whether they require you to remove non-metal components like glass doors or electronic controls. Some facilities offer free pickup for appliances, while others require drop-off during specific hours.

Scrap Metal Recycling Centers

Steel and iron make up 75-85% of a typical stove’s weight, making these appliances valuable to scrap yards. Electric stoves contain additional copper wiring that increases their scrap value—you might receive $15-$40 for an electric range versus $8-$25 for a gas model, depending on current metal prices and the facility’s rates.

Before loading your stove for transport, call local recycling centers to verify their requirements. Some accept stoves as-is, while others ask you to remove the door, racks, and any attached electrical cords. Gas stoves may require documentation that the gas line was properly disconnected by a licensed professional. If you’re replacing multiple appliances during a kitchen renovation, renting a roll-off dumpster can simplify disposal since many rental services coordinate recycling for metal appliances rather than sending them to landfills.

Most scrap metal facilities operate on a first-come basis and weigh your appliance on-site. Bring a government-issued ID, as yards typically require identification for payment. If your stove still sits in an upstairs apartment or you lack a truck, check whether the recycler offers pickup service—many charge $25-$50 for this, which they may deduct from your scrap payment.

Hiring Professionals vs. DIY Disposal

Deciding between professional removal and DIY disposal depends on your stove type, physical capability, and timeline. Gas stoves always require a licensed technician to disconnect the fuel line—attempting this yourself creates explosion and carbon monoxide risks. Electric stoves are safer to disconnect and move yourself if you’re comfortable with basic electrical work, but weigh the $100-$200 professional removal cost against potential injury from moving a 200-300 pound appliance down stairs or through tight doorways.

When to Call a Professional

Gas stove disconnection isn’t optional—it’s a legal requirement in most jurisdictions. A licensed plumber or HVAC technician must cap the gas line, test for leaks, and document the work. Trying to save $75-$150 on disconnection fees puts your home and family at serious risk. Even a minor leak you don’t immediately smell can cause catastrophic damage.

Beyond gas hookups, professional removal makes sense when stairs are involved or when you’re dealing with commercial-grade appliances. A standard 30-inch residential range weighs around 200 pounds, but restaurant-quality ranges or vintage cast-iron stoves can exceed 500 pounds. Professional haulers have dollies, straps, and the experience to navigate these loads without damaging floors, walls, or themselves. They also handle disposal, which means you don’t need to research recycling centers or haul the unit yourself.

DIY Disposal Options

Electric stoves with accessible shutoffs are manageable DIY projects if you have help and proper equipment. Turn off the circuit breaker, pull the stove forward, and disconnect the power cord or hardwired connection. The actual removal requires two strong adults, furniture sliders, and a clear path—measure doorways first, because a 30-inch stove becomes 32+ inches with handles and trim.

Once disconnected, you have several disposal routes. Scrap metal recyclers often accept stoves for free and may even pay $10-$30 depending on current metal prices. Call ahead to confirm they accept appliances—some require you to remove certain components first. Curbside bulk pickup works in many municipalities, though you’ll need to schedule in advance and sometimes pay a $25-$50 fee. If you’re tackling a kitchen renovation and generating other debris, a roll-off dumpster rental handles the stove along with cabinets, countertops, and flooring, which streamlines a multi-item disposal project into one pickup.

Using a Dumpster Rental for Appliance Removal

A roll-off dumpster simplifies stove disposal when you’re handling multiple renovation tasks or clearing out several large items at once. You rent a container sized to your project, load the stove yourself on your timeline, and the rental company hauls everything away when you’re done. This approach works best when stove removal is part of a bigger cleanout rather than a standalone task.

When Renting Makes Sense

Renting a dumpster becomes cost-effective when you’re disposing of more than just a stove. Kitchen remodels generate cabinets, countertops, flooring, and multiple appliances—all items that fill a container quickly. A 10-yard dumpster typically holds three to four major appliances plus construction debris from a standard kitchen tear-out. Paying for a week-long rental (generally ranging from $300-$500 in 2026, depending on location and container size) beats making multiple dump runs or scheduling separate pickups for each item.

Home cleanouts present another clear use case. Clearing an estate or downsizing often means removing furniture, boxes of household goods, and several old appliances simultaneously. Having a dumpster on-site for a week lets you work at your own pace instead of coordinating with a hauler’s schedule or cramming everything into a single pickup window.

What You Can and Can’t Put In

Most dumpster rental companies allow standard electric and gas stoves in their containers without restrictions. The metal body, glass door, and internal components all qualify as acceptable waste. Gas stoves require the same preparation you’d do for any disposal method: disconnect the gas line and have a qualified technician cap it properly. The stove itself goes in the dumpster after disconnection.

Refrigerators and air conditioners face different rules. These appliances contain refrigerants that require EPA-certified technicians to recover before disposal. Many rental companies either prohibit them entirely or charge separate fees ($50-$100 per unit in 2026) for proper refrigerant handling. Check your rental agreement before assuming all appliances are treated equally.

Size and Timing Considerations

A 10-yard dumpster—roughly the size of a pickup truck bed, four feet high—handles most kitchen remodels that include one or two appliances. If you’re gutting multiple rooms or dealing with a full-house cleanout involving several stoves, water heaters, and other large items, a 20-yard container prevents the need for a second rental. Rental periods typically run seven days, with options to extend for additional daily fees.

Load heavy appliances like stoves first, placing them flat on the container floor. This distributes weight evenly and creates a stable base for lighter debris. Breaking down wooden cabinets or cutting drywall into smaller pieces maximizes the space around your appliances. You can fit significantly more material in a dumpster when you’re thoughtful about placement rather than just tossing items in randomly.

Ready to get started?

Find a Dumpster Near You


Illustration of dumpster rental for this project

How to Dispose of a Microwave (2026 Guide)

You can dispose of a microwave by taking it to a local recycling center that accepts e-waste, arranging a pickup through your municipal waste service (many offer appliance collection), donating it if it still works, or renting a roll-off dumpster for larger cleanouts that include multiple appliances. This matters because microwaves contain metals and components that don’t belong in standard trash—tossing one at the curb often means it ends up in a landfill where toxic materials leach into soil, or it gets rejected entirely and you’re stuck with it on your property. The right disposal method depends on whether your microwave still functions, what waste services your area provides, and whether you’re clearing out just one appliance or tackling a whole kitchen renovation. Most people don’t realize how many free or low-cost options exist for microwave disposal beyond the obvious “haul it to the dump” approach.

Renting a Dumpster for This Project?

For most of these jobs, a roll-off dumpster delivered to your driveway is the simplest, cheapest way to handle the haul. Compare local providers and get a free quote in minutes.

Find Dumpster Rental in Your City →

Contact Form Demo

Check If Your Microwave Still Works

Check If Your Microwave Still Works

Before disposing of your microwave, run a simple 30-second heating test with a cup of water. If it heats the water and the turntable rotates, the unit may still have value for donation or resale. A working microwave — even an older model — can save you disposal hassle and help someone who needs an appliance.

Test Basic Functions Before Disposal

Fill a microwave-safe cup with water and heat it for 30 seconds on high power. The water should be noticeably warm, and you should hear the magnetron (the humming component that generates heat) running consistently. Check that the turntable spins smoothly and the door latches securely with no light leaking from the seals.

Look for obvious deal-breakers: burn marks inside the cavity, a door that won’t close properly, or sparking when the unit runs. Listen for unusual grinding noises or a magnetron that cycles on and off repeatedly. These signs indicate the microwave isn’t safe to pass along, even if it technically still heats. A unit that works but has minor cosmetic issues — a broken handle, faded buttons, light scratches — can still be donated.

Donation and Resale Options

Habitat for Humanity ReStores accept working microwaves in clean condition. Call your local ReStore first, since some locations have specific wattage or age requirements. Goodwill and Salvation Army thrift stores also take functional units, though they typically won’t accept microwaves older than 10 years or those with visible damage.

For resale, list working microwaves on Facebook Marketplace or Craigslist for $20-50 depending on age and features. College students moving into dorms and people furnishing first apartments actively search for cheap microwaves. Take a clear photo showing the interior and control panel, and mention the wattage in your listing. Most units sell within a week if priced under $40. If no one bites after two weeks and you’re clearing out a kitchen during a larger renovation project, a roll-off dumpster handles the microwave along with other debris — just verify with your rental company that small appliances are allowed.

Recycling Your Old Microwave

Recycling Your Old Microwave

Recycling centers, retail stores, and local programs accept microwaves for responsible disposal. Most municipalities run e-waste collection events quarterly or monthly where residents drop off small appliances at no cost. Major retailers like Best Buy and Home Depot operate permanent take-back programs—you walk in with your old microwave, and they handle the recycling regardless of where you bought it.

Where to Recycle Small Appliances

Your city or county’s solid waste department typically runs the most accessible recycling program. Check their website for a permanent drop-off location—many maintain year-round facilities that accept microwaves during regular business hours. You’ll find these centers often share space with hazardous waste facilities, accepting everything from laptops to coffee makers in the same visit.

Retail take-back programs work well if you’re replacing your microwave. Best Buy accepts up to three items per household per day, with microwaves falling under their free haul-away service when you purchase a replacement. Even without buying new, you can drop off a microwave at their customer service desk. Lowe’s and The Home Depot run similar programs, though policies vary by location—call ahead if you’re making a special trip.

Scrap metal recyclers pay for appliances in some areas, though the payout rarely exceeds a few dollars. The advantage here isn’t financial—it’s knowing the steel cabinet and copper components get extracted for reuse. Search “scrap metal recycler near me” and call to confirm they accept microwaves. Some require you to remove the electrical cord first; others take the unit intact. If you’re already clearing out multiple large items like water heaters or old washing machines, a roll-off dumpster from a local rental company might make sense for a whole-house cleanout, though most services specifically prohibit electronics without prior arrangement.

Using a Dumpster Rental for Appliance Disposal

Using a Dumpster Rental for Appliance Disposal

A roll-off dumpster makes sense when you’re clearing out multiple appliances or handling a larger cleanout project. Most rental companies accept microwaves in standard household debris containers, though you’ll want to confirm electronics policies before booking. This option costs more upfront than curbside pickup but saves multiple trips and lets you work on your own timeline.

Renting a dumpster works best when the microwave is part of a bigger project—a kitchen remodel, estate cleanout, or whole-house renovation. Paying for a container just to toss one appliance rarely pencils out. But if you’re already filling a bin with old cabinets, carpeting, or construction debris, throwing in the microwave takes no extra effort or cost.

Most rental periods run 7-14 days, giving you plenty of time to sort through items and load everything at once. The container sits in your driveway, so there’s no rushing to meet a pickup window or worrying about what day to set items at the curb. You control the pace.

Size matters here. A 10-yard dumpster (roughly the size of four pickup truck beds) handles most residential cleanouts that include a few appliances. A 20-yard works for full kitchen gut jobs or estate sales with furniture and multiple electronics. Going bigger than you need just means paying for empty space—rental costs generally range from $300-$600 depending on size and location in 2026.

Before the container arrives, ask specifically about electronics. Some haulers treat microwaves like any other household item. Others charge a small surcharge for appliances with electronic components, typically $10-$25 per unit. A few won’t accept them at all and require separate e-waste handling. Getting clarity upfront prevents surprises when the driver shows up for pickup.

Place the microwave near the back of the container where it won’t get buried under heavier debris. This makes it easier for the sorting facility to pull out recyclable components. If you’re disposing of other electronics—old TVs, computer monitors, printers—group them together in one section. Haulers appreciate when e-waste is visible and accessible rather than crushed under demolition material.

Preparing Your Microwave for Disposal

Before disposing of your microwave, unplug it and let it cool completely if recently used. Wipe down the interior and exterior to remove food residue and grease. Remove the glass turntable and any detachable parts—these may need separate disposal. Check local regulations about whether microwaves require special handling as electronics waste in your area.

Cleaning and Safety Precautions

A quick cleaning makes handling easier and prevents attracting pests during transport or storage. Use a damp cloth with mild soap to wipe the cavity, paying attention to splatters on the ceiling and walls. The exterior only needs a simple wipe-down to remove dust and kitchen grime.

Never attempt to disassemble the microwave yourself. Even unplugged units can retain electrical charge in the high-voltage capacitor for weeks. The magnetron and other internal components contain materials that require professional handling. If you’re curious about the internal components, leave that work to qualified recyclers or repair technicians.

Removing and Disposing of Turntables

Glass turntables and their plastic support rings separate easily from most microwaves. Pull the turntable straight up, then lift out the roller ring underneath. Both pieces typically go in standard trash or recycling, depending on your municipality’s glass and plastic policies.

Some turntables are tempered glass, which doesn’t belong in glass recycling bins. If your turntable broke during removal, wrap the shards in newspaper or cardboard and tape the package securely. Mark “broken glass” clearly on the outside. If you’re renting a roll-off dumpster for a larger home cleanout project, intact or broken turntables can go in with other household items—just place them where they won’t shatter and create hazards for anyone handling the load.

Securing Loose Parts and Cords

Wrap the power cord around the microwave body or tape it to the back panel. Loose cords create trip hazards during transport and can snag on other items. Use packing tape or zip ties—avoid duct tape, which leaves sticky residue.

If your microwave has a removable door or any panels that came loose during use, secure them with tape or remove them entirely. Doors with broken latches should be taped shut. For appliances headed to a dumpster rental or curbside pickup, stable packaging prevents the unit from shifting and potentially damaging other items or creating unsafe conditions for collection crews.

Ready to get started?

Find a Dumpster Near You