Construction site cleanout is the systematic process of removing debris, materials, and waste from a job site during or after a building project, typically requiring a roll-off dumpster, coordinated disposal schedules, and clear protocols to keep the site safe, compliant with regulations, and ready for the next phase of work. Without a solid cleanout plan, projects face delayed inspections, safety hazards from accumulated scrap and packaging, and unexpected costs when crews spend billable hours hauling trash instead of building. The difference between a smooth final walkthrough and a scramble to pass inspection often comes down to how debris gets managed from day one. What follows breaks down the phases of an effective construction site cleanout, the materials you’ll handle, how to choose the right dumpster size and service, and the common mistakes that turn a routine task into a expensive problem.
Renting a Dumpster for This Project?
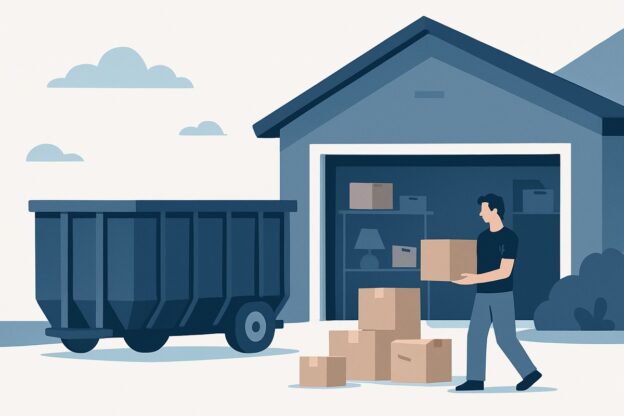
For most of these jobs, a roll-off dumpster delivered to your driveway is the simplest, cheapest way to handle the haul. Compare local providers and get a free quote in minutes.
Find Dumpster Rental in Your City →
What Construction Site Cleanout Involves
What Construction Site Cleanout Involves
Construction site cleanout removes all debris, materials, and waste generated during building or demolition work, preparing the site for the next phase or final handoff. This process requires identifying debris types, estimating volumes accurately, and following safety protocols and local disposal regulations. Most projects generate mixed waste streams that need sorting, and volumes typically range from 10 to 40 cubic yards depending on project scope.
Debris Types and Volume Estimates
Construction sites produce distinct categories of waste that affect disposal methods and costs. Wood scraps, drywall offcuts, and packaging materials make up the bulk of light debris on new construction projects. Demolition work adds concrete chunks, asphalt, brick, metal framing, and roofing materials to the mix. Hazardous materials like asbestos-containing insulation, lead paint chips, or contaminated soil require separate handling and cannot go in a standard roll-off dumpster.
Volume estimation prevents mid-project scrambles for additional disposal capacity. A 2,000-square-foot home renovation typically generates 15-20 cubic yards of debris. Commercial demolition produces roughly one cubic yard of waste per 50-75 square feet of demolished space, though this varies wildly based on building construction—a steel-frame building yields less volume than one with masonry walls. Framing waste is deceptively bulky; a single floor’s worth of lumber scraps and sheathing cutoffs can fill a 20-yard container despite weighing relatively little.
Safety and Compliance Requirements
Job sites must maintain clear pathways and staging areas throughout cleanout operations. OSHA requires debris removal when accumulation creates trip hazards or blocks emergency exits. Placing a dumpster rental within 50 feet of active work areas reduces the temptation to create unauthorized debris piles, which become safety violations during inspections. The container needs positioning on stable ground with adequate clearance—12-15 feet of vertical space for truck access and no overhead power lines in the swing path.
Local regulations dictate what goes where. Most municipalities ban mixing construction debris with household garbage, and many require sorting recyclables like metal, clean wood, and cardboard. Building permits often include waste management plans specifying disposal methods for each material type. Violating these requirements triggers stop-work orders or fines that exceed proper disposal costs by several multiples. Documentation matters too—keep weight tickets and disposal receipts for permit closeout and potential LEED certification requirements.
Choosing the Right Roll-Off Dumpster
Choosing the Right Roll-Off Dumpster
Selecting the right dumpster size depends on your project scope, debris type, and site constraints. Most residential remodels need 10-20 yard containers, while commercial construction typically requires 30-40 yard roll-off dumpsters. Match the container to your specific waste volume rather than guessing — an undersized dumpster means extra haul fees, while oversizing wastes money on unused capacity.
Dumpster Sizes for Construction Projects
A 10-yard dumpster holds roughly three pickup truck loads and works for small bathroom renovations or single-room demolitions. You’ll see these on projects generating 2-3 tons of debris — think tearing out old cabinets, removing carpet and padding, or replacing a small deck. The compact footprint (typically 14 feet long by 8 feet wide) fits in tight driveways and urban job sites.
The 20-yard container is the workhorse for medium residential projects. It handles full kitchen gut jobs, multi-room flooring replacements, or roof tear-offs up to 3,000 square feet. At about 4-5 tons capacity, this size accommodates most single-family home renovations without requiring a swap. Framers doing additions frequently use 20-yarders for lumber scraps, drywall cutoffs, and general construction waste as the job progresses.
Commercial projects and large-scale demolitions need 30-yard or 40-yard dumpsters. A 30-yard container (16 feet long) handles whole-house cleanouts, major commercial remodels, or new construction framing for buildings up to 5,000 square feet. The 40-yarder — holding up to 8 tons — works for full building demolitions, large roof replacements on commercial structures, or site development projects with substantial concrete and asphalt removal. These larger containers need significant clearance: expect to provide 60 feet of straight-line access for the delivery truck and at least 23 feet of vertical clearance for the hydraulic lift system.
Weight limits matter more than volume for dense materials. A 20-yard dumpster filled with concrete or brick hits the typical 3-4 ton weight limit while still half-empty by volume. For heavy debris, rent a smaller container and plan for multiple hauls, or negotiate a dumpster rental agreement that specifies cost per ton above the base weight allowance.
Managing Hazardous and Special Waste
Construction sites generate materials that standard roll-off dumpsters cannot legally accept. These include paint, solvents, asbestos-containing materials, certain adhesives, batteries, fuel containers, and chemically-treated lumber. Mixing these items with regular debris creates liability issues, potential fines from $2,500 to $25,000 per violation, and forces disposal facilities to reject entire loads—leaving you to sort and re-haul everything at your expense.
Identifying Prohibited Materials on Site
Walk your site before ordering a dumpster rental and flag items that need separate handling. Look for aerosol cans (even empty ones contain propellants), fluorescent bulbs containing mercury, oil-based stains, and anything labeled “flammable,” “toxic,” or “corrosive.” Pressure-treated wood from demolition falls into a gray area—lumber treated before 2004 often contains arsenic and requires specialized disposal in many jurisdictions, while newer treated wood typically goes in standard construction waste streams.
The trickiest items are those that seem harmless. Old ceiling tiles might contain asbestos. HVAC refrigerant lines need professional recovery before disposal. Lead paint chips from pre-1978 buildings trigger strict EPA regulations if they exceed certain thresholds. When in doubt, separate it out.
Setting Up Segregation Systems
Create designated staging areas away from your main dumpster for questionable materials. Use clearly labeled drums or bins—a 55-gallon drum for liquid waste, a separate container for aerosols, another for electronics. This prevents the common mistake of tossing a paint can into a dumpster at 4:45 PM on Friday, contaminating two tons of clean debris.
Train your crew to ask before disposing. The few minutes spent checking saves hours of sorting rejected loads. One superintendent I know uses a simple system: “If it plugs in, has a warning label, or smells like chemicals, it stays out of the dumpster.” That rule catches 90% of problem items before they become expensive mistakes.
Working with Specialized Haulers
Most regions have hazardous waste collection services that visit construction sites on scheduled routes, similar to regular trash pickup but with proper handling protocols. These services typically charge per container type—around $75-$150 per drum for liquid waste, $50-$100 for aerosol disposal, and $200-$400 for asbestos removal depending on volume. Schedule pickups before the material accumulates to the point where it creates storage problems.
For larger projects, consider contracting with an environmental services company that provides on-site containers and regular servicing. They handle documentation, ensure regulatory compliance, and often cost less than emergency hazmat hauling when you discover prohibited items mixed into your regular waste stream. The documentation they provide also protects you during inspections or if disposal questions arise years later during property transactions.
Timing Your Cleanout for Project Efficiency
Most construction projects benefit from a rolling cleanout schedule rather than a single end-of-project push. Schedule debris removal at the completion of major phases — after demolition, rough framing, drywall, and final finishes — to keep the site accessible and prevent secondary damage from accumulated waste. This phased approach maintains workflow, reduces safety incidents, and often costs less than emergency cleanouts when debris blocks critical work.
Schedule Around Critical Milestones
Debris interferes with inspections. Building inspectors need clear sight lines to structural elements, electrical panels, and plumbing rough-ins. A framing inspection with sawdust covering floor joists or drywall scraps blocking junction boxes creates delays. Plan your first major cleanout for the day before any scheduled inspection. This gives your crew time to address obvious deficiencies the inspector might flag rather than scrambling after a failed inspection.
Material deliveries become problem events when yesterday’s waste hasn’t been cleared. A lumber truck can’t unload efficiently if the driver has to navigate around broken concrete chunks or discarded formwork. The typical drywall delivery — 100+ sheets on pallets — requires staging space near the entry point. When crews need to relocate debris piles before accepting delivery, you’re paying workers to move trash instead of installing materials. Position a roll-off dumpster before major material drops and clear the previous phase’s waste completely.
Coordinate with Subcontractor Transitions
The gap between trades is your cleanout window. When electricians finish roughing in and plumbers are scheduled to start in three days, those three days should include debris removal. Each trade generates distinct waste streams — electricians leave wire scraps and box cutouts, plumbers leave pipe offcuts and fittings packaging. Letting these layers accumulate creates archaeology projects later where workers waste time sorting through mixed debris to find what can be salvaged.
Overlapping trades amplify debris problems. If your HVAC installer arrives before the framing crew’s waste is cleared, ductwork gets laid over debris piles. Workers then relocate the ducts to clear the waste, handle the waste, and reposition the ducts. You’ve paid for the same material handling three times. A simple coordination rule prevents this: no new trade starts until the previous trade’s area is cleaned and their waste is staged for removal.
Account for Weather and Access Constraints
Wet debris weighs significantly more than dry debris. Standard construction waste roughly doubles in weight when saturated. This affects both dumpster rental weight limits and hauling logistics. If rain is forecast, either schedule your cleanout before the weather hits or plan for heavier loads and potentially higher disposal costs. Covering debris piles with tarps works for short delays but becomes impractical for multi-week stretches.
Site access changes throughout a project. Early demolition phases might allow debris loading from multiple points with direct equipment access. Once new construction begins, you’re often limited to a single entry point and hand-carrying debris around completed work. The same volume of waste that took four hours to remove during demolition might require eight hours later. Schedule heavy debris removal — concrete, masonry, soil — while you still have equipment access. Leave lighter materials like packaging and drywall scraps for phases when access tightens.
More Cleanout & Project Guides
- Whole Home Declutter Dumpster: Guide & Checklist
- Moving Cleanout Dumpster: Size Guide & Checklist
- Estate Cleanout Dumpster: Size Guide & Checklist
- Garage Cleanout: Dumpster Size Guide & Checklist
- Home Remodel Debris Removal: Dumpster Guide
- Attic Cleanout: Dumpster Size Guide & Checklist
- Garage Demolition Debris Removal: Dumpster Guide
- Fence Removal Debris Removal: Dumpster Guide
- Pool Removal Debris Removal: Dumpster Guide
- Shed Demolition Debris Removal: Dumpster Guide
- Deck Removal Debris Removal: Dumpster Guide
- Flooring Removal Debris Removal: Dumpster Guide
- Post-construction Cleanout: Dumpster Size Guide & Checklist
- Roofing Debris Removal: Dumpster Guide
- Kitchen Renovation Debris Removal: Dumpster Guide
- Bathroom Renovation Debris Removal: Dumpster Guide
- Rental Property Cleanout: Dumpster Size Guide & Checklist
- Spring Cleaning Cleanout: Dumpster Size Guide & Checklist
- Whole House Cleanout: Dumpster Size Guide & Checklist
- Remodel Dumpster Rental: How to Choose the Right Size and Service for Your Home Renovation
Ready to get started?
Find a Dumpster Near You