A garage cleanout involves systematically removing unwanted items, organizing what you’re keeping, and disposing of junk through donation, recycling, or hauling services—typically requiring a roll-off dumpster for efficiency if you’re tackling years of accumulated clutter in one go. Most homeowners underestimate the time and physical effort involved, then find themselves overwhelmed when they realize a Saturday afternoon won’t cut it for a space that’s become a catch-all for broken furniture, old paint cans, and mystery boxes from three moves ago. The decision to finally clear out your garage usually comes from a specific trigger: needing the space for a workshop, preparing to sell your home, or simply being unable to park your car where it belongs. What separates a successful garage cleanout from an abandoned half-effort comes down to having a clear sorting system, knowing your disposal options before you start, and being ruthlessly honest about what actually deserves to stay.
Renting a Dumpster for This Project?
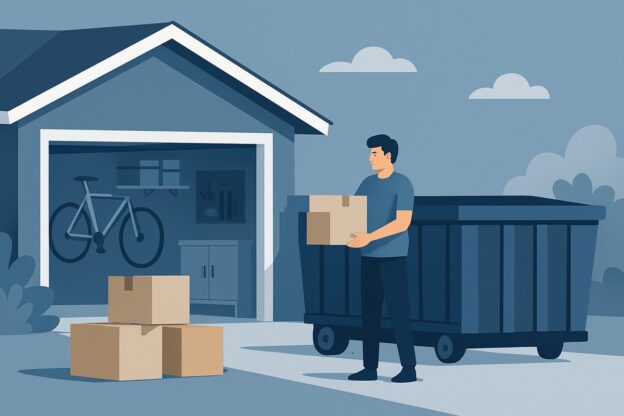
For most of these jobs, a roll-off dumpster delivered to your driveway is the simplest, cheapest way to handle the haul. Compare local providers and get a free quote in minutes.
Find Dumpster Rental in Your City →
Planning Your Garage Cleanout
Planning Your Garage Cleanout
Planning transforms a garage cleanout from an overwhelming weekend project into a manageable process. Start by sorting everything into clear categories—keep, donate, sell, and trash—then calculate how much debris you’ll generate to secure the right disposal method. Most homeowners underestimate volume by half, so measure your space and multiply by the percentage you’re clearing out before committing to a dumpster size.
What to Keep and What to Toss
Apply the eighteen-month rule: if you haven’t used something in a year and a half, you won’t miss it. Exceptions exist for seasonal equipment (snow blowers in warm months, beach gear in winter) and sentimental items, but that camping stove you swore you’d fix three years ago? Gone. Tools you actually use, functioning sports equipment, and items with genuine resale value earn their shelf space. Everything else becomes clutter that’ll creep back into the corners within six months.
Create four distinct zones in your driveway or yard. Trash goes in one area—broken furniture, cracked storage bins, moldy cardboard boxes, paint cans dried solid. Donations get another spot: clothes that still fit someone, working appliances, books your kids outgrew. Set aside obvious resale items like power tools, bikes, or vintage signs. What remains goes back inside, but be ruthless. That bread maker gathering dust since 2019 isn’t suddenly going to start earning its square footage.
Choosing the Right Dumpster Size
A 10-yard dumpster handles cleanouts where you’re tossing maybe 30% of what’s in a standard two-car garage—think broken shelving, accumulated junk, and bags of trash. This size works when you’re organizing more than purging. A 20-yard dumpster suits full-scale cleanouts where you’re clearing 60% or more, especially if you’re disposing of bulky items like old water heaters, workbenches, or multiple filing cabinets.
Measure your pile before calling for a dumpster rental. Stack everything you’re tossing in your driveway and estimate the footprint. A 10-yard dumpster holds roughly three pickup truck loads; a 20-yard holds six. Round up if you’re demolishing built-in storage or dealing with dense materials like concrete blocks or stacks of old tile. Running out of room mid-project means either a second rental or that pile of debris sitting in your yard for another week while you wait for pickup.
Sorting and Removing Debris Efficiently
Sorting and Removing Debris Efficiently
Most garage debris splits into three simple categories: trash for the dumpster, items worth donating or selling, and things you’ll keep. Start by clearing a staging area where you can physically separate everything, then work section by section rather than bouncing around randomly. This systematic approach prevents the common mistake of shuffling the same boxes five times without making real progress.
Handling Hazardous Materials Safely
Paint cans, motor oil, antifreeze, pesticides, and old batteries cannot go in a standard roll-off dumpster. These materials require separate disposal through your municipality’s hazardous waste program. Most counties run collection events quarterly or maintain permanent drop-off sites—check your local solid waste authority’s website for schedules and accepted items.
Aerosol cans present a gray area. Empty cans with no pressure remaining typically qualify as regular trash, but half-full cans of spray paint or starting fluid need hazardous disposal. Press the nozzle—if nothing comes out and you hear no hiss, it’s empty. Propane tanks, even small camping cylinders, also require special handling. Many hardware stores and propane retailers accept them for exchange or proper disposal, sometimes for a small fee.
Old fluorescent bulbs and compact fluorescents contain mercury. Home improvement stores often have free recycling bins near the entrance. Car batteries have value—auto parts stores will take them at no charge and some pay a core deposit. The same goes for used motor oil: most quick-lube shops and auto parts retailers accept it free. Separating these materials before your rental dumpster arrives saves you from contaminating a full load, which can trigger disposal surcharges or rejection at the landfill.
Dumpster Rental for Garage Projects
A roll-off dumpster removes the biggest friction point in garage cleanout: figuring out what to do with everything you’re getting rid of. Instead of making multiple dump runs, sorting items for different disposal methods, or waiting weeks for bulk trash pickup, you throw everything into one container and have it hauled away when you’re done.
Most garage projects work well with a 10-yard or 15-yard dumpster. A 10-yard handles the typical single-car garage worth of accumulated stuff—old paint cans, broken tools, cardboard boxes, and a few pieces of unwanted furniture. Move up to a 15-yard if you’re clearing a two-car garage or dealing with heavier debris like old workbenches, metal shelving units, or construction materials from a partial renovation.
Rental periods typically run seven to ten days, though many companies offer flexible scheduling. That timeline works for most people tackling a garage on weekends—you can work at your own pace without the pressure of same-day disposal. If you’re methodical and the project takes longer, you can usually extend for an additional fee.
The container sits in your driveway, ideally positioned close to the garage door. You want it near enough to minimize carrying distance but with clearance for the delivery truck (about 60 feet of straight access with 14 feet of overhead clearance for the boom). Place plywood under the dumpster if you’re concerned about driveway staining or surface damage, though this matters more with asphalt than concrete.
Most dumpster rentals for garage projects generally range from $300 to $500 in 2026, varying by location and size. That price typically covers delivery, pickup, disposal fees for a set weight limit (often one to two tons), and the rental period. You’ll pay overage fees if you exceed the weight limit—usually $50 to $100 per ton—so estimate your debris volume honestly when ordering.
What you can’t put in: hazardous materials like oil-based paint, pesticides, car batteries, or propane tanks. Most companies also prohibit tires and electronics. These items require separate disposal through hazardous waste facilities or retailer take-back programs. Everything else—broken furniture, scrap wood, metal shelving, old sports equipment, boxes of miscellaneous junk—goes in the dumpster without sorting.
After the Cleanout: Organizing Your Garage
A clean garage stays functional only if you establish systems that prevent clutter from returning. The key is creating designated zones for different activities and storage types, then using vertical space and proper containers to keep everything accessible and visible. Most people who skip this step find their garage just as messy within six months.
Create Functional Zones
Divide your garage into distinct areas based on how you actually use the space. A sports equipment zone near the door makes sense if your kids grab bikes and balls daily. Lawn care equipment belongs near the garage door you use to access the yard. Seasonal storage can occupy harder-to-reach corners because you only need it a few times per year.
Mark these zones on the floor with tape or paint if it helps you commit to the system. One homeowner I know uses different colored floor sections — blue for automotive, green for yard tools, red for sports gear. It sounds excessive until you realize his three teenagers can now find anything without asking.
Maximize Vertical Storage
Wall-mounted systems reclaim the most usable space after a cleanout. Pegboards work well for hand tools and small items you reach for frequently. Slatwall panels with adjustable hooks accommodate everything from ladders to garden hoses. Heavy-duty shelving units should mount to wall studs, not just drywall, especially if you’re storing paint cans or bulk supplies.
Overhead racks make sense for items you use seasonally — holiday decorations, camping gear, winter sports equipment. Install them high enough to clear your car but low enough that you can safely retrieve bins without a ladder. The 4×8-foot ceiling racks hold roughly 600 pounds when properly installed, enough for most household seasonal storage.
Label and Containerize
Clear plastic bins beat cardboard boxes because you can see what’s inside without opening them. Label all four sides of each bin, not just the top — you’ll often stack them or view them from different angles. Use a label maker if your handwriting is hard to read in dim garage lighting.
Group similar items together: all automotive fluids in one bin, all camping cookware in another, all pet supplies in a third. This sounds obvious, but most garages accumulate random catch-all boxes that become useless after a few months. If you can’t describe a bin’s contents in three words or less, it’s too broad a category.
Skip the bins entirely for items you use weekly. Bikes, frequently-used tools, and active sports equipment should hang on hooks where you can grab them in seconds. Containerizing something you touch often just creates an extra step that you’ll eventually ignore.
Ready to get started?
Find a Dumpster Near You