Author Archives: houston.barnettgearhart

Illustration of dumpster rental for this project

Dumpster Rental Cost: Hidden Fees to Watch For

Hidden fees in dumpster rental typically include overage charges when you exceed weight limits, extended rental fees if you keep the container longer than agreed, permit costs in municipalities that require them, certain prohibited material surcharges, and delivery fees to remote locations — costs that can add 30-50% to your quoted price if you’re not prepared. Most renters discover these charges only after the job is done, when disputing them becomes nearly impossible and the bill has already hit your account. The gap between the advertised rate and final invoice happens because base quotes usually cover only the container drop-off, a standard rental period, and a weight allowance that’s easier to exceed than you’d think. Understanding common dumpster rental hidden fees before you book means you can ask specific questions up front, compare true total costs between companies, and structure your project timeline to avoid the penalties that catch most first-time renters. The difference between a transparent rental company and one that profits from surprise charges often shows up in how they explain weight limits and what “included” actually means.

Renting a Dumpster for This Project?

For most of these jobs, a roll-off dumpster delivered to your driveway is the simplest, cheapest way to handle the haul. Compare local providers and get a free quote in minutes.

Find Dumpster Rental in Your City →

Contact Form Demo

Common Hidden Fees in Dumpster Rentals

Common Hidden Fees in Dumpster Rentals

The two most common hidden fees in dumpster rentals are overage charges when your debris exceeds the weight limit, and extended rental fees when you keep the container longer than your initial rental period. Both can significantly increase your final bill—overage fees typically range from $40 to $100 per ton over the limit, while extension fees generally run $5 to $15 per day.

Overage and Weight Limit Charges

Most roll-off dumpster rentals include a weight allowance—usually 1 to 10 tons depending on container size. The problem is that estimating debris weight before you start a project is nearly impossible for most people. A 10-yard dumpster filled with heavy materials like concrete, dirt, or roofing shingles can easily exceed a 2-ton limit, even though it looks half-empty.

Rental companies weigh the container at the landfill after pickup. If you’re over the included weight, you’ll see an overage charge on your final invoice. These charges aren’t technically hidden—they’re disclosed in contracts—but many customers don’t realize how quickly weight adds up. A bathroom remodel that includes tile, drywall, and an old cast-iron tub can generate 3-4 tons of debris. Ask your rental company for weight guidance specific to your materials before loading, and consider a larger container with a higher weight limit if you’re working with dense materials.

Extended Rental Period Fees

Standard rental periods usually run 7 to 14 days, which sounds generous until your project hits a delay. Maybe the contractor gets behind schedule, or weather pushes back your timeline, or you simply underestimated how long demo would take. Each day beyond your included rental period adds a daily fee to your bill.

What catches people off guard is how these fees accumulate. At $10 per day, a two-week delay adds $140 to your cost. Some companies offer discounted weekly extension rates if you call ahead, but daily fees kick in automatically if you don’t. The best approach is to be realistic about your project timeline when booking. If you’re doing the work yourself on weekends, a 14-day rental might not be enough. Call the rental company if you see a delay coming—extending proactively often costs less than letting fees pile up.

How Rental Companies Calculate Extra Costs

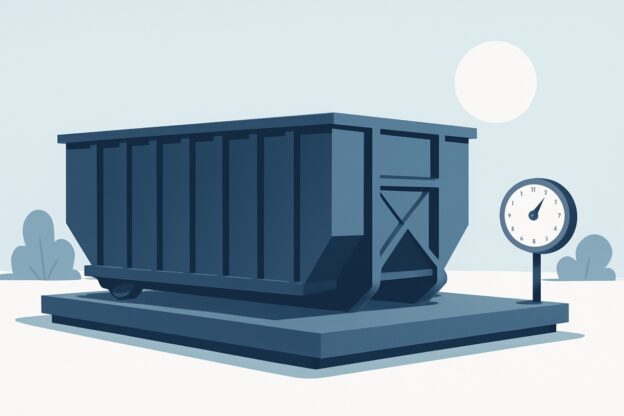
Rental companies measure your debris weight at the landfill or transfer station, then compare it against your container’s tonnage allowance. If you exceed that limit, they apply a per-ton overage rate to the extra weight. Most companies set allowances between one and three tons for residential containers, with overages typically ranging from $50 to $100 per additional ton in 2026.

Tonnage Limits and Overage Formulas

Your quoted price includes a weight threshold built into the base rate. A 10-yard roll-off dumpster might come with a two-ton allowance, while a 20-yard container often allows three to four tons. The allowance varies by company and container size—smaller dumpsters usually carry lower limits because they’re priced for lighter debris like household cleanouts.

The overage formula itself is straightforward: (Total Weight – Included Tonnage) × Per-Ton Rate = Overage Fee. If you rent a container with a three-ton limit and dispose of 4.5 tons of construction debris, you’ll pay for 1.5 tons of overage. At $75 per ton, that’s $112.50 added to your final bill. Some companies round up to the nearest half-ton or full ton, which can push a 3.2-ton load into a four-ton billing tier. Ask whether your rental company rounds weight measurements and at what increment—this detail can mean the difference between a small overage and a significant one.

Questions to Ask Before You Rent

Questions to Ask Before You Rent

Before signing anything, ask the rental company to specify all charges in writing, confirm weight limits and what qualifies as prohibited materials, clarify their damage policy for containers, and get their overage fees on record. You want documentation of the final price, not estimates that balloon later. These questions force transparency and give you a paper trail if disputes arise.

What’s Actually Included in the Base Price?

The quoted rate should cover delivery, pickup, and a specific tonnage allowance for your rental period. Ask the company to break down exactly what that number includes. Some providers bundle seven days of rental with two tons of debris. Others might include ten days but only one ton, or they might charge separately for drop-off and retrieval.

Get clarity on whether fuel surcharges, environmental fees, or taxes appear as add-ons or get rolled into the quote. A company quoting “$350” might mean $350 all-in, or they might mean $350 plus a 15% environmental recovery fee, plus tax, plus a fuel adjustment. Those details matter when you’re comparing options.

How Do They Calculate Overages?

Most roll-off dumpster rentals include a weight allowance measured in tons. Once you exceed that limit, the company charges per ton or per hundred pounds over. The rates vary wildly—anywhere from $40 to $100+ per additional ton depending on your market and the material type.

Ask for the overage rate upfront and confirm how they weigh the container. Do they use certified scales? Do you get documentation of the weight? Some operations estimate based on volume and material type, which leaves room for interpretation. If you’re tackling a concrete demolition or a full-house cleanout, those overages can add hundreds of dollars. Knowing the math beforehand lets you gauge whether you need a larger container or should plan multiple lighter loads.

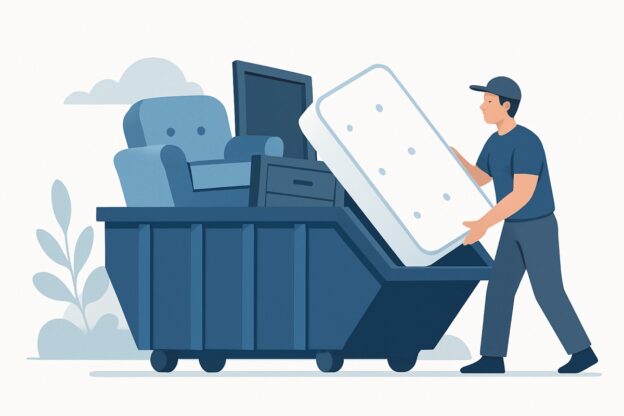
What Materials Are Prohibited, and What Happens if You Break the Rule?

Every dumpster rental has a no-go list: hazardous waste, batteries, tires, certain electronics, and sometimes liquids or appliances containing refrigerants. The company should provide this list before delivery. If prohibited materials end up in the container, you’ll typically face a contamination fee—often $100 to $500—plus the cost of proper disposal.

Ask specifically about gray-area items. Paint cans cause confusion. Empty, dried-out latex paint cans are usually fine. Wet paint or oil-based paint? That’s a problem. Same with old mattresses, which some providers accept and others refuse. If you’re unsure whether something belongs in the bin, get a definitive answer before loading it. Contamination fees aren’t negotiable once the driver spots the issue.

Are There Additional Charges for Extending the Rental Period?

A standard rental period typically runs seven to ten days. If your project runs long, extension fees kick in—usually $5 to $15 per day, though some companies charge weekly blocks. That sounds minor until a two-week delay turns a $300 rental into a $450 one.

Confirm the extension policy before delivery, especially if your timeline isn’t firm. Some providers include grace periods; others start charging the day after your contract ends. If you know upfront that demo might stretch into a third week, ask whether booking a longer initial period costs less than paying daily overages.

Getting a Transparent Quote

A transparent quote includes every possible charge spelled out line by line before you commit. Ask for a written estimate that lists the base rental rate, tonnage allowance, overage fees per ton, delivery and pickup charges, any fuel surcharges, and disposal fees separately. If the company provides only a single all-in number, request the breakdown — you need to see where your money goes.

Ask These Five Questions Upfront

Before accepting any quote, ask what happens if you exceed the weight limit. The answer should include a specific dollar amount per ton, not a vague “additional charges apply.” Most companies charge between $50 and $100 per ton over the limit, but some go higher. Get that number in writing.

Find out if there’s a minimum rental period and what happens if you need the dumpster longer. A standard rental might cover seven to fourteen days, with daily or weekly fees after that. Some companies build buffer days into their pricing; others start charging the moment your initial period expires. You want to know exactly when the clock starts on extension fees.

Red Flags in Pricing Estimates

Watch for quotes that don’t specify weight limits. A price that seems great might come with a three-ton allowance when competitors offer five or six tons at similar rates. You’ll pay the difference in overage charges, often without realizing it until the final bill arrives.

Be cautious of estimates that list “fees may apply” without naming them. Legitimate companies know their fee structure — delivery costs, fuel surcharges, disposal rates — and can state them clearly. Vague language suggests they’re leaving room to add charges later. Similarly, if a company refuses to provide a written quote or insists you must commit before seeing all fees itemized, that’s a signal to call someone else.

Getting Everything in Writing

A proper written quote functions as your protection against surprise charges. It should include the rental period start and end dates, the size of the roll-off dumpster, weight allowance, and every fee that could possibly apply. Email works fine as long as all terms are clearly stated.

Before you sign or pay a deposit, confirm that the written quote matches what you discussed on the phone. Sales representatives sometimes quote one price verbally and send paperwork with different terms. If you spot discrepancies, address them immediately. Once you’ve accepted delivery, you’ve agreed to the terms — whether you understood them or not.

Ready to get started?

Find a Dumpster Near You


Illustration of dumpster rental for this project

How Does Dumpster Rental Work?

Dumpster rental works by contacting a company to reserve a container size that matches your project needs, scheduling a delivery date, loading it with debris during your rental period (typically 7-14 days), and then having the company haul it away for disposal once you’re finished. This process matters because missteps—like choosing the wrong container size, loading prohibited materials, or misunderstanding weight limits—can add hundreds of dollars in overage fees or require a second rental mid-project. Most people approach their first rental assuming it works like any other delivery service, but roll-off dumpsters come with specific rules about placement, filling methods, and material restrictions that directly affect your timeline and budget. Understanding how dumpster rental works upfront helps you avoid the common pitfalls that turn a straightforward cleanup into a frustrating logistical problem. The key is knowing what happens at each stage—from sizing and pricing to pickup—so you can plan accordingly and keep your project moving without surprises.

Renting a Dumpster for This Project?

For most of these jobs, a roll-off dumpster delivered to your driveway is the simplest, cheapest way to handle the haul. Compare local providers and get a free quote in minutes.

Find Dumpster Rental in Your City →

Contact Form Demo

Choosing the Right Dumpster Size

Choosing the Right Dumpster Size

The right dumpster size matches your project’s volume and the physical space available for delivery. Most residential projects use a 10, 20, or 30-yard roll-off dumpster, while commercial jobs often need 40-yarders. Picking too small means scheduling a second rental; too large wastes money on unused capacity.

Common Roll-Off Dumpster Sizes

A 10-yard dumpster holds about three pickup truck loads and fits in most driveways. Expect dimensions around 14 feet long, 7.5 feet wide, and 3.5 feet high—roughly the footprint of a large sedan. These work well for bathroom remodels, small deck removals, or garage cleanouts where you’re generating 2-4 tons of debris.

The 20-yard size doubles that capacity and is the most popular choice for homeowners. At roughly 22 feet long and 4.5 feet high, it handles full kitchen renovations, roof replacements on smaller homes (up to 2,000 square feet), or estate cleanouts. The taller sides mean you can toss material in without everything spilling over.

Thirty-yard dumpsters measure about 22 feet long and stand 6 feet tall. Use these for large additions, whole-home cleanouts, or significant landscaping projects where you’re removing old fencing, sheds, and yards of soil. They hold 9-10 pickup loads, so unless you’re doing multi-room demo, you probably don’t need this much space.

Forty-yard containers stretch to 22 feet long and 8 feet high—tall enough that you’ll want to avoid throwing materials from ground level if you have a weak arm. Commercial construction sites use these for ongoing projects that generate debris over weeks. Residential customers rarely need this size unless they’re tearing down an entire structure.

Matching Size to Your Project

Start by estimating volume, not weight. Walk through your project space and visualize how much material you’ll remove. A standard interior door takes up about 10 cubic feet; a kitchen’s worth of cabinets fills roughly 100 cubic feet. If you’re removing flooring, calculate square footage and multiply by the depth of materials—old carpet with padding typically stacks 4-6 inches thick once rolled.

Weight limits matter more than volume for dense materials. Concrete, dirt, and brick max out weight restrictions quickly, even in a small dumpster. A 10-yard container filled with concrete chunks from a patio demo hits the typical 2-3 ton limit before it’s half full. For heavy materials, you need a smaller dumpster rental or multiple trips—overfilled containers can’t be safely hauled.

The delivery area determines your practical maximum size. Measure the space where the dumpster will sit: you need at least 60 feet of straight access for the truck to back in, plus 10-12 feet of width. Overhead clearance matters too—trees, power lines, or low-hanging eaves can block placement. A 20-yard dumpster fits most residential driveways, but a 30 or 40-yarder might force you to use the street, which often requires a permit.

Scheduling Delivery and Placement

Scheduling Delivery and Placement

Scheduling delivery means choosing a drop-off date and confirming placement details with your rental company before the driver arrives. Most companies offer next-day or same-week delivery, and you’ll need to specify exactly where the dumpster goes on your property—typically a driveway, street, or cleared area. Getting placement right the first time prevents redelivery fees and project delays.

Where to Place Your Dumpster

Your driveway is usually the best spot if it’s wide enough and paved. A standard roll-off dumpster is roughly 8 feet wide and 14-22 feet long depending on size, so measure your driveway width first. If you have a two-car driveway, you’ll likely have room, but a single-car driveway might force you to block the entire width. The driver needs a straight shot to drop the container—sharp turns or overhanging tree branches can make placement impossible.

If your driveway won’t work, the street becomes your next option, but check local permit requirements first. Many cities require street permits for dumpster placement, especially in residential areas. You’ll also want the container close to where you’re working. Carrying demolition debris or roofing shingles an extra 50 feet gets old fast. Make sure the placement area is level and firm—soft ground or grass can cause the dumpster to sink, and unlevel surfaces make loading awkward and potentially unsafe.

Loading and Using Your Rental

Once your dumpster arrives, you can start loading immediately. Fill it level with the top edge — anything sticking above counts as overfilling and may trigger extra fees or require the driver to refuse pickup. Distribute weight evenly, break down bulky items to use space efficiently, and keep prohibited materials out entirely. Most rentals allow you to fill at your own pace throughout the rental period.

Safe Loading Practices

Start heavy, finish light. Place the densest materials — concrete chunks, soil, roofing shingles — on the bottom. This keeps the center of gravity low and prevents lighter debris from getting crushed and compacted in ways that waste space. If you’re mixing construction debris with household junk, layer them: a base of heavy demo waste, then lighter framing lumber, then bags of general trash on top.

Break down everything that folds, collapses, or disassembles. Flatten cardboard boxes completely. Dismantle furniture so you’re loading planks and cushions, not air-filled armchairs. Cut long boards to fit within the dumpster’s length — a 2×4 sticking out three feet will get flagged at pickup. The more you compress and tessellate, the more you fit before hitting the fill line.

Weight Distribution Tips

Load from front to back, not side to side. Walk into the dumpster and place heavy items toward the front and center, then work your way backward. This mimics how the container will sit on the hauler’s truck during transport. Uneven weight on one side can make the dumpster tilt during lifting, which slows down pickup or requires redistribution on-site.

Avoid creating hollow pockets. If you toss in a rolled-up carpet, you’ve just wasted all the empty space inside that tube. Unroll it and lay it flat, or cut it into sections. Same with garbage bags — don’t throw them in haphazardly. Place them in gaps between larger items where they’ll conform to the available space.

Fill Level Guidelines

The top rail of the roll-off dumpster is your hard limit. Picture a flat plane across the container’s open top — nothing can break that plane. Even a single bag or board poking above the edge means the driver either has to stop and push it down (delaying their route and potentially costing you a fee) or refuse to take the load until you fix it.

Rental companies have legitimate safety and legal reasons for enforcing this rule. Overloaded dumpsters can shed debris on highways, damage the hydraulic mechanisms during lifting, or exceed road weight limits. If you’re nearing the top edge with materials left to go, stop loading and call for an earlier pickup or a second container. Trying to Tetris one last bag onto a maxed-out dumpster rarely ends well.

Extending Your Rental Period

Most rentals include seven to fourteen days of on-site time. If your project runs long, contact the company before your scheduled pickup date. Extensions typically cost $5 to $15 per day in 2026 estimates, though some companies charge weekly rates instead. The earlier you call, the easier it is for dispatch to adjust the route schedule.

Don’t wait until the driver is en route to ask for more time. Haulers plan their days around specific pickup windows, and last-minute changes disrupt those logistics. If you know midweek that you won’t finish by Friday, make the call on Wednesday. You’ll avoid rush fees and the awkward situation of a driver showing up to a half-full container that you’re still actively loading.

Pickup and Final Costs

Pickup and Final Costs

When your rental period ends, the company retrieves the dumpster and weighs your debris at a certified scale. You’ll receive a final invoice showing the base rental fee plus any overage charges for weight beyond your limit, extra days you kept the container, or prohibited items requiring special disposal. Most companies process final bills within a few business days of pickup.

The pickup itself happens fast—usually 15 minutes or less. The driver needs the same clear path they used for delivery. If you’ve parked cars near the dumpster or set items around it, move everything before the scheduled pickup window. Some companies call 30 minutes ahead; others simply show up during the time slot you confirmed.

Weight overages represent the most common surprise cost. If you rented a container with a two-ton limit but filled it with 2.8 tons of concrete and dirt, expect charges for that extra 1,600 pounds. Rates for overage generally range from $50 to $100 per ton in 2026, varying by material type and location. Dense materials like soil, brick, and roofing shingles hit weight limits faster than bulky but lighter debris like furniture or drywall.

You might also see disposal fees for prohibited items discovered during processing. If the facility finds paint cans, treated lumber, or electronics mixed into your general debris, many rental agreements allow the company to charge the specialized disposal costs back to you. A single can of latex paint might add $15 to your bill; treated lumber could run $75 to $150 depending on volume. Calling ahead to ask about questionable items saves you from these add-ons. Most companies would rather tell you to dispose of a few cans separately than deal with contaminated loads.

Extended rental fees apply when you keep the roll-off dumpster past your agreed period. A three-day delay might cost $10 to $15 per day; keeping it an extra two weeks could add $100 to $200 to your total. If you realize mid-project that you need more time, contact the company before your deadline expires. They’ll typically extend your rental at the daily rate rather than charging late fees on top of it.

Ready to get started?

Find a Dumpster Near You


Illustration of dumpster rental for this project

How Much Does It Cost to Rent a Dumpster? (2026 Guide)

Renting a dumpster typically costs between $300 and $800 for a week-long rental in 2026, with the final price determined by the container size you need, how long you keep it, what you’re throwing away, and where you’re located. That range matters because choosing the wrong size or misunderstanding weight limits can double your cost through overage fees and extra haul-away charges. Most people underestimate how quickly construction debris and household junk add up, then face surprise bills when their project generates more waste than their dumpster can legally hold. Understanding how rental companies actually price their services – and which factors you can control versus which ones you can’t – helps you avoid the most common costly mistakes and ensures the roll-off dumpster you rent matches what your project actually demands.

Short answer: Most dumpster rentals cost $300–$600 for a standard 7–10 day rental in 2026. A small 10-yard dumpster typically starts around $300, a 20-yard runs about $375–$550, and a large 40-yard roll-off for construction debris can reach $500–$750 or more. Your final price depends on container size, location, debris weight, and how long you keep it.

Renting a Dumpster for This Project?

For most of these jobs, a roll-off dumpster delivered to your driveway is the simplest, cheapest way to handle the haul. Compare local providers and get a free quote in minutes.

Find Dumpster Rental in Your City →

Contact Form Demo

Average Dumpster Rental Costs by Size

Dumpster Size Typical 2026 Price (7–10 days) Best For
10 yard $300 – $450 Small cleanouts, single-room remodels, concrete
15 yard $325 – $500 Flooring tear-outs, medium cleanouts
20 yard $375 – $550 Renovations, roofing, deck removal
30 yard $425 – $650 New construction, large remodels, estate cleanouts
40 yard $500 – $750 Major construction & demolition debris

These are general 2026 estimates; actual prices vary by provider, region, and debris weight.

Dumpster rental prices in 2026 generally range from $250 to $800 for a standard rental period, with size being the primary cost driver. A 10-yard roll-off dumpster for a bathroom remodel typically runs $250-$400, while a 40-yard container for a whole-house cleanout or major construction project usually costs $500-$800. The price you pay depends on container capacity, your location, rental duration, and what you’re disposing of.

Small Dumpsters for Light Projects

A 10-yard dumpster handles roughly three pickup truck loads of material – perfect for clearing out a garage, replacing a roof on a small home, or gutting a single bathroom. Rental costs typically fall between $250 and $400 for a week. These containers work well when you’re dealing with a defined scope: you know exactly what’s going out, and it won’t fill more than about 50-60 trash bags worth of space.

The 20-yard size steps up to hold about six pickup loads, suited for kitchen remodels, deck removals, or moderate estate cleanouts. Expect to pay $300-$500 for this middle-ground option. One advantage: you avoid the “I wish I’d gone bigger” problem without paying for capacity you don’t need. If you’re tearing out carpet from a 1,500-square-foot home or disposing of old furniture from multiple rooms, this size usually hits the mark without excess cost.

Large Dumpsters for Major Cleanouts

A 30-yard dumpster holds roughly nine pickup loads and costs $400-$650 in most markets. This size makes sense for whole-home cleanouts, major landscaping projects, or new construction jobs where you’re generating debris daily. You’re paying for volume, but also for flexibility – contractors often keep these on-site for weeks during renovation work, making the per-day cost more economical than repeatedly renting smaller containers.

The 40-yard option maxes out residential capacity at about twelve pickup loads, with prices ranging from $500 to $800. You see these at demolition sites, commercial construction jobs, and large estate clearances where multiple rooms of furniture and belongings need removal at once. The math works when you’d otherwise need two smaller rentals or multiple haul-away trips. A whole-house foreclosure cleanout or tearing down an old shed along with years of accumulated yard waste – these situations justify the larger footprint and higher cost.

What Affects the Cost of Renting a Dumpster

Your location and how far the dumpster must travel to reach you directly impact rental costs. Companies calculate delivery fees based on distance from their depot to your site, with urban customers often paying less than those in rural areas. Local fuel costs, disposal regulations, and regional competition also shape pricing, meaning the same size roll-off dumpster can cost $100-$200 more in one city than another just 50 miles away.

Location and Delivery Distance

Most dumpster rental companies set a delivery radius – typically 25 to 50 miles from their facility – where standard rates apply. Beyond that zone, expect additional mileage fees. A site 10 miles from the depot might pay no extra delivery charge, while a location 60 miles out could see $75-$150 added to the base price. The math is straightforward: longer trips mean more fuel, more driver time, and more wear on the truck hauling your roll-off dumpster.

Urban and suburban customers usually benefit from shorter delivery distances and more provider options. Rural customers face the opposite reality. If only one company serves your area and their nearest yard sits 40 miles away, you’ll pay for that distance. Some providers build these costs into their advertised rates; others itemize delivery as a separate line. Always ask whether the quoted price includes delivery to your specific address, not just delivery in general. The difference matters when the nearest depot is across county lines.

Permit Costs

If your dumpster will sit on a public street or sidewalk rather than your driveway, most cities require a right-of-way permit. Permit costs typically range from around $10 to $100 or more depending on the municipality and how long the container stays out. Dumpsters placed entirely on private property usually don’t need a permit, and many rental companies will obtain the permit on your behalf for a small handling fee.

Flat-Rate vs. Variable-Rate Pricing

Dumpster rentals are usually priced one of two ways. Flat-rate pricing bundles delivery, a set rental period, a weight allowance, and disposal into a single quoted price – predictable, with extra charges only if you exceed the included weight or days. Variable-rate pricing advertises a lower base fee, then adds per-ton dump fees and daily rates separately, which can be cheaper for light loads but harder to predict. Always ask which model a company uses, and confirm the included weight allowance, before you book.

Hidden Fees and Surcharges to Watch For

The advertised price for a dumpster rental rarely tells the full story. Beyond the base rate, you’ll typically encounter overage charges for exceeding weight limits, extension fees if you keep the container longer than agreed, and permit costs in areas requiring street placement authorization. Certain materials trigger disposal surcharges, and some companies add fuel fees or environmental charges that aren’t obvious upfront.

Overage Fees for Weight Limits

Every roll-off dumpster comes with a weight allowance – usually expressed as a tonnage limit included in your rental period. A 20-yard container might include two or three tons, for instance. Cross that threshold, and you’ll pay per-ton overage fees that generally range from $50 to $100 per additional ton in 2026. The problem? Weight adds up faster than volume with dense materials. Half a dumpster filled with dirt, concrete, or roofing shingles can easily exceed limits that wouldn’t be an issue with household junk or construction lumber.

Ask about the included weight before signing anything. If your project involves heavy debris, consider renting a larger container with a higher tonnage allowance rather than paying overages. Some companies weigh loaded containers at the landfill and bill you afterward, which means surprise charges weeks later if you miscalculated.

Daily or Weekly Rental Period Extensions

Most dumpster rentals include a set rental period – commonly seven to ten days. Need the container longer? Extension fees kick in, typically ranging from $5 to $15 per day beyond the initial period. A week-long delay can add $50 to $100 to your final bill. Some companies structure this as a flat weekly extension fee instead, which might run $75 to $150.

The rental period starts when the container is delivered, not when you begin filling it. Schedule delivery for when you’re actually ready to load debris. If your project timeline shifts, call the rental company immediately. Many will work with you on extensions if you communicate early rather than letting the deadline pass silently.

Prohibited Material Disposal Surcharges

Load the wrong materials into your dumpster, and you’ll face disposal surcharges that dwarf your base rental cost. Hazardous waste – paint, chemicals, asbestos, tires, batteries, electronics – requires specialized handling. If a driver spots prohibited items during pickup, you might pay $100 to $500 in sorting fees, or the company may refuse to haul the container until you remove the offending materials yourself.

Even non-hazardous items can trigger extra fees. Mattresses, appliances with refrigerants, and certain electronics often carry per-item disposal charges. Mixed loads sometimes cost more than single-material loads; clean concrete or yard waste might be cheaper to dispose of than general construction debris. Review the rental agreement’s prohibited items list carefully, and ask specifically about anything questionable before loading it.

Fuel Surcharges and Environmental Fees

Some dumpster rental companies add fuel surcharges to offset transportation costs, particularly in areas requiring long hauls to disposal facilities. These charges typically appear as a percentage of the base rate – anywhere from 5% to 15% in 2026 – and may fluctuate with diesel prices. Environmental fees, ranging from $10 to $50, cover landfill-imposed costs for waste processing and regulatory compliance.

These fees aren’t always negotiable, but they should be disclosed upfront. When comparing quotes, ask whether the price is all-inclusive or if fuel and environmental charges will be added at billing. A slightly higher quote that includes everything may actually cost less than a lower base rate with multiple add-ons.

How to Get the Best Price on a Dumpster Rental

Getting the best price on a dumpster rental comes down to timing, transparency, and doing your homework before you call. Request quotes from at least three local companies, be specific about your project details, and ask what’s included in the base price versus what costs extra. Most companies offer better rates for longer rental periods and mid-week deliveries, and simply asking about current promotions or flexible scheduling can often knock 10-15% off your total cost.

Compare Multiple Local Companies

Call at least three dumpster rental companies in your area and give each the exact same project details – your address, the type of debris, estimated weight, and how long you need the container. Write down not just the total price, but what each company includes: how many days of rental, the weight limit, whether delivery and pickup are separate charges, and what happens if you go over on weight or time.

The lowest headline price rarely tells the whole story. One company might quote $325 for a 20-yard roll-off dumpster with a 2-ton limit and 7-day rental, while another quotes $375 with a 3-ton limit and 14 days. The second option actually costs less per day and gives you an extra ton of capacity. Look at the complete package, not just the starting number.

Be Upfront About Your Debris Type

Tell the rental company exactly what you’re throwing away before they quote you. A dumpster for household junk costs significantly less than one for construction debris or yard waste because disposal fees vary wildly by material type. If you say “general cleanup” but then fill the container with concrete and asphalt, you’ll get hit with overage charges that can double your final bill.

Describe your project honestly: “I’m gutting a kitchen – old cabinets, drywall, some tile, and a laminate countertop.” That specificity lets the company steer you to the right size container and quote accurate disposal costs upfront. Mixing prohibited items like paint cans, electronics, or mattresses can also trigger extra fees, so ask what’s not allowed and plan accordingly.

Ask About Discounts and Promotions

Most dumpster companies run seasonal promotions or offer discounts for specific customer types, but they won’t volunteer them unless you ask. Request quotes for off-peak times – a Tuesday morning delivery in February typically costs less than a Saturday in May when everyone’s doing spring projects. Some companies discount longer rental periods because it saves them a trip, so a 14-day rental might cost only $30-50 more than a 7-day.

Military members, seniors, and repeat customers often qualify for 5-10% discounts. Ask directly: “Do you have any current promotions?” and “Are there discounts for flexible delivery dates?” If you’re a contractor or property manager who might need multiple rentals, mention it – volume pricing can reduce per-rental costs by 15-20%.

Schedule Delivery Strategically

Coordinate your dumpster delivery for the day you actually start generating debris, not three days before. You’re paying for each day the container sits on your property, so having it arrive early just burns rental time. If your project timeline is flexible, ask the company when they have open routes – filling an existing delivery route costs them less in fuel and labor, and they may pass those savings to you.

Keep the dumpster accessible and ready to go when pickup day arrives. Companies charge extra trip fees ($50-100) if they show up and can’t remove the container because you’ve parked cars around it or piled materials on top. Set a phone reminder for the day before pickup to clear the area and make sure you’re done loading.

Dumpster Rental Cost by City

Prices shift from metro to metro based on local landfill and disposal fees, demand, and permit rules. Check local pricing and compare providers in your area:

  • Dumpster rental in Denver
  • Dumpster rental in Phoenix
  • Dumpster rental in Austin
  • Dumpster rental in Houston
  • Dumpster rental in Atlanta
  • Dumpster rental in Tampa
  • Dumpster rental in Los Angeles
  • Browse all cities →

Frequently Asked Questions

How much does it cost to rent a dumpster for a day?

Most companies price dumpsters as a multi-day rental (typically 7–10 days) rather than per day, so a one-day rental usually costs the same as the standard period – generally $300–$600. Keeping it longer adds a daily extension fee of roughly $5–$15.

How much does a 20-yard dumpster cost?

A 20-yard dumpster – the most common residential size – typically runs about $375–$550 for a standard rental period in 2026, depending on your location and debris weight.

Is it cheaper to rent a dumpster or hire junk removal?

For large do-it-yourself projects where you load over several days, a dumpster rental is usually cheaper per cubic yard. Junk removal costs more but includes the labor of hauling items away, which can be worth it for smaller or one-time loads.

Why are dumpster rentals so expensive?

The price covers far more than the container: delivery and pickup, the rental period, a weight allowance, and landfill or transfer-station disposal fees, which have risen steadily. Heavy debris like concrete or shingles can push you over weight limits and add overage charges.

What is the cheapest way to rent a dumpster?

Compare quotes from two or three local providers, choose the smallest size that fits your debris, be upfront about debris type to avoid surprise fees, and keep the container only as long as you need it.

Ready to get started?

Find a Dumpster Near You


Illustration of dumpster rental for this project

How to Dispose of a Refrigerator (2026 Guide)

To dispose of a refrigerator properly, you need to remove refrigerants (legally required before disposal), disconnect the unit, and transport it to a certified recycling facility, appliance retailer offering haul-away service, or arrange municipal bulk pickup — simply leaving it curbside or in a landfill violates EPA regulations and can result in fines. The catch is that refrigerators contain refrigerants like Freon that damage the ozone layer when released, which is why federal law mandates certified technicians handle the extraction process. Most people discover this requirement only after they’ve already bought a replacement, creating an urgent need to clear space in their kitchen or garage. Beyond the legal requirements, you’ll need to consider logistics — these units weigh 200-300 pounds, won’t fit in a standard vehicle, and require either professional removal or a roll-off dumpster rental during larger cleanouts. This guide walks through each disposal method, explains the refrigerant removal process, and covers what actually happens when you need a working fridge gone by tomorrow versus when you’re tackling a whole-house renovation.

Renting a Dumpster for This Project?

For most of these jobs, a roll-off dumpster delivered to your driveway is the simplest, cheapest way to handle the haul. Compare local providers and get a free quote in minutes.

Find Dumpster Rental in Your City →

Contact Form Demo

Why Refrigerators Require Special Disposal

Why Refrigerators Require Special Disposal

Refrigerators contain refrigerants that damage the ozone layer and contribute to climate change when released into the atmosphere. Federal law requires certified technicians to recover these chemicals before disposal. Beyond refrigerants, old fridges house toxic materials like mercury switches, PCB-laden capacitors, and foam insulation treated with flame retardants—all classified as hazardous waste that can’t go in standard landfills or a typical roll-off dumpster.

Refrigerant and Environmental Regulations

The EPA’s Clean Air Act makes it illegal to vent refrigerants during appliance disposal. Anyone removing these chemicals must hold Section 608 certification, which means you can’t simply throw a fridge in a dumpster rental and call it done. Older units manufactured before 2010 typically contain R-12 (Freon) or R-134a, both potent greenhouse gases. A single refrigerator can hold 4-6 ounces of refrigerant—enough to equal the warming impact of driving a car 1,800 miles if released directly into the air.

Disposal facilities use specialized equipment to capture refrigerants, which are then either destroyed or recycled for reuse in other appliances. Violations carry fines up to $44,539 per day for individuals and significantly higher penalties for businesses. Most municipal waste programs and scrap metal recyclers won’t accept refrigerators unless you provide documentation that a certified technician has already recovered the refrigerant.

Hazardous Components Inside Old Fridges

Mercury switches controlled interior lighting in refrigerators built before 2000. Each switch contains approximately 3 grams of elemental mercury—a neurotoxin that contaminates soil and water when fridges break apart in landfills. Capacitors in units from the 1950s through the 1980s were manufactured with polychlorinated biphenyls (PCBs), compounds now known to cause cancer and persist in the environment for decades.

The foam insulation presents another problem. Manufacturers injected polyurethane foam with blowing agents like HCFCs or HFCs, both regulated substances under international environmental agreements. When foam gets crushed or shredded without proper containment, these chemicals escape. Modern recycling facilities use closed-loop systems to capture gases from foam while grinding it into reusable material, but this specialized process isn’t available through standard waste collection or construction debris services.

Free and Low-Cost Refrigerator Disposal Options

Free and Low-Cost Refrigerator Disposal Options

Many electric and gas utilities offer free refrigerator pickup and disposal programs, often paying you $25-$75 to haul away your old unit. These programs help utilities reduce energy consumption by removing inefficient appliances from the grid. Call your utility provider directly or check their website’s rebate section to see if they service your area and schedule a pickup date.

Utility Company Pickup Programs

Electric utilities in most states run appliance recycling programs that make old refrigerator removal surprisingly easy. You schedule an appointment online or by phone, and a contractor shows up at your home to disconnect and haul away the unit. The service is completely free, and many programs add a rebate check on top of the pickup.

The requirements are straightforward but strict. Your refrigerator must be working (even if poorly), typically between 10-30 cubic feet, and you need to own it — rental units don’t qualify. Some programs require the fridge to be your second unit (like a garage beer fridge), while others accept primary refrigerators when you’re upgrading. You’ll need to provide clear access — crews won’t navigate tight basement stairs or remove doors to squeeze units through narrow hallways. Check your specific utility’s size and access requirements before scheduling. Programs usually book 2-4 weeks out during peak summer months when people upgrade before vacation season, so plan ahead if you’re working on a home renovation timeline.

Disposal Methods for Remodels and Multiple Appliances

When you’re renovating a kitchen or clearing out several old appliances at once, coordinating individual pickups becomes impractical. A roll-off dumpster solves this by giving you a central drop point for refrigerators, stoves, dishwashers, and construction debris from the same project. This approach works particularly well when you’re managing your own timeline and need flexibility to dispose of items as you disconnect them.

Renting a Dumpster for Kitchen Renovations

A 10-yard or 15-yard dumpster handles most kitchen remodels that include appliance removal. You’ll pay a flat weekly rate—generally ranging from $300 to $500 in most markets as of 2026—which covers delivery, pickup, disposal fees, and a weight allowance that typically accommodates three to four major appliances plus cabinets and countertops.

The real advantage shows up in scheduling flexibility. You can remove the old refrigerator on Monday, disconnect the stove on Wednesday, and tear out cabinets over the weekend without coordinating separate pickup appointments. Most rental periods run seven days, with extensions available for $10 to $20 per day if your project runs long.

Appliance Disposal Rules for Roll-Off Containers

Rental companies require refrigerators and freezers to have doors removed before they go in the dumpster. This safety rule prevents children from becoming trapped and is non-negotiable—drivers will refuse to haul containers with intact appliance doors. You can typically leave the doors alongside the unit in the dumpster, just detached.

Some haulers charge a separate appliance processing fee of $25 to $50 per refrigerator or freezer to cover refrigerant recovery, even when using a dumpster rental. Others include this in their base price. Ask specifically about appliance fees when you book, because these charges appear as line items on your final invoice and can surprise contractors who bid jobs assuming all-inclusive pricing. Air conditioners and dehumidifiers often carry the same fee due to their refrigerant systems.

When Multiple-Item Pickup Makes More Sense

Utility companies and scrap metal services offer bulk pickup programs that collect multiple appliances in one trip, typically at no cost if you’re replacing them with new units. This option beats dumpster rental when you’re only disposing of appliances—no cabinets, no flooring, no drywall. You’ll schedule a single appointment, set everything curbside the night before, and avoid rental fees entirely.

The calculation shifts when renovation debris enters the picture. If you’re generating more than a few bags of trash alongside your appliances, the convenience of tossing everything into one container outweighs the cost difference. A dumpster also eliminates the weight limits that bulk pickup services enforce—some programs cap collections at three appliances or 300 pounds total.

Preparing Your Refrigerator for Removal

Preparing a refrigerator for removal requires defrosting the unit at least 24 hours before pickup, disconnecting all power and water lines, securing or removing doors, and cleaning out any residual moisture. You’ll also need to tape loose components in place and ensure all food and shelving are removed. Proper preparation prevents water damage during transport and makes the unit safe for disposal workers to handle.

Empty and Defrost the Unit

Pull everything out of both the refrigerator and freezer compartments at least 48 hours before your scheduled removal date. Food, condiments, ice trays, removable shelves — all of it needs to go. Most people underestimate how much ice builds up in freezer compartments. A typical freezer accumulates 5-10 pounds of ice depending on how long it’s been since the last defrost.

Unplug the unit and prop both doors open with towels wedged underneath to catch dripping water. Place additional towels inside and around the base to absorb meltwater. The defrosting process takes 12-24 hours depending on ice thickness. If you’re working on a tight timeline, you can speed this up by placing bowls of hot water inside the compartments, but never use sharp tools to chip away ice — you risk puncturing refrigerant lines.

Disconnect Utilities and Remove Hazards

Locate the water supply line if you have an ice maker or water dispenser. Turn off the shut-off valve (usually behind the fridge or under the sink), then disconnect the line from the back of the unit. Have a bucket and towels ready because residual water will drain out. Coil the disconnected line and tape it to the back of the refrigerator so it doesn’t drag during moving.

Remove the doors entirely if small children live in or visit your home. Even a refrigerator sitting outside waiting for pickup poses a suffocation risk. Most doors lift off easily once you remove the top hinge pin with a screwdriver and wrench. If you’re placing the unit in a roll-off dumpster yourself, removing doors also makes the fridge more compact and easier to maneuver. Store the doors separately until disposal day, or tape them securely to the side of the unit with the handles facing inward.

Secure Loose Components

Tape down any shelves, drawers, or bins you can’t remove. Use painter’s tape or duct tape to secure the power cord to the back panel — a dragging cord can trip workers or get caught on doorways during removal. If the drip pan (the tray underneath that collects condensation) slides out, either remove it and discard it separately or tape it firmly in place.

Clean out the interior with a vinegar solution or mild detergent to eliminate odors. Disposal facilities and workers deal with enough unpleasant smells without adding spoiled food residue to the mix. A quick wipe-down also prevents mold growth if there’s any delay between when you finish preparing the unit and when it actually gets picked up. Let the interior air-dry completely before closing the doors for transport.

Ready to get started?

Find a Dumpster Near You


Illustration of dumpster rental for this project

How to Dispose of a Futon (2026 Guide)

To dispose of a futon, you can haul it to a municipal landfill or transfer station yourself, hire a junk removal service to pick it up, donate it if it’s still usable, or rent a roll-off dumpster if you’re clearing out multiple large items during a move or renovation. The method you choose affects both your wallet and your schedule — dropping off a futon at the dump might cost $25-50 and require a truck, while a junk removal service runs $100-200 for the convenience of curbside pickup. Futons occupy an awkward middle ground in furniture disposal: they’re too bulky for regular trash pickup but not valuable enough for most charities to justify a trip unless the frame and mattress are in genuinely good shape. Knowing how to dispose of a futon efficiently matters most when you’re working against a lease deadline or trying to avoid multiple trips in a borrowed pickup. This guide walks through each disposal method with realistic cost ranges, explains what condition qualifies for donation versus landfill, and covers the logistics of scheduling pickups or drop-offs so you can clear the space without wasting time or money.

Renting a Dumpster for This Project?

For most of these jobs, a roll-off dumpster delivered to your driveway is the simplest, cheapest way to handle the haul. Compare local providers and get a free quote in minutes.

Find Dumpster Rental in Your City →

Contact Form Demo

Can You Throw Away a Futon

Can You Throw Away a Futon?

Yes, you can throw away a futon, but not in your regular trash. Most municipalities classify futons as bulky waste that requires special pickup, drop-off at designated facilities, or rental of a roll-off dumpster. The method you’ll use depends on your local waste regulations and whether your futon contains materials your area accepts in standard disposal streams.

What Futons Are Made Of

Traditional futons consist of a cotton batting core wrapped in fabric, sitting on a wooden or metal frame. Modern futons often blend cotton with polyester, foam, or synthetic fibers to reduce cost and weight. The frame typically uses pine, oak, or metal tubing with hardware connections.

This mixed-material construction creates disposal challenges. The wood frame might qualify for yard waste programs in some areas, while the mattress portion—especially foam varieties—gets treated as household trash or requires mattress-specific handling. Metal frames are universally recyclable but need separation from fabric components first. If your futon has a particle board frame or flame-retardant chemical treatments common in budget models, some recycling facilities won’t accept those components.

Local Disposal Rules and Restrictions

Check your city’s solid waste website or call their customer service line before moving your futon to the curb. Most areas limit bulk item pickup to one or two pieces per scheduled collection, and some charge fees ranging from $25 to $75 per item. You’ll typically need to schedule pickup at least three days ahead and place the futon curbside the night before your designated date.

Certain jurisdictions ban specific disposal methods outright. New York City residents, for example, can’t include mattresses or box springs in regular bulk pickup—these items go to designated drop-off centers or require private carting services. California communities often prohibit any upholstered furniture with foam padding from going to landfills, mandating recycling or donation instead. If you’re clearing out multiple items during a renovation or move, renting a dumpster lets you dispose of the futon alongside other bulky debris on your timeline, though you’ll still need to verify your rental company accepts furniture in their terms.

Donation and Resale Options

Donation and Resale Options

Donating a used futon works best when the frame is solid and the mattress shows minimal wear—no major stains, rips, or sagging. Thrift stores, furniture banks, and faith-based charities accept gently used futons, though most require you to drop off the item yourself. Call ahead to confirm they’re accepting furniture donations that day, since many locations have fluctuating inventory limits and seasonal restrictions.

Where to Donate a Used Futon

Goodwill and Salvation Army stores take futons in good condition, but policies vary by location. Some accept only the frame, while others want the complete set if the mattress passes a visual inspection. Expect to haul the futon to a donation center yourself—most thrift chains stopped offering furniture pickup years ago except in dense urban markets. The staff will assess the piece when you arrive, and they can refuse items with structural damage or hygiene concerns.

Furniture banks operate differently. Organizations like Furniture Bank Network affiliates specifically serve families transitioning out of homelessness or leaving domestic violence situations. They’re often more flexible about cosmetic imperfections since they’re furnishing empty apartments on tight timelines. Many offer free pickup if you’re within their service area, though you’ll need to schedule a few days out. Check if your futon meets their size requirements—some programs can’t accommodate anything larger than a full-size mattress due to warehouse constraints. Faith-based groups like St. Vincent de Paul also run furniture programs, and they typically pick up from your curb on designated days if the item meets their standards.

Curbside Pickup and Recycling Services

Most municipalities offer bulk waste pickup for large items like futons, either on scheduled collection days or by appointment. Call your local sanitation department to confirm whether they accept mattresses and upholstered furniture—some cities prohibit these items due to bedbug concerns or landfill restrictions. If your area allows it, you’ll typically need to place the futon curbside the night before your designated pickup date.

Standard Bulk Waste Collection

Check your city’s sanitation website or call their office directly to learn your bulk pickup schedule. Many cities offer monthly or quarterly collection days when residents can set out oversized items without an appointment. In neighborhoods with weekly trash service, you might need to request a special pickup 3-5 business days in advance.

Some municipalities require you to disassemble the futon frame or wrap mattress-style futons in plastic before placing them curbside. This rule exists to contain potential pests and prevent rain damage during collection. Confirm these requirements before your pickup day—violating them often means your futon won’t get collected, and you’ll have to haul it back inside until the next available date.

Fee-Based Pickup Services

Cities that don’t include bulk items in standard service typically charge per-item fees ranging from $25 to $75 for futon pickup in 2026. You’ll schedule an appointment, pay online or by phone, and receive a confirmation number. The sanitation crew collects your futon on the scheduled date, usually during normal collection hours.

Private hauling companies offer another option when municipal services have long wait times or refuse upholstered furniture entirely. Junk removal services will come to your home, carry the futon from wherever it sits, and handle disposal. Expect to pay $100-200 for a single futon pickup, though prices drop if you’re removing multiple large items at once. For major cleanouts involving a futon plus other bulky debris, a short-term dumpster rental often costs less than paying per-item pickup fees.

Textile Recycling Programs

Some cities partner with textile recyclers who accept clean, dry futons in good structural condition. These programs divert usable materials from landfills by breaking down futons into component parts—metal frames get scrapped, wood goes to biomass facilities, and fabric becomes industrial wiping cloths or insulation fill.

Contact your local recycling coordinator to find participating drop-off centers. Most require you to transport the futon yourself during business hours. Stained, torn, or pest-damaged futons usually don’t qualify for textile recycling and must go through standard bulk waste channels instead.

Using a Roll-Off Dumpster for Futon Removal

A roll-off dumpster simplifies futon disposal when you’re clearing out multiple items or tackling a renovation project. You rent a container (typically 10-20 cubic yards for household cleanouts), have it delivered to your driveway, toss in your futon alongside other unwanted furniture or debris, and schedule pickup when you’re done. Most futons take up about 25-35 cubic feet of space, so they fit easily in even the smallest dumpster sizes without requiring disassembly.

When a Dumpster Rental Makes Financial Sense

Renting a dumpster becomes cost-effective when you’re disposing of more than just a futon. A 10-yard dumpster rental typically costs $250-$400 for a week in 2026, depending on your location. If you’re also throwing out a matching loveseat, old carpet, broken appliances, or construction debris from a room remodel, you’re spreading that cost across multiple disposal needs. Compare this to paying $75-$150 for a single-item furniture pickup or making three separate trips to the dump at $40 per load.

The break-even point usually hits around three to five bulky items. Tossing a futon, a dresser, a box spring, and bags of donation rejects into one container costs less per item than coordinating individual removals. Property cleanouts—clearing a deceased relative’s home, emptying a rental between tenants, or purging before a move—are textbook dumpster scenarios.

Choosing the Right Dumpster Size

A 10-yard dumpster handles most single-room cleanouts involving a futon and miscellaneous household items. Picture a container about 12 feet long, 8 feet wide, and 3.5 feet tall—roughly the footprint of two parking spaces. This size accommodates three to four pieces of bulky furniture plus several dozen bags of clothing, books, or kitchenware.

Step up to a 15 or 20-yard roll-off dumpster if you’re clearing multiple rooms or combining furniture disposal with a flooring project. A 20-yard container holds enough material to clear out an entire basement or garage, including that old futon you’ve been using as overflow seating. These larger sizes make sense when debris volume becomes hard to estimate. You won’t pay dramatically more for the size upgrade—usually $50-$100—but you’ll avoid the hassle and expense of ordering a second container mid-project.

Placement and Loading Tips

Position your dumpster on a hard, level surface like a driveway or street parking spot. Grass and gravel work in a pinch, but request plywood boards underneath the wheels to prevent lawn damage or the container sinking into soft ground. Most rental companies include boards upon request at no extra charge. Check local regulations—many municipalities require a permit for street placement, typically $25-$75 for a week.

Load heavy items like the futon frame first, placing them flat against the dumpster’s front wall. This creates a stable base and maximizes space. Break down the futon if you have time—removing the mattress from the frame and standing the frame on its side can free up 30-40% more room for other items. Toss lighter materials like bedding, pillows, or cardboard boxes on top. Fill gaps with smaller debris to avoid wasting vertical space. The goal is to load the container level rather than creating a pyramid in the center, which wastes half your rental capacity.

Ready to get started?

Find a Dumpster Near You


Illustration of dumpster rental for this project

How to Dispose of a Box Spring (2026 Guide)

You can dispose of a box spring through several practical routes: municipal bulk trash pickup (often free but scheduled), direct drop-off at a waste transfer station or landfill (typically $10-40), specialty recycling facilities that dismantle and recycle components (where available), or donation to charities and resale shops if the box spring is still functional. Most people underestimate how difficult it is to move a box spring down stairs or fit one in a standard vehicle, which is why planning your disposal method before you start wrestling with it saves considerable frustration. The method you choose depends on your timeline, whether the box spring is damaged or intact, and what disposal infrastructure exists in your area. Understanding how to dispose of a box spring properly means knowing which services operate near you, what condition requirements they have, and when cutting the box spring down for easier handling makes sense versus keeping it whole for donation or resale.

Renting a Dumpster for This Project?

For most of these jobs, a roll-off dumpster delivered to your driveway is the simplest, cheapest way to handle the haul. Compare local providers and get a free quote in minutes.

Find Dumpster Rental in Your City →

Contact Form Demo

Check for Donation and Resale Options

Check for Donation and Resale Options

A structurally sound box spring in decent condition doesn’t belong in the trash—charities, furniture banks, and individual buyers often need them. Habitat for Humanity ReStores, Salvation Army, and Goodwill accept box springs without stains or broken frames, while online marketplaces like Facebook Marketplace and Craigslist can connect you with buyers willing to pay $20-$75 or haul it away free.

Where to Donate Used Box Springs

Habitat for Humanity ReStores operate in most major metro areas and accept gently used box springs as long as they’re clean and fully functional. Call ahead—some locations won’t take anything larger than a twin, while others gladly accept kings and queens. The Salvation Army and Goodwill have stricter standards: expect them to refuse box springs with visible stains, tears in the fabric covering, or sagging. Many locations offer free pickup for furniture donations, though you’ll typically need to schedule 3-7 days out.

Furniture banks serve families transitioning out of homelessness or fleeing domestic violence, and they’re often more flexible than retail thrift stores. Organizations like Furniture Bank Network affiliates will accept box springs with minor cosmetic issues that wouldn’t pass muster at Goodwill. If you’re clearing out an entire bedroom and the box spring isn’t donation-worthy but other items are, renting a roll-off dumpster lets you dispose of the unusable pieces while keeping quality furniture aside for pickup.

Selling Your Box Spring Online

Facebook Marketplace and Craigslist move used box springs faster than any other channel, especially if you price aggressively and post clear photos. A queen box spring in good shape typically sells for $30-$50 if you’re willing to wait a week; drop it to $20 or offer it free with same-day pickup and you’ll get responses within hours. List it as “free—you haul” on Nextdoor if you just want it gone quickly without dealing with a dumpster rental.

Take photos in good natural light that show all four sides and any damage. Buyers want to see the frame construction, the condition of the fabric, and whether the corners are intact. Mention the brand if it’s a recognized name like Sealy or Simmons—that adds perceived value. Be explicit about pickup logistics: whether they’ll need a truck, if you can help carry it to their vehicle, and what floor it’s currently on. The fewer surprises, the less likely a buyer flakes after committing.

Recycling and Material Recovery Programs

Recycling and Material Recovery Programs

Most box springs contain 80-90% recyclable materials — steel coils, wood framing, and cotton padding — that specialized recycling centers can separate and process. Dedicated mattress recycling facilities operate in most metro areas, often charging $10-$30 per unit or accepting drop-offs free during scheduled collection events. These programs recover metal and wood for resale while keeping bulky items out of landfills.

Box Spring Recycling Centers Near You

Start with the Mattress Recycling Council’s online locator if you live in California, Connecticut, or Rhode Island — states with mandatory mattress stewardship programs. Residents in these areas can drop off box springs at no cost at hundreds of participating retailers and municipal sites. The programs exist because manufacturers fund them through point-of-sale fees.

Outside those states, check with your city’s solid waste department. Many contract with private recycling operations like Bye Bye Mattress or local scrap metal yards that accept box springs. A typical facility will cut open the fabric casing, extract the steel coils (which scrap dealers pay for by weight), separate the wood frame for chipping or resale, and compress the fiber fill. Some charge a processing fee; others operate on the scrap value alone. Call ahead — most require you to transport the box spring yourself, and not all accept units with significant damage, mold, or bedbug evidence. For larger cleanout projects involving multiple bulky items, a roll-off dumpster may prove more practical than making several recycling center trips, though you’ll sacrifice the material recovery benefit.

Curbside Pickup and Municipal Disposal

Most cities will collect box springs through regular bulk trash pickup or at designated drop-off sites, but the rules vary widely. Some municipalities require advance scheduling or special tags purchased from city hall. Others ban box springs from curbside collection entirely due to recycling facility complications. Check your local solid waste department’s website or call before dragging your box spring to the curb—improper placement can result in the item sitting uncollected for weeks or fines of $50 to $200.

Understanding Your City’s Bulk Waste Schedule

Bulk waste collection typically runs monthly or quarterly, separate from your weekly trash service. Philadelphia, for instance, assigns each neighborhood a specific bulk pickup day once per month based on your regular collection route. You’ll need to place items curbside by 6 AM on that designated day. Other cities like Austin operate on an on-demand system where you schedule pickups online up to three times per year at no charge.

The catch: many municipalities cap the number of bulk items per pickup. Exceed three pieces in Portland, and you’ll pay $30 for each additional item. If you’re clearing out a bedroom during a move and have a box spring, mattress, and old dresser, you might hit your limit immediately. Miss your scheduled day, and you’re waiting another month or paying for a special collection.

Special Collection Requirements and Tag Systems

Some cities require proof of payment before they’ll touch your box spring. Madison, Wisconsin residents must buy a $10 orange sticker from local retailers and affix it to oversized items. The sticker funds the extra handling and disposal costs that bulk items create. No sticker means the truck drives past.

Sacramento takes a different approach: residents get two free on-demand bulky item collections per year but must schedule 48 hours in advance through an online portal. The system prevents surprise piles of furniture from appearing on random street corners, but it also means you can’t impulse-dump a box spring the night before moving out. Cities with tag or appointment systems usually list participating retailers and scheduling phone numbers on their sanitation department pages.

When Curbside Collection Isn’t Available

Not every municipality offers bulk pickup. Smaller towns often direct residents to county transfer stations instead, where you’ll pay a disposal fee based on weight or item type. Box springs typically cost $10 to $25 at these facilities. You’ll need a vehicle large enough to transport the item—most stations won’t accept walk-up deliveries.

Apartment complexes add another layer of complication. Your lease might prohibit leaving furniture in shared dumpsters, and property management rarely arranges special pickups for individual tenants. In these situations, renting a roll-off dumpster makes sense if you’re handling a larger cleanout. Otherwise, you’re looking at hiring a private junk removal service or making the drive to a transfer station yourself during their limited Saturday hours.

Using a Dumpster Rental for Quick Removal

Renting a roll-off dumpster makes box spring disposal straightforward when you’re handling multiple large items or tackling a whole-house cleanout. The container sits in your driveway for days or weeks, letting you toss the box spring whenever convenient. Most 10-yard dumpsters easily accommodate several box springs along with mattresses, furniture, and general household debris without requiring disassembly.

When Dumpster Rental Makes Financial Sense

A dumpster rental becomes cost-effective when you’re disposing of more than just a box spring. If you’re clearing out an estate, renovating a bedroom, or downsizing from a larger home, the per-item cost drops significantly. A 10-yard dumpster typically ranges from $300-$450 for a week-long rental in 2026, depending on your location and what you’re tossing. That same budget covers roughly three to four specialty hauling trips for individual items.

The break-even point usually hits around three to five bulky items. Tossing a box spring, mattress, old dresser, and broken couch into one container costs less than scheduling separate pickups. You also avoid the coordination headache of multiple appointments and the risk of items sitting on your curb for days.

Sizing and Placement Considerations

A 10-yard dumpster handles most residential needs involving box springs. These containers measure roughly 12 feet long, 8 feet wide, and 3.5 feet tall — about the size of three pickup truck beds. You can fit four to six box springs in one if you’re clearing out a rental property or handling an estate cleanout.

Place the dumpster on a flat surface close to where you’re working. Most rental companies drop containers on driveways, but confirm the truck can access your property without damaging landscaping or low-hanging wires. If you’re putting it on the street, check if your city requires a permit — many municipalities charge $20-$50 for temporary placement permits that you’ll need to secure before delivery. The rental company won’t obtain this for you.

What Actually Goes Wrong

The most common mistake is underestimating how much other stuff you’ll want to toss once the dumpster arrives. That “just the box spring” plan turns into clearing the garage when you realize you have container space. Budget for the next size up if you’re even slightly tempted to tackle additional projects.

Weight limits matter more than volume for household items. A 10-yard dumpster typically includes a 2-3 ton weight allowance. Box springs, mattresses, and furniture rarely approach these limits, but if you’re mixing in construction debris or books, you might trigger overage fees that generally run $50-$75 per additional ton in 2026. Ask your rental company about weight restrictions specific to your debris type before loading.

Ready to get started?

Find a Dumpster Near You


Illustration of dumpster rental for this project

How to Dispose of a Sectional Sofa (2026 Guide)

The most practical ways to dispose of a sectional sofa include scheduling a bulk trash pickup through your municipal waste service, hiring a junk removal company, donating it to a charity if it’s still usable, or renting a roll-off dumpster for DIY removal during larger cleanout projects. Getting rid of a sectional is trickier than disposing of a standard sofa because the multiple pieces create logistical challenges — they’re awkward to move, won’t fit in most vehicles, and often exceed weight limits for curbside pickup. Your best option depends on the sofa’s condition, your timeline, whether you’re clearing out other items at the same time, and what disposal services operate in your area. Some sectionals can be disassembled enough to fit through doorways and into a truck bed, while others require professional handling or a dumpster that can accommodate oversized furniture. Learning how to dispose of a sectional sofa the right way saves you from violation fees, missed pickups, and the frustration of discovering your chosen method won’t actually work for a piece this large.

Renting a Dumpster for This Project?

For most of these jobs, a roll-off dumpster delivered to your driveway is the simplest, cheapest way to handle the haul. Compare local providers and get a free quote in minutes.

Find Dumpster Rental in Your City →

Contact Form Demo

Best Disposal Methods for Sectional Sofas

Best Disposal Methods for Sectional Sofas

Getting rid of a sectional sofa depends on its condition and your timeline. Functional pieces can be donated to charities or sold through online marketplaces, while damaged sofas require municipal bulk pickup or a roll-off dumpster rental for projects with other large items. Most methods are free or low-cost if you plan ahead, though same-day solutions may cost $50-$150.

Donation and Resale Options

Charities like Habitat for Humanity ReStore, Goodwill, and The Salvation Army accept sectionals in good condition—no major stains, rips, or structural damage. Most offer free pickup for larger furniture, but you’ll need to schedule 1-2 weeks in advance. Call first to confirm they’re accepting upholstered furniture, since some locations pause donations during high-volume periods or if they’re overstocked.

Online resale works if your sectional is less than 10 years old and still looks presentable. Facebook Marketplace and Craigslist let you list for free, and “porch pickup” listings move quickly if priced right—think $100-$300 for mid-range sectionals in decent shape. OfferUp and Nextdoor work similarly. For higher-end pieces, consignment shops might take them on commission, though they’re selective and typically keep 40-50% of the sale price.

Curbside and Bulk Pickup Services

Most municipalities offer bulk trash pickup once or twice monthly at no extra charge beyond regular waste fees. You’ll place the sectional at the curb on your scheduled day—usually listed on your city’s sanitation website or available by calling public works. Restrictions vary: some cities require advance registration, others have size limits (individual pieces under 50 pounds each), and a few charge $25-$40 per large item.

If you’re managing a full cleanout—estate clearing, renovations, or moving multiple households worth of furniture—a dumpster rental handles sectionals alongside other debris. A 15-yard roll-off dumpster typically accommodates a standard sectional plus several rooms of clutter, with rental periods of 7-14 days. This works when you can’t wait for municipal pickup dates or need to clear everything at once. Breaking the sectional into smaller sections helps maximize space in either a dumpster or bulk pickup scenario.

Using a Dumpster Rental for Large Furniture

Using a Dumpster Rental for Large Furniture

A roll-off dumpster rental handles sectional sofa disposal efficiently when you’re clearing out multiple pieces or tackling a larger home cleanout. You rent a container that gets delivered to your driveway, toss in your furniture, and the company hauls everything away on your schedule. This works particularly well if you’re renovating, downsizing, or dealing with an estate cleanout where the sectional is just one of many items headed out the door.

Choosing the Right Roll-Off Dumpster Size

Most sectional sofas fit comfortably in a 10-yard dumpster, which measures roughly 12 feet long by 8 feet wide by 3.5 feet tall. A standard three-piece sectional takes up about 60-80 cubic feet of space, leaving plenty of room for other furniture, boxes, or renovation debris. If you’re only disposing of the sectional and maybe a coffee table or end tables, a 10-yard container prevents you from paying for unused capacity.

Step up to a 15-yard or 20-yard dumpster if your sectional is oversized (think deep-seat models or configurations with five or more pieces) or if you’re clearing out an entire room’s worth of furniture. A furnished basement cleanout—sectional, entertainment center, bookshelves, old carpet—justifies the larger size. The price difference between a 10-yard and 15-yard dumpster typically ranges from $50 to $100 in most markets as of 2026, so err on the side of more space if you’re uncertain about the total volume you’re hauling out.

Preparing Your Sectional for Disposal

Before disposing of your sectional sofa, you need to disassemble it into manageable pieces, measure each section to ensure it fits your disposal method, and remove any non-furniture items like cushions covers or personal belongings. Most sectionals break down into 2-5 separate pieces by unlatching connectors or removing brackets underneath, making them easier to move through doorways and load into vehicles or dumpsters.

Disassembling the Sectional

Flip your sectional sections upside down to locate the connection hardware. Most modern sectionals use metal brackets, clips, or hook-and-latch systems that secure pieces together. You’ll typically find these connectors underneath where two sections meet—look for exposed metal brackets or plastic clips about 6-12 inches from the seating area’s edge.

For bracket systems, use a screwdriver or Allen wrench to remove the screws holding sections together. Hook-and-latch designs usually require you to lift one section slightly while pressing a release mechanism. Some sectionals use simple alligator clips that you can pry apart by hand. Take photos of the connection points before disassembly if you’re uncertain—this helps if you need to reassemble temporarily or explain the configuration to someone else.

Measuring Each Section

Measure the width, depth, and height of each separated piece before moving it. Standard sectional components range from 30-40 inches wide for single seats to 60-80 inches for chaise sections. Doorway width matters most—standard interior doors are 30-36 inches wide, while exterior doors run 36 inches.

If you’re using a roll-off dumpster for disposal, confirm your sectional pieces will fit through the opening and within the container’s dimensions. A typical 10-yard dumpster has a door opening around 4 feet wide, easily accommodating most sectional sections when positioned correctly. Measure the tallest piece to ensure it won’t extend above the dumpster’s fill line, which creates pickup issues and potential extra fees.

Removing Cushions and Covers

Strip all seat and back cushions from the frame, then check for removable cushion covers with zippers. Cushion fills and covers often go in regular trash bags if they’re not being donated, keeping them separate from the frame simplifies disposal. Remove any throw pillows, blankets, or decorative items you’ve stored in or on the sectional.

Check the crevices between sections and under cushions for lost items—remote controls, coins, jewelry, and small toys commonly hide there. Detach any removable feet or legs if they screw off easily, as this reduces the overall height and makes loading more stable. Leave permanently attached components in place to avoid creating sharp edges or unstable frames.

What Not to Do When Disposing Furniture

What Not to Do When Disposing Furniture

Getting rid of a sectional sofa seems straightforward until you make a costly mistake. Avoid dumping it on the curb without checking pickup rules, abandoning it in public spaces (which can result in fines up to $500 in many municipalities), or breaking it down with tools that damage recyclable components. Skip disassembly methods that release hazardous materials, and never assume your regular trash service will take oversized furniture without advance notice.

Don’t Leave It Curbside Without Confirmation

Setting your sectional on the curb without verifying collection rules creates problems for everyone. Many waste management services require 24-48 hours advance notice for bulky item pickup, and some charge separate fees ranging from $25 to $75 per item. If you put furniture out on the wrong day or without scheduling, it may sit for weeks—collecting rainwater, attracting pests, and blocking sidewalks. Your city may issue a citation for unauthorized waste placement.

Call your local sanitation department first. Ask specifically about sectional sofas since some services count each piece separately (a three-piece sectional equals three charges). Document the pickup date and any confirmation number. If your service doesn’t offer bulky item collection, you’ll need an alternative like a roll-off dumpster rental for larger cleanouts or a dedicated furniture removal company.

Avoid Illegal Dumping Sites

Driving your sectional to a vacant lot or wooded area feels like an easy solution until you face the consequences. Illegal dumping carries fines between $250 and $2,500 for first offenses in most states, and repeat violations can result in criminal charges. Many areas now use surveillance cameras and tracking systems that identify violators through license plates or embedded trash.

Public dumping also creates environmental hazards. Furniture foam contains flame retardants that leach into soil, and fabric treatments release chemicals as they decompose. Someone—typically city workers or nonprofit volunteers—has to retrieve and properly dispose of abandoned furniture, diverting resources from legitimate community needs. If you genuinely cannot afford disposal fees, contact local charities or municipal programs that offer free pickup for low-income residents rather than dumping illegally.

Don’t Damage Recyclable Components During Breakdown

Aggressively cutting your sectional into smaller pieces might seem efficient, but you’re destroying materials that recycling centers could recover. Ripping through cushions releases polyurethane foam particles that contaminate wood and metal components. Using a reciprocating saw through upholstery cuts wiring harnesses and springs into unusable fragments.

If you plan to disassemble your sectional, remove fabric carefully with seam rippers or utility knives along existing stitching. Separate wooden frames from metal hardware—many scrap yards pay for clean metal springs and brackets. Keep foam intact for textile recycling programs that process bulk foam separately. Strategic disassembly takes an extra 30 minutes but can reduce disposal weight by half and create materials that recyclers actually accept rather than reject as contaminated waste.

Ready to get started?

Find a Dumpster Near You


Illustration of dumpster rental for this project

How to Dispose of a Sofa (2026 Guide)

Getting rid of an old sofa typically involves one of four main routes: arranging a bulk trash pickup through your municipality (often free or low-cost), hiring a junk removal service for same-day haul-away, renting a roll-off dumpster if you’re tackling multiple large items, or donating it to a charity if the piece is still in usable condition. The path you choose hinges on timing, whether you have other bulky items to clear out, and the sofa’s condition—because a stained, sagging couch won’t qualify for donation and may require paid removal. Most people underestimate how quickly bulk pickup slots fill during spring cleaning season, which can leave a couch sitting in your driveway for weeks. Knowing how to dispose of a sofa efficiently saves you from that scenario and helps you avoid surprise fees that some removal services tack on for stairs, oversized sectionals, or same-day scheduling. This guide walks through each disposal method with real-world costs, timing expectations, and the specific situations where each option makes the most sense.

Renting a Dumpster for This Project?

For most of these jobs, a roll-off dumpster delivered to your driveway is the simplest, cheapest way to handle the haul. Compare local providers and get a free quote in minutes.

Find Dumpster Rental in Your City →

Contact Form Demo

Free and Low-Cost Sofa Disposal Methods

Free and Low-Cost Sofa Disposal Methods

Getting rid of a sofa without spending much money comes down to three main routes: donating it to organizations that offer free pickup, scheduling your city’s bulk trash collection, or posting it online for someone to haul away. Most donation centers pick up furniture at no charge if the piece is clean and functional, while municipal bulk pickup is typically free for residents on designated collection days.

Donation Centers That Accept Sofas

Goodwill, Salvation Army, and Habitat for Humanity ReStores accept sofas in good condition and usually offer free pickup for larger items. The catch: they’ll refuse anything with rips, stains, pet odors, or sagging cushions. Schedule pickup at least a week ahead during busy seasons—most centers book up quickly in spring and early summer when people are moving.

Smaller local charities often have more flexible standards than national chains. A furniture bank serving low-income families might accept a sofa with minor wear that Goodwill would reject. Call directly rather than using online forms—you’ll get a faster answer about whether your specific piece qualifies and can often schedule same-week pickup.

Curbside Pickup and Bulk Trash Services

Most cities offer free bulk trash pickup once or twice monthly, but the rules vary dramatically. Philadelphia requires scheduling 48 hours in advance and limits you to one large item per pickup. San Antonio provides quarterly collection with no appointment needed—just put items out the night before your designated week. Check your city’s sanitation website for the exact protocol, since putting a sofa out on the wrong day can result in a fine.

Private haulers charge $75-$150 for single-item pickup if you’ve missed your city’s schedule or live somewhere without municipal service. Some waste management companies bundle furniture removal with regular trash service for an added monthly fee. If you’re clearing out multiple pieces or tackling a full cleanout, renting a roll-off dumpster becomes more economical than paying per-item pickup fees.

Renting a Dumpster for Large Furniture

Renting a Dumpster for Large Furniture

A roll-off dumpster makes financial sense when you’re disposing of multiple large items at once or tackling a cleanout that generates more waste than a sofa alone. If you’re clearing out an entire room, renovating a space, or dealing with an estate cleanout, the per-item cost drops significantly compared to hiring separate haulers for each piece of furniture.

When a Roll-Off Dumpster Makes Sense

Renting works best for batch disposal projects. Picture this: you’re replacing all the furniture in your living room, cleaning out a deceased relative’s home, or preparing a rental property for new tenants. In these situations, you’re dealing with couches, chairs, tables, mattresses, and boxes of miscellaneous items. A 10-yard dumpster can typically hold three to four sofas plus additional furniture, while a 20-yard can handle the contents of several rooms.

The math shifts in your favor once you cross three or four large items. Most junk removal services charge per piece — often $75-150 per sofa depending on your market. A week-long dumpster rental generally ranges from $300-500 for a 10-yard container in 2026, giving you time to work at your own pace. You load it yourself, which means no scheduling windows or waiting for crews. The rental period also lets you handle demo work if you’re pulling out built-ins or tearing up carpeting alongside the furniture disposal.

Multi-family properties and landlords use roll-off dumpsters as standard practice during tenant turnovers. When someone moves out and abandons furniture, property managers often find a couch, a bed frame, bags of trash, and carpet remnants all at once. One dumpster handles the entire cleanout in a single rental period, and you’re not paying separate fees for furniture haul-away, appliance removal, and trash pickup.

Recycling and Eco-Friendly Disposal Options

Most sofas contain recyclable materials like metal springs, wood frames, and foam cushions that shouldn’t end up in landfills. Furniture recyclers and specialized programs break down couches to recover these components, often at no cost to you. Some municipalities offer curbside furniture recycling, while nonprofit programs will pick up usable pieces and refurbish them for resale or donation.

Finding Furniture Recycling Programs in Your Area

Search “[your city] furniture recycling” to locate facilities that process upholstered items. Many recycling centers accept sofas directly, though some charge drop-off fees ranging from $20 to $50 for oversized furniture. Call ahead to confirm they handle couches specifically—not all recycling operations have the equipment to separate fabric from frames and springs.

Look for programs run by municipal waste departments or regional recycling cooperatives. These programs typically shred fabric for industrial wiping cloths, melt down metal components for scrap, and chip wood frames into mulch or composite materials. Earth911’s recycling search tool can identify facilities within your zip code that process furniture.

What Happens to Recycled Sofa Materials

The breakdown process starts with manual disassembly. Workers remove fabric coverings, extract foam padding, and separate wooden or metal frames. Metal springs go to scrap yards where they’re melted and reformed into new steel products. Wood frames become mulch, particleboard, or biomass fuel depending on condition and type.

Foam presents the biggest challenge. Some facilities compress clean foam into carpet padding or wrestling mats. Contaminated or degraded foam usually goes to waste-to-energy plants. Fabric rarely gets recycled into new textiles—most becomes industrial rags or insulation fill. A standard three-seat sofa yields roughly 40 pounds of metal, 25 pounds of wood, and 15 pounds of foam when fully broken down.

Upcycling Parts Before Disposal

Strip your sofa yourself to recover reusable components before final disposal. Remove cushions first—the foam inside works as padding for DIY projects, pet beds, or packing material. Unscrew wooden legs and arms to repurpose as furniture feet, craft lumber, or firewood if the wood is solid hardwood rather than particleboard.

Metal springs have surprising second lives. Upholstery shops buy used springs for repair work. Artists use them in sculptures and industrial decor. The fabric, if unstained and durable, can line a dumpster rental when hauling construction debris or cover outdoor equipment. Even worn-out fabric strips make excellent rags for painting or automotive work. This approach reduces waste volume and might save disposal costs if you’re renting a roll-off dumpster for a larger cleanout project.

What to Do Before You Dispose

Before you dispose of a sofa, assess its condition honestly and measure doorways, hallways, and staircases it needs to pass through. Check if your chosen disposal method requires disassembly, schedule any necessary pickup or drop-off times, and remove personal items from cushions and crevices. Taking these steps prevents last-minute problems and saves you from paying twice for disposal.

Check the Sofa’s Actual Condition

Flip cushions over and inspect the frame by pressing down on different sections. A sofa with torn fabric but solid bones might be worth donating or selling for someone willing to reupholster. One with a sagging frame, broken springs, or visible mold belongs in a dumpster, not a donation center.

Pull out the sleeper mechanism if your sofa has one — broken metal frames add weight and create sharp edges that make handling dangerous. Charities reject furniture with structural damage, so an honest assessment now saves you a wasted trip.

Measure Your Exit Path

Measure the sofa’s height, width, and depth, then measure every doorway, hallway turn, and stairwell it needs to navigate. A standard doorway is 32 inches wide, but your sofa likely needs 36+ inches of clearance to angle through. Measure diagonally too — sometimes tipping a sofa at 45 degrees is the only way to clear a tight corner.

If the numbers don’t work, disassembly becomes mandatory, not optional. Sketch the path on paper if you have a complex route. Professional movers use this trick to avoid getting furniture wedged in stairwells.

Decide If Disassembly Makes Sense

Removing legs takes 30 seconds with a screwdriver and reduces height by 4-6 inches. Detaching seat cushions and back pillows makes a sofa easier to grip and lighter to carry. Some sectionals simply unclip where pieces connect.

Going further requires more effort. Cutting fabric and removing the frame’s staples is messy work that only makes sense if you’re breaking down a sofa for compact disposal in a roll-off dumpster or need to fit pieces through an impossible doorway. Use a staple remover and reciprocating saw if you go this route — trying to break a sofa apart by hand damages walls and wastes energy.

Remove Everything Hidden Inside

Reach into every gap between and under cushions. People find phones, remotes, cash, keys, jewelry, and important papers wedged in sofas years after losing them. Shake out cushions outside if possible — you’ll be surprised what falls out.

Check under the sofa too. Items slide underneath and get forgotten. If you’re donating or selling, this step protects your privacy. If you’re disposing, it saves you from throwing away something valuable.

Confirm Logistics for Your Chosen Method

Call ahead if you’re donating — some charities stopped accepting upholstered furniture after 2020, and others only take items on specific days. Confirm they’ll send a truck or verify their drop-off hours. Donation centers hate when people leave furniture outside overnight.

For curbside pickup, check your city’s bulky waste schedule and any rules about placement distance from the street. If you’re renting a dumpster for a larger cleanout project, verify the rental period gives you enough time to actually get the sofa to the container. A three-day rental sounds sufficient until you realize the delivery happens Friday afternoon and you work all weekend.

Ready to get started?

Find a Dumpster Near You


Illustration of dumpster rental for this project

How to Dispose of a Couch (2026 Guide)

Getting rid of an old couch typically involves one of five methods: hiring a junk removal service, renting a roll-off dumpster for larger cleanouts, arranging municipal bulk pickup where available, donating it if it’s still usable, or disassembling it yourself for regular trash collection. The method you choose depends on your timeline, budget, and whether you’re disposing of just the couch or tackling a bigger project like a move or renovation. A couch in good condition opens up free donation options, while one that’s stained, torn, or structurally damaged limits you to disposal services that charge by weight or volume. Most people underestimate how much wrestling a sectional down a narrow stairwell actually costs in time and potential injury — knowing your options for how to dispose of a couch before you commit to a removal method saves both. We’ll walk through what each disposal method actually entails, what it costs, and which situations make each one the practical choice.

Renting a Dumpster for This Project?

For most of these jobs, a roll-off dumpster delivered to your driveway is the simplest, cheapest way to handle the haul. Compare local providers and get a free quote in minutes.

Find Dumpster Rental in Your City →

Contact Form Demo

Why Proper Couch Disposal Matters

Why Proper Couch Disposal Matters

Improper couch disposal creates environmental hazards and legal risks that affect entire communities. Couches contain foam, flame retardants, and non-biodegradable fabrics that contaminate soil and water when dumped illegally. Most municipalities enforce strict regulations on furniture disposal, with fines starting at several hundred dollars and escalating to criminal charges for repeat offenders or large-scale dumping.

Environmental Impact of Furniture Waste

A single couch occupies roughly 50 cubic feet in a landfill and takes decades to decompose. The foam inside breaks down into microplastics that leach into groundwater, while the flame-retardant chemicals required by fire safety codes—polybrominated diphenyl ethers in older furniture—persist in soil for years. Wood frames treated with formaldehyde or other preservatives add another layer of contamination.

Furniture accounts for nearly 9 million tons of waste in U.S. landfills annually. When you dump a couch in a wooded area or vacant lot, rainwater accelerates the breakdown process, washing these chemicals into nearby streams and affecting local ecosystems. The fabric covering provides little protection—most upholstery materials are synthetic blends that fragment rather than decompose, creating pollution that outlasts the original structure by generations.

Municipal codes classify furniture dumping as illegal disposal of solid waste, typically a misdemeanor with fines generally ranging from $250 to $1,000 for first offenses. Many cities have increased enforcement by installing cameras in known dumping zones and using identifying information left on furniture to trace violators. Property owners who allow dumping on their land face similar penalties, even if they didn’t personally discard the items.

Repeat violations carry steeper consequences. A second offense often doubles the fine, and three or more incidents can result in criminal charges with potential jail time of 30 to 90 days. If dumped furniture blocks a roadway or creates a fire hazard, charges may escalate to reckless endangerment. Cities also bill violators for cleanup costs—hiring a crew to retrieve and properly dispose of illegally dumped furniture typically costs $300 to $600, added directly to your fine. Renting a roll-off dumpster for a cleanout project costs less than these combined penalties and eliminates any legal risk.

Best Ways to Get Rid of Your Old Couch

Donation works best when your couch still functions properly, shows minimal wear, and meets basic hygiene standards. Most charities accept sofas without major stains, tears, or structural damage—essentially anything someone would reasonably use in their home. This option costs nothing, supports your community, and keeps usable furniture out of landfills, but timing and logistics matter since organizations have specific pickup schedules and acceptance criteria.

When Donation Makes Sense

Check the couch’s condition honestly before calling a charity. Sit on every cushion and pull out any hideaway bed mechanisms. Small cosmetic issues like faded fabric or minor scuffs qualify for donation, but sagging frames, broken springs, persistent odors, or stains larger than a dinner plate typically disqualify your piece. Charities resell donations to fund their programs—they can’t accept items that won’t sell.

Most organizations schedule pickups one to three weeks out, so plan ahead if you’re working around a moving date. Habitat for Humanity ReStores, Goodwill, and Salvation Army operate their own trucks in many areas and will haul your couch away free. Smaller local shelters might accept quality furniture but often lack pickup services, meaning you’ll need to arrange transport yourself. Call ahead rather than dropping off unannounced—many locations have limited warehouse space and can’t always accept large items immediately.

The timing matters beyond just scheduling. December donation centers overflow with holiday donations, while summer months see less competition for pickup slots. If your couch gets rejected by one organization, that doesn’t mean others won’t take it. A sectional deemed too large for a Goodwill store might work perfectly for a transitional housing program furnishing multi-bedroom apartments.

Using a Roll-Off Dumpster for Furniture Removal

A roll-off dumpster handles couch disposal in one trip, especially when you’re clearing out multiple pieces or tackling a renovation. You rent the container for a set period (typically 3-14 days), toss the couch in along with other debris, and the company hauls everything away when you’re done. This works best when you have several bulky items to discard or need flexible timing for a cleanout project.

When a Dumpster Rental Makes Sense

Renting a dumpster becomes cost-effective around the three-item threshold. If you’re disposing of a couch plus a mattress, old carpet, and broken shelving, paying for a single container often costs less than multiple junk removal appointments or dump runs. The math shifts further in your favor during estate cleanouts, foreclosure cleanups, or whole-house renovations where furniture is just one category among construction debris, old appliances, and household waste.

The timing flexibility matters more than people expect. You’re not rushing to meet a pickup window or coordinating schedules with haulers. Load the couch at midnight if that’s when you finish dismantling it. Add more items as you find them in the garage or attic. The container sits in your driveway until you fill it or hit your rental period limit.

Choosing the Right Dumpster Size

A 10-yard dumpster—roughly the size of a large pickup bed—holds 2-3 couches plus other household items. That’s the minimum most companies rent. Move up to a 20-yard container if you’re clearing a multi-bedroom home or combining furniture disposal with flooring removal or kitchen demolition. The 20-yarder handles 6-8 standard couches, though you’ll rarely fill one with furniture alone.

Sectionals and sleeper sofas with thick frames eat up space fast. A single L-shaped sectional can occupy a quarter of a 10-yard container if you don’t break it down first. Most rental companies let you call for pickup early if you fill the dumpster before your rental period ends, so starting smaller often makes more sense than overestimating.

Breaking Down Furniture for Maximum Space

Remove cushions and legs before loading. Couch legs typically twist off or require a socket wrench—the entire process takes under five minutes per piece. Stand the frame vertically against one wall of the dumpster rather than laying it flat. This single change can double your usable space.

For larger sectionals, separate the pieces at their connection points. Most connect with metal brackets you can unbolt with basic tools. If the frame is solid wood or metal, cutting through the main support beams with a reciprocating saw reduces volume by half. You’re not trying to make the couch unrecognizable—just creating pieces that nest together efficiently. Place seat cushions in the gaps between frames. Wedge throw pillows into corners. The goal is eliminating air pockets that waste vertical space.

Preparing Your Couch for Disposal

Before hauling your couch anywhere, take time to prepare it properly. Remove all cushions and check every crevice for lost items—phones, remotes, and loose change add up fast. Measure your couch’s dimensions and doorways to confirm it fits through your exit route. If you’re renting a roll-off dumpster, disassembling the couch saves significant space and makes loading easier.

Check for Salvageable Parts

Pull off removable cushions and inspect the frame for quality hardwood components. Older couches, particularly those made before the 1990s, often contain solid oak or maple frames worth salvaging for woodworking projects or resale. Metal springs and mechanisms also have scrap value—a typical couch contains 15-30 pounds of recyclable steel.

Look underneath the fabric for identification tags. These tags indicate whether the couch contains flame retardants or other chemicals that affect disposal options. Some recycling centers won’t accept furniture treated with certain brominated compounds, common in couches manufactured between 1975 and 2005.

Measure Doorways and Pathways

Doorways reveal problems fast. Standard interior doors measure 30-32 inches wide, while your couch likely spans 72-96 inches long and 36-42 inches deep. Remove the feet or legs first—most screw off counterclockwise with a wrench or pliers, immediately reducing height by 4-8 inches.

Tilt sectional pieces at a diagonal when navigating corners. The path from your living room to the curb probably includes at least two 90-degree turns where the couch can jam. Walk the route backward from your endpoint, noting ceiling heights in stairwells (typically 80 inches) and any permanent fixtures that narrow the pathway. External doors usually provide 36 inches of clearance, but storm doors and railings cut into that space.

Disassemble When Possible

Most modern couches come apart more easily than you’d expect. Flip the couch upside down and look for bolts connecting sections—sectionals use 3-4 large bolts per connection point that a socket wrench removes in minutes. Reclining mechanisms detach with basic tools once you remove the upholstery staples holding the fabric.

For non-sectional couches, removing the back panel creates two manageable pieces instead of one unwieldy mass. The back typically attaches with screws accessible from underneath or behind the rear cushions. Detached backs stack flat in a dumpster, and separate seat bases slide in alongside them. This disassembly cuts the couch’s volume roughly in half—critical when you’re paying for dumpster rental by size.

Ready to get started?

Find a Dumpster Near You


Illustration of dumpster rental for this project

How to Dispose of a Recliner (2026 Guide)

You can dispose of a recliner through curbside bulk trash pickup (if your city offers it), by hauling it to a local landfill or transfer station yourself, by renting a roll-off dumpster for larger cleanouts, or by arranging donation pickup if the chair still works and meets acceptance standards. The method you choose matters because the wrong approach can mean wasted trips, unexpected fees, or a recliner sitting in your driveway for weeks while you figure out plan B. Recliners present specific disposal challenges — they’re bulky, often too heavy for one person to move safely, and many contain metal frames that complicate recycling. How you dispose of a recliner depends on its condition, your timeline, whether you’re clearing out just one piece or an entire household, and what services your municipality actually provides versus what their website claims. This guide walks through each disposal option with the real costs, timing, and limitations you’ll encounter, so you can pick the method that actually works for your situation.

Renting a Dumpster for This Project?

For most of these jobs, a roll-off dumpster delivered to your driveway is the simplest, cheapest way to handle the haul. Compare local providers and get a free quote in minutes.

Find Dumpster Rental in Your City →

Contact Form Demo

Donating or Reselling Your Old Recliner

Donating or Reselling Your Old Recliner

If your recliner still functions and looks presentable, donating or selling it keeps usable furniture out of landfills while helping someone else. Local charities, thrift stores, and furniture banks will often pick up recliners for free, while online marketplaces let you sell directly to buyers in your area—sometimes for $50 to $200 depending on condition and brand.

Where to Donate Furniture Locally

Goodwill and Salvation Army accept recliners in good condition at their donation centers, though policies vary by location. Call ahead to confirm they’ll take your specific piece—some locations refuse recliners with stains, pet hair, or mechanical issues. Habitat for Humanity ReStores also accept furniture donations and will sometimes arrange free pickup for larger items if you’re within their service area.

Furniture banks serve families transitioning out of homelessness or escaping domestic violence. Organizations like National Furniture Bank Association members prioritize working recliners since many families they serve have nothing when they move into new housing. Search “furniture bank” plus your city name to find local programs. Most will schedule a pickup within a week and provide a tax receipt for your donation.

Selling a Used Recliner Online

Facebook Marketplace and Craigslist work best for selling used recliners because buyers can see the item locally before committing. Price your recliner at 20-40% of its original retail cost if it’s in good shape—a $600 recliner in decent condition might sell for $120 to $240. Take clear photos showing the recliner from multiple angles, including close-ups of any wear on the upholstery and a shot of the mechanism working.

Write your listing honestly. Mention the brand, approximate age, any flaws, and whether you’re willing to help load it. “Lazy Boy rocker recliner, four years old, small stain on right armrest, works perfectly, you haul” tells buyers exactly what they’re getting. Expect serious buyers to test the recliner before paying—have it clean and positioned where they can easily sit in it. Most recliners sell within two weeks if priced fairly, though you might need to drop the price 15-20% if you get no interest in the first ten days.

Curbside Pickup and Municipal Disposal

Curbside Pickup and Municipal Disposal

Most cities offer bulk waste collection for oversized furniture like recliners, either through scheduled pickup days or on-demand services. Contact your local waste management department to confirm whether your recliner qualifies, verify size restrictions (some municipalities refuse items over 50 pounds or six feet in any dimension), and schedule a collection date—typically requiring 24-72 hours advance notice.

Scheduling Bulk Waste Collection

Call your city’s sanitation department or check their website for the bulk waste calendar. Many municipalities designate specific collection days by neighborhood—maybe the second Tuesday of each month for your zone, or quarterly pickups tied to seasonal cleanups. You’ll need your service address and a description of the item. The dispatcher will tell you whether your recliner needs disassembly (some cities won’t take furniture with the footrest still attached) and the exact placement requirements.

Set the recliner at the curb the night before pickup, not days in advance. Leaving furniture out too early invites scavenging, illegal dumping by neighbors who pile their junk next to yours, and code enforcement warnings. Place it within three feet of the street but clear of mailboxes, utility boxes, and low-hanging branches that might block the truck’s mechanical arm. If rain is forecast, bag any exposed cushions—wet furniture sometimes gets refused because it’s too heavy for collection crews or creates mold concerns at the landfill.

Renting a Roll-Off Dumpster for Furniture

Renting a Roll-Off Dumpster for Furniture

A roll-off dumpster makes sense when you’re clearing out multiple pieces of furniture or tackling a larger cleanout project. Rental companies drop a container at your property for a set period—typically 7 to 14 days—giving you time to load bulky items like recliners at your own pace. This option works particularly well during moves, estate cleanouts, or renovations where one recliner is just part of a bigger pile of unwanted items.

When Dumpster Rental Makes Financial Sense

The math works in your favor once you’re disposing of more than a few pieces. A 10-yard dumpster—the smallest size most companies offer—can hold roughly three to four recliners plus additional furniture, boxes, and household debris. If you’re already paying someone to haul away a couch and a bedroom set, adding that old recliner to a dumpster rental costs nothing extra beyond the base fee.

Compare this to multiple dump runs in your own vehicle or hiring a junk removal service for individual pickups. A single dumpster rental typically ranges from $250 to $450 for a week, depending on your location and the container size. Junk removal services, by contrast, often charge $75 to $150 per item for furniture pickup. The breakeven point usually hits around three or four furniture pieces, making a roll-off dumpster the more economical choice for larger cleanouts.

Choosing the Right Dumpster Size

A 10-yard dumpster handles most single-room cleanouts or small furniture loads. Picture a container roughly 12 feet long, 8 feet wide, and 3.5 feet tall—about the footprint of a parking space. This size accommodates two to three recliners, a couch, and several boxes of household goods.

Step up to a 20-yard dumpster if you’re clearing multiple rooms or an entire apartment. This mid-size option holds around eight recliners’ worth of furniture along with other debris from a renovation or move. Most residential driveways can fit a 20-yard container without blocking the street, though you’ll want to measure your available space before the delivery truck arrives. Rental companies can provide exact dimensions, but you generally need at least 60 feet of linear space (driveway plus street) for the delivery truck to maneuver and drop the container safely.

Disassembling a Recliner for Easier Removal

Disassembling a Recliner for Easier Removal

Breaking down a recliner makes disposal significantly easier—most recliners reduce to 3-5 manageable pieces that fit through doorways and into vehicles. The frame separates from the backrest, the footrest mechanism detaches, and in many models, the armrests come off independently. This process takes 15-30 minutes with basic tools and immediately solves the biggest challenge: maneuvering a bulky, awkward piece through tight spaces.

Tools You’ll Need

A socket wrench set, Phillips-head screwdriver, and flathead screwdriver handle most recliners. Older models use bolts almost exclusively—typically 3/8″ or 1/2″ hex heads—while newer ones mix bolts with metal clips and plastic tabs. Keep a pair of pliers handy for stubborn clips. If you’re disposing of multiple furniture pieces, having them broken down makes loading into a roll-off dumpster much more efficient.

Work gloves protect your hands from sharp metal edges and wood splinters. Recliners contain dozens of staples and exposed springs once you start separating components. A flashlight helps you see bolt locations in the dark recesses under the seat platform where most connection points hide.

Step-by-Step Disassembly Process

Flip the recliner face-down on a blanket or tarp to protect your floor and give yourself access to the underside. Locate the backrest mounting brackets—two metal plates where the backrest meets the seat base. Most recliners use two to four bolts here. Remove these bolts and lift the backrest straight up and away.

Next, tackle the footrest mechanism. Extend the footrest fully to expose the pivot arms on either side of the seat. These arms attach to the frame with bolts or large pins. Remove the hardware and the entire footrest assembly pulls free as one unit. Some mechanisms have a secondary support bar across the middle—check for an additional bolt there.

The seat cushion usually lifts off once you remove the backrest, revealing the internal frame. Armrests on most models bolt to this frame from underneath. Remove two bolts per armrest and they separate cleanly. What started as a 150-pound recliner is now five pieces, none weighing more than 40 pounds, all flat enough to stack.

Ready to get started?

Find a Dumpster Near You